When we were younger, my mom handpainted beautiful ornaments for craft shows. Often, she laid them out like an assembly line: all faces, then all hair, and on and on. She had to make quite a lot of the same thing by hand, with slight variations in skin and hair colors and decorative borders.
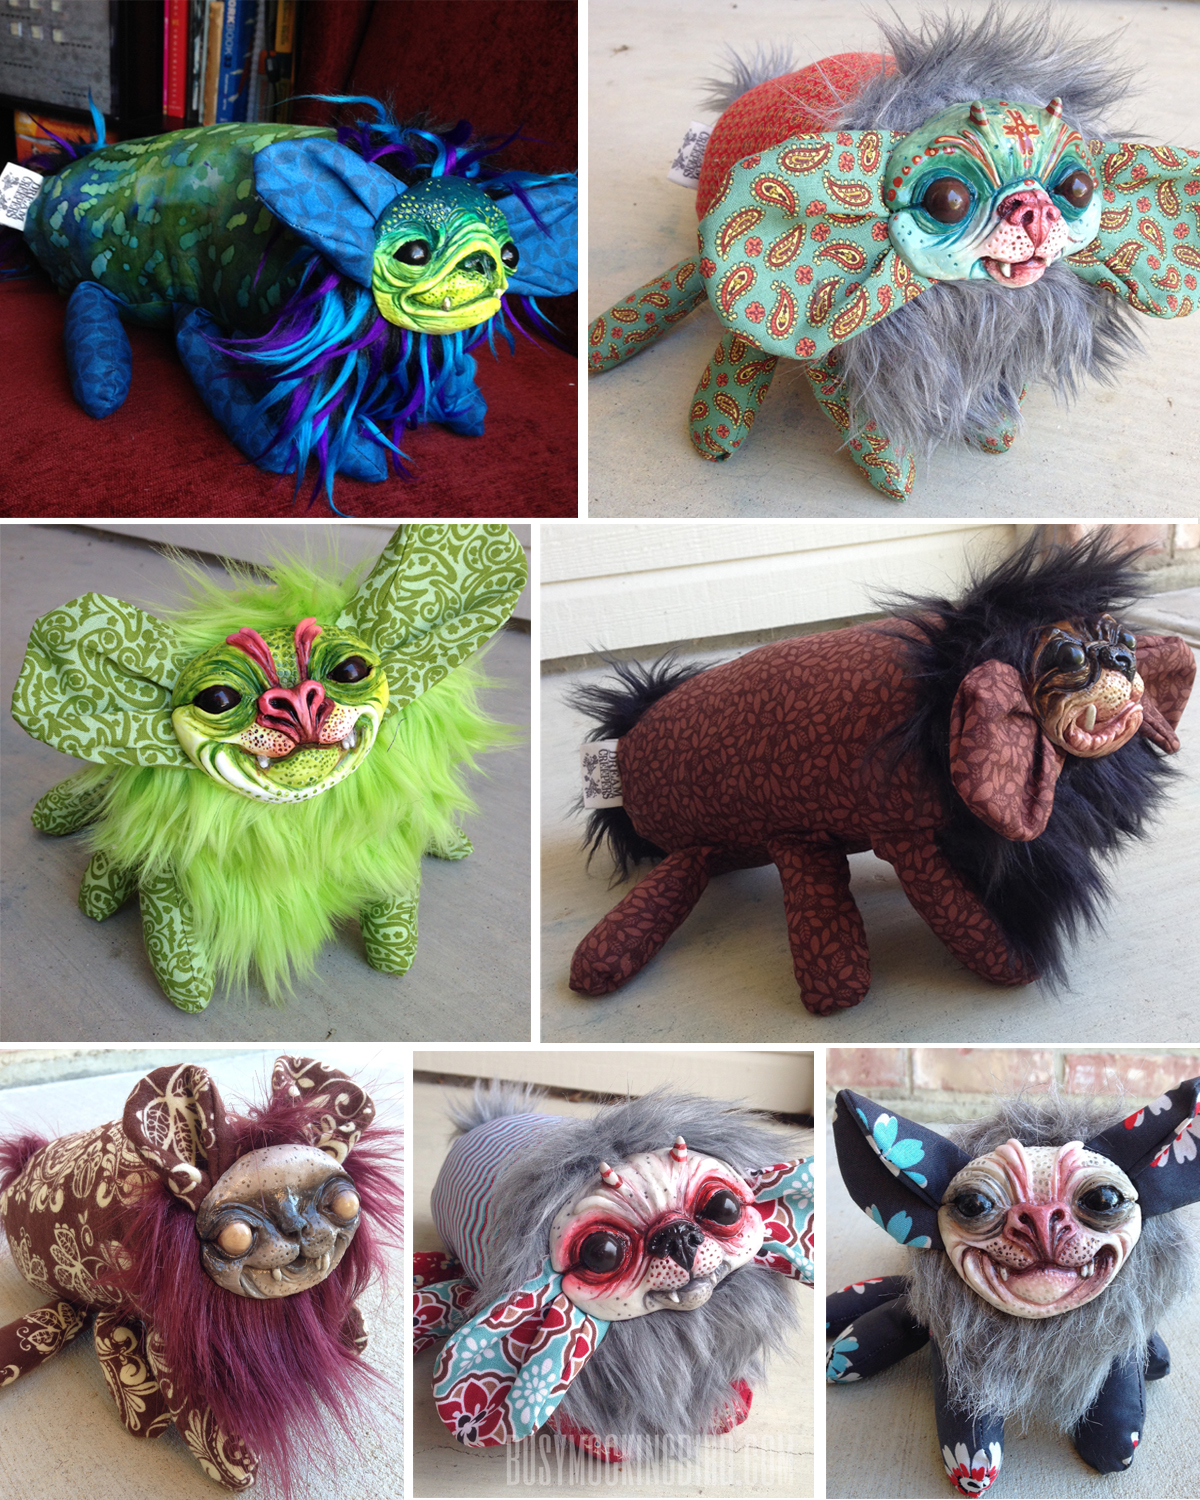
Sometimes repetition is monotonous. But there are other times when doing the same thing over and over again can be quite comforting. That’s how I feel about my Dream Creepers.
I started making Dream Creepers when I was playing around with resin casting, and wanted to use the resin casts and mix them with fabric doll bodies. I came up with these little monster puppy dolls. Myla loved them, and since they were a little strange looking, we came up with the idea that they HAD to be a little creepy to chase bad thoughts and bad dreams away. Later, talking to my mom, she suggested we call them “Dream Creepers.” And there ya go.

I experimented with a few things, and finally came up with a good system. They’re fun, but there are so many steps to making Creepers that it would sometimes get overwhelming–until I set up a sort of assembly line for myself that works pretty well. I thought I’d get tired of making the same things over and over, but like my mom said, it actually is quite comforting.
So I thought it’d be fun to share the process with you!
First off, to make sure all the Creepers are roughly the same size, I made myself a little pattern. One of the fun parts for me is picking fabric that works for the body and finding or corresponding fabric for the legs & ears. (I’m a bit of a fabric junkie.)

1: I lay all my fun little fabrics out and try to match them with fake fur.
2: I have a giant box of scrap fake fur, so it’s kind of fun to match up some of the fake fur with the fabric colors and patterns and see what I can come up with, just using the materials I already have. I’m more a fan of earthy colors than bright ones, but I try to make a little of everything.
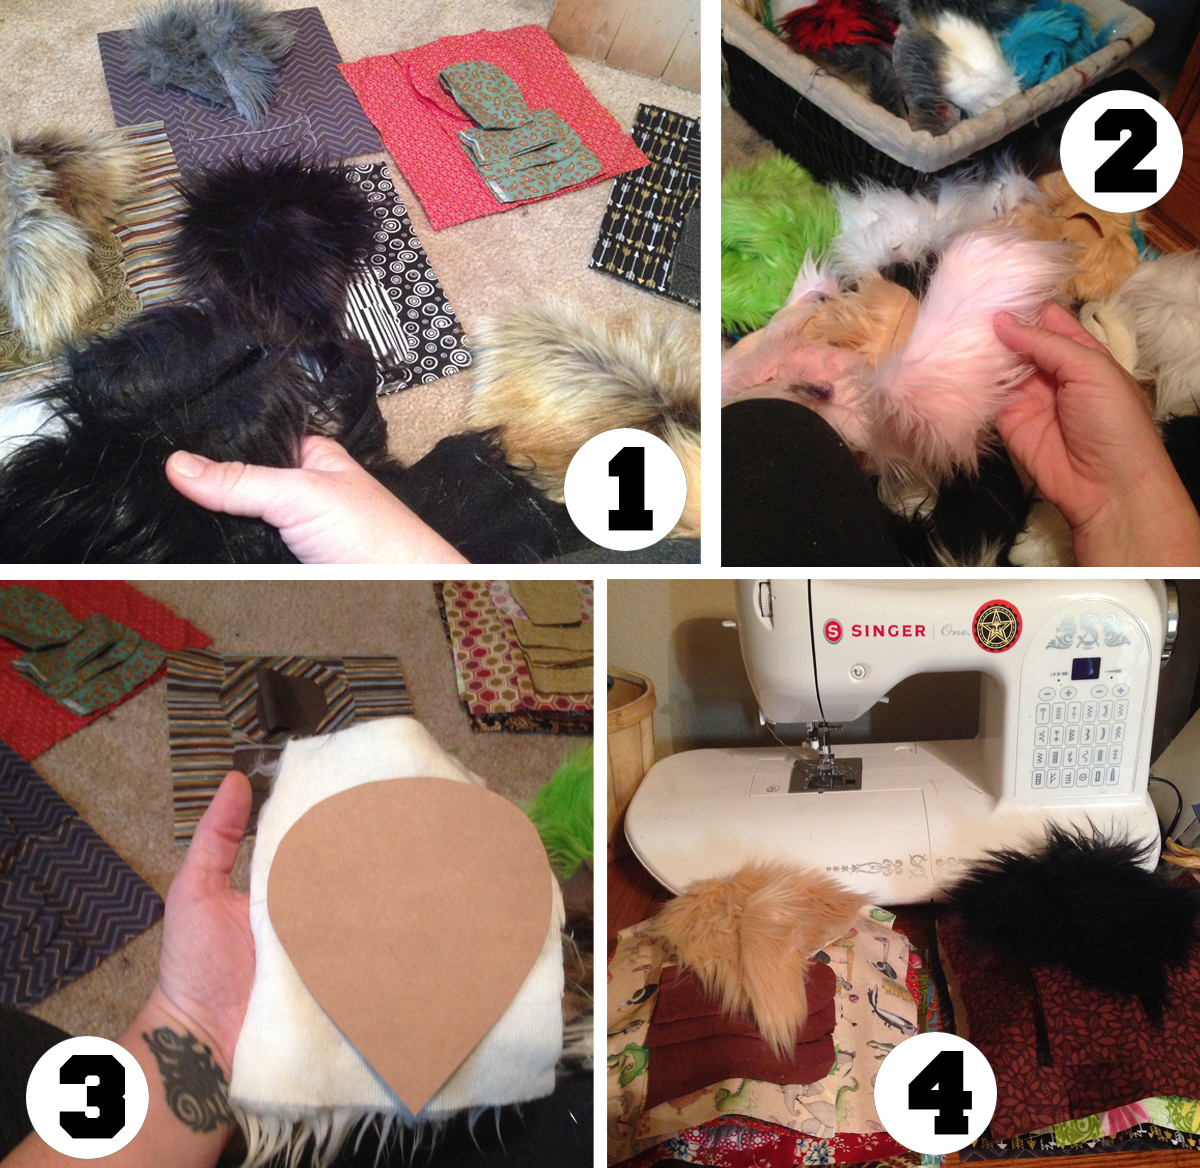
3: Once I find a color that’ll work, I cut a mane and tail from the scrap fur.
4: I lay out all the paired-up fabrics and fake furs. Sometimes it sits there for quite awhile before I get to them because: life.
5: I have several saved molds from sculpts I did awhile back. I pour resin into them. This has to be done when the kid is busy doing her own projects and doesn’t need help, since I have sticky gloves on for a while, and usually end up getting resin on my clothing because I forget to wear an apron or something.
6: Now I have a box of resin monster heads and faces! Sometimes they need to be sanded and smoothed out, sometimes they just need to be washed.
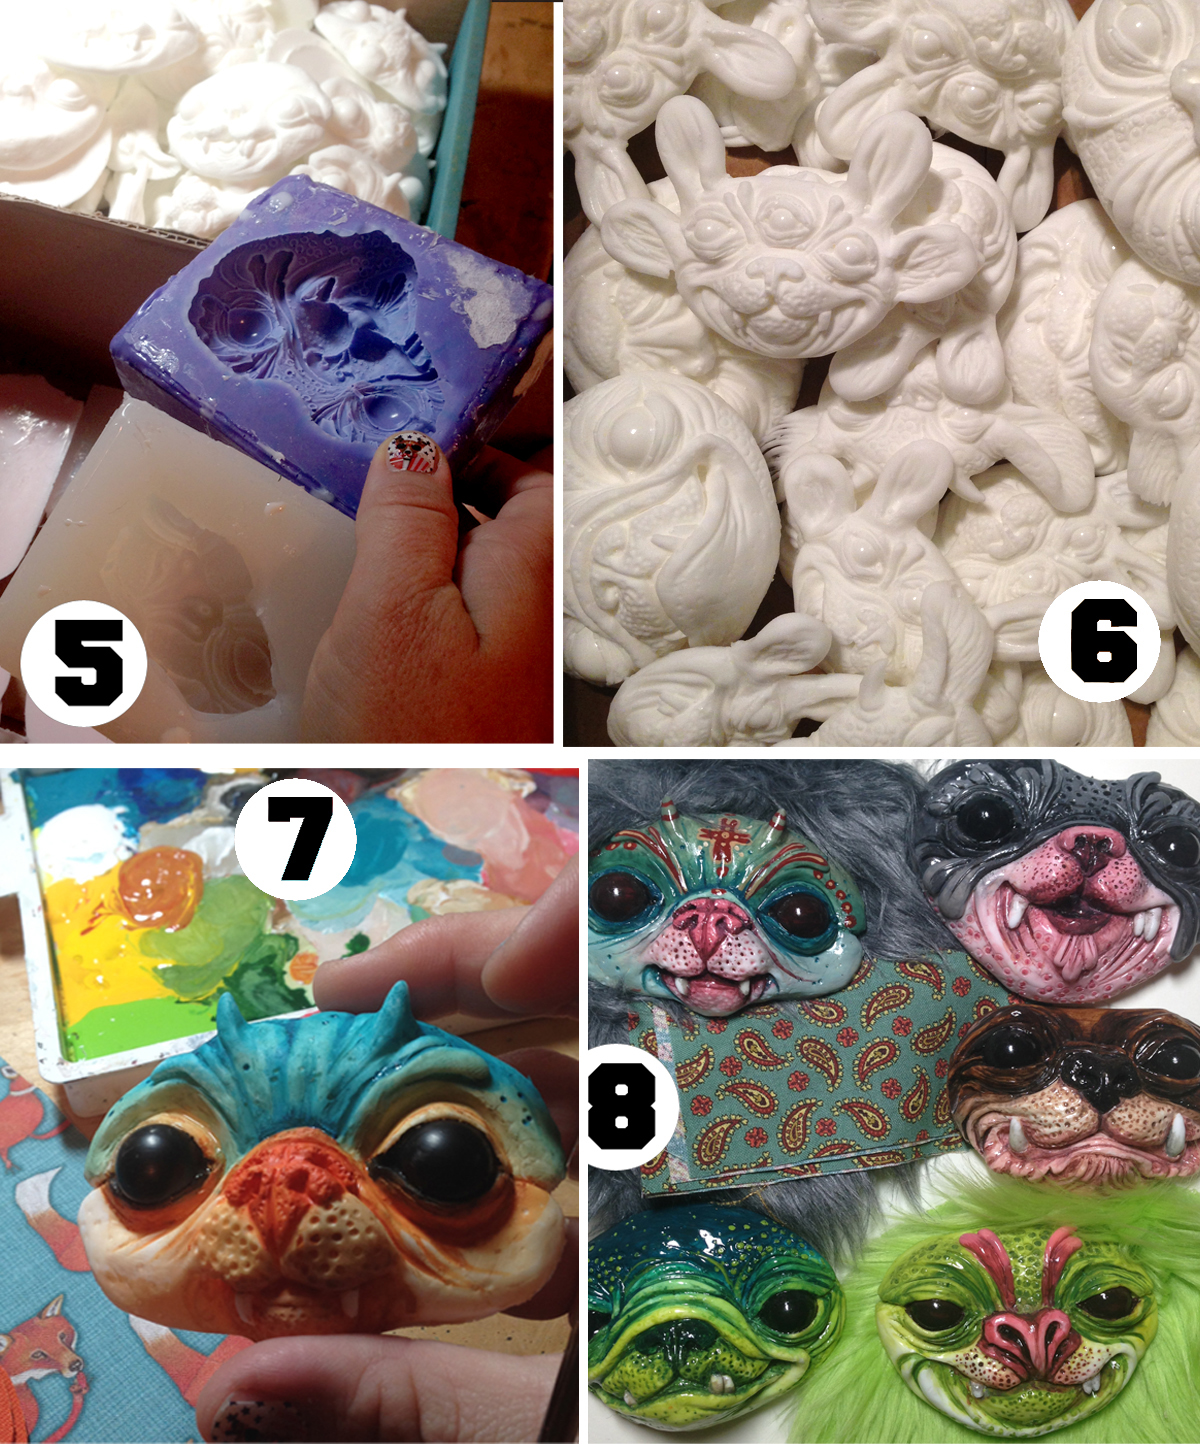
7: I pull one of the fabric stacks out–I usually work on about 4 or 5 at a time. I have fun painting each of the faces to match up with the fabrics for their bodies. (before I had my system, I’d randomly paint heads and THEN match up fabrics…which was way more frustrating than this new way!)
8: The faces are gloss varnished in my garage. I use either Krystal Clear spray varnish or resin spray.
9: Next up, I sew the ears, fold them and sew them to the manes. I like to play with ear positions, as it totally changes the personalities of the little Creepers. Once the ears are sewn to the manes, I glue the varnished resin heads to the mane/ears with E6000 glue. This requires that I place pressure on each of the heads to really seal the glue, so I stash them under heavy things (like my sewing machine, or stacks of books) all around my art room for several hours, often overnight.

10: I got some CUTE little bum labels from a seller on Etsy! I designed the little fabric labels and ordered them and now I sew them on all the bums. When I get an item (like a doll) I love being able to find and contact the artist in case I’d like to order more of the same thing later down the road. Plus, they’re just stinkin’ cute!
11: Next up, when I have some time, I sew up all the little legs and flip them. Since I do about 4 or 5 dolls at a time, it doesn’t take very long for this step–so I like to be able to pop in and do that one if I have a little time.
12: Stuff legs! Another quick step I can do when I don’t have much time.
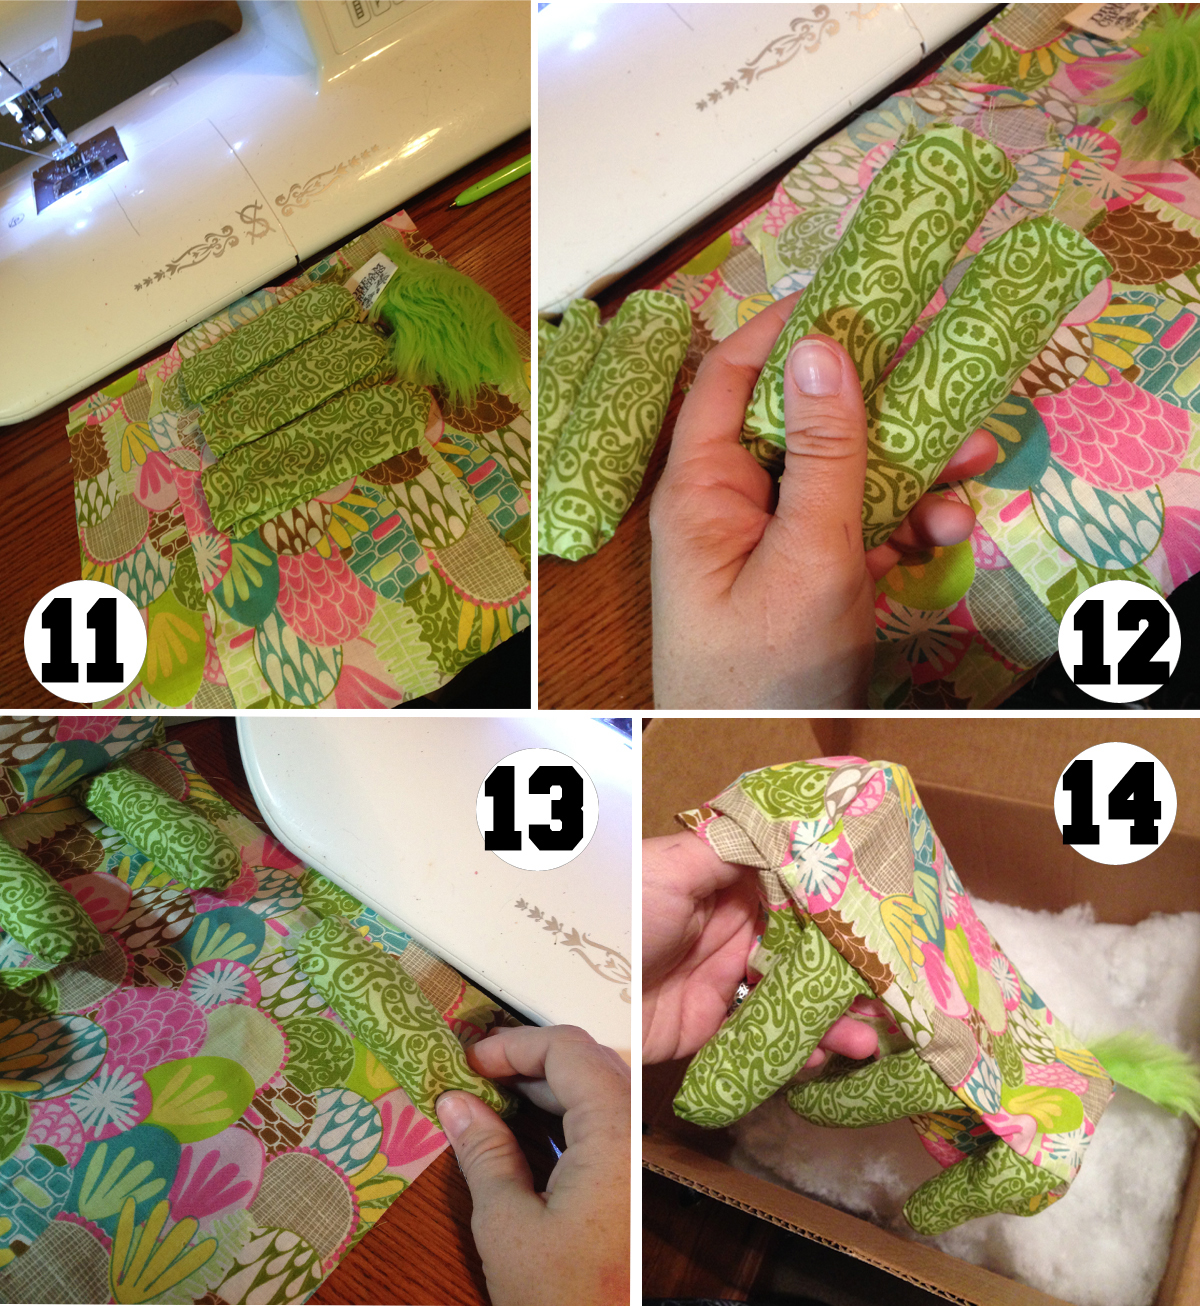
13: I sew the little legs (3 on each side) to the body/belly pieces. There’s a circle piece for the bum and head endpieces of the cylindrical body-shape, leaving the neck open, and making sure to add the tail and the new bum-labels.
14: Then I stuff it! This is a fun step, since it’s nearly done and starting to look like a little fella.
15 & 16: I match up the heads and lay them on the bodies, so that later, when I have a chance, I can sew them on.
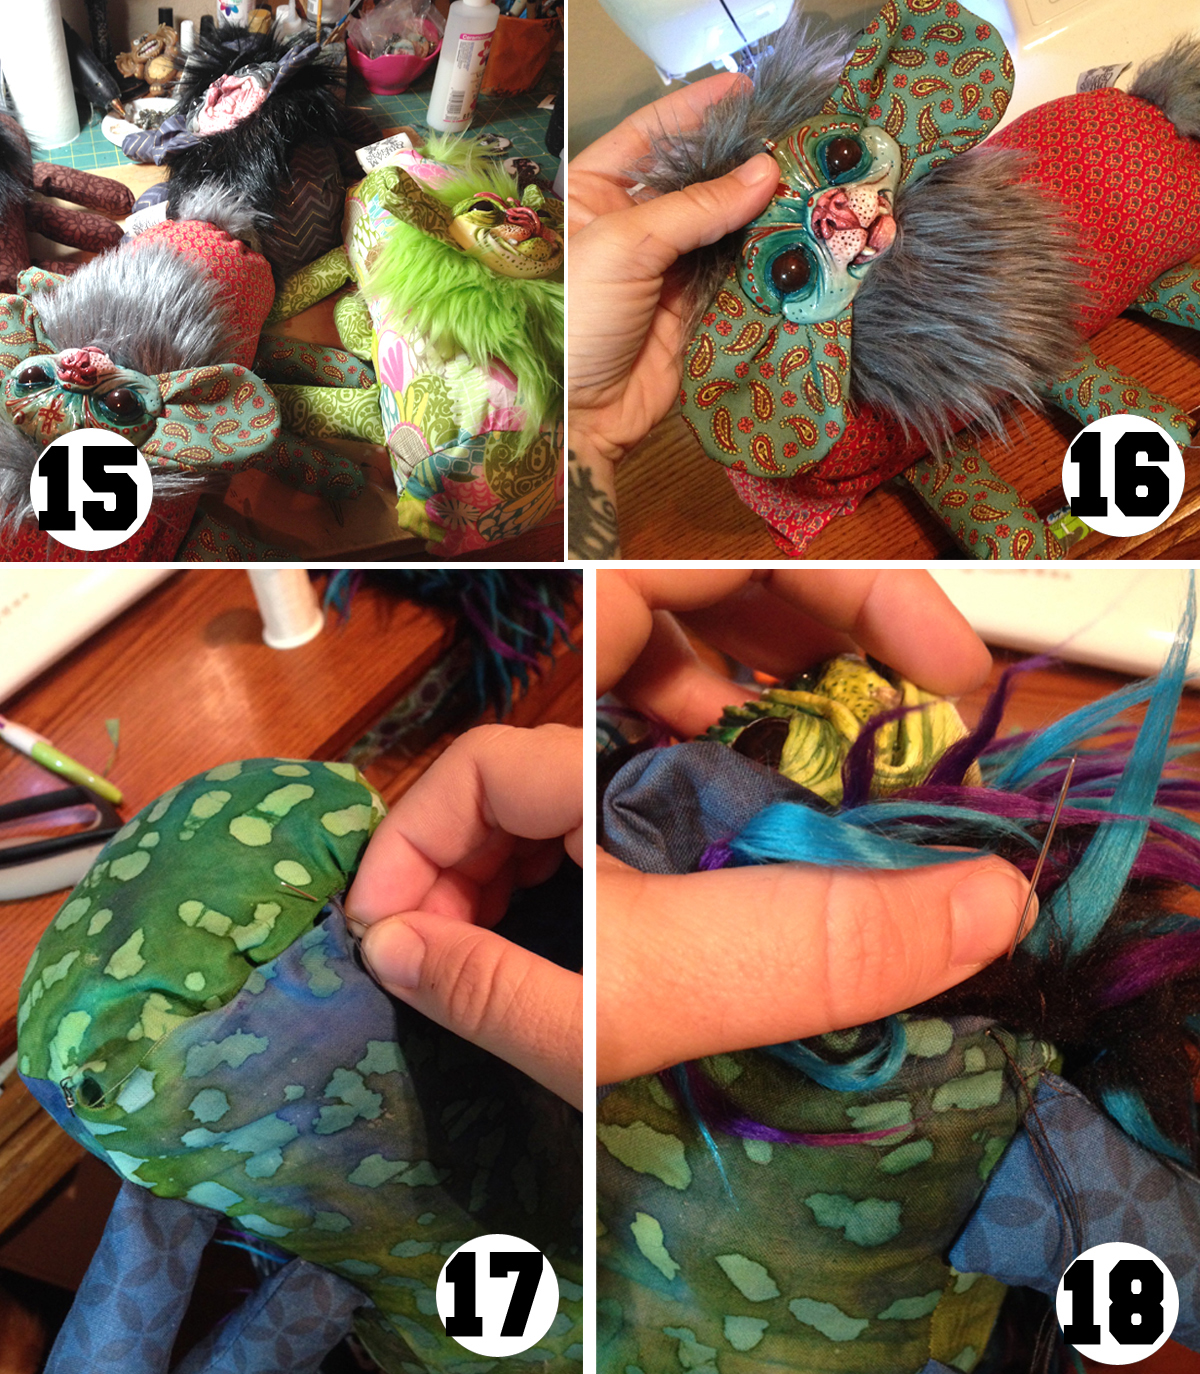
17: I sew up the neck. It’s kinda boring…but necessary.
18: I sew the mane on the body. These two steps are especially tedious and not my favorite part, but it means I’m nearly finished, and I never really know what they’ll look like til they’re almost done.
AND THEN BOOM–THEY’RE DONE!
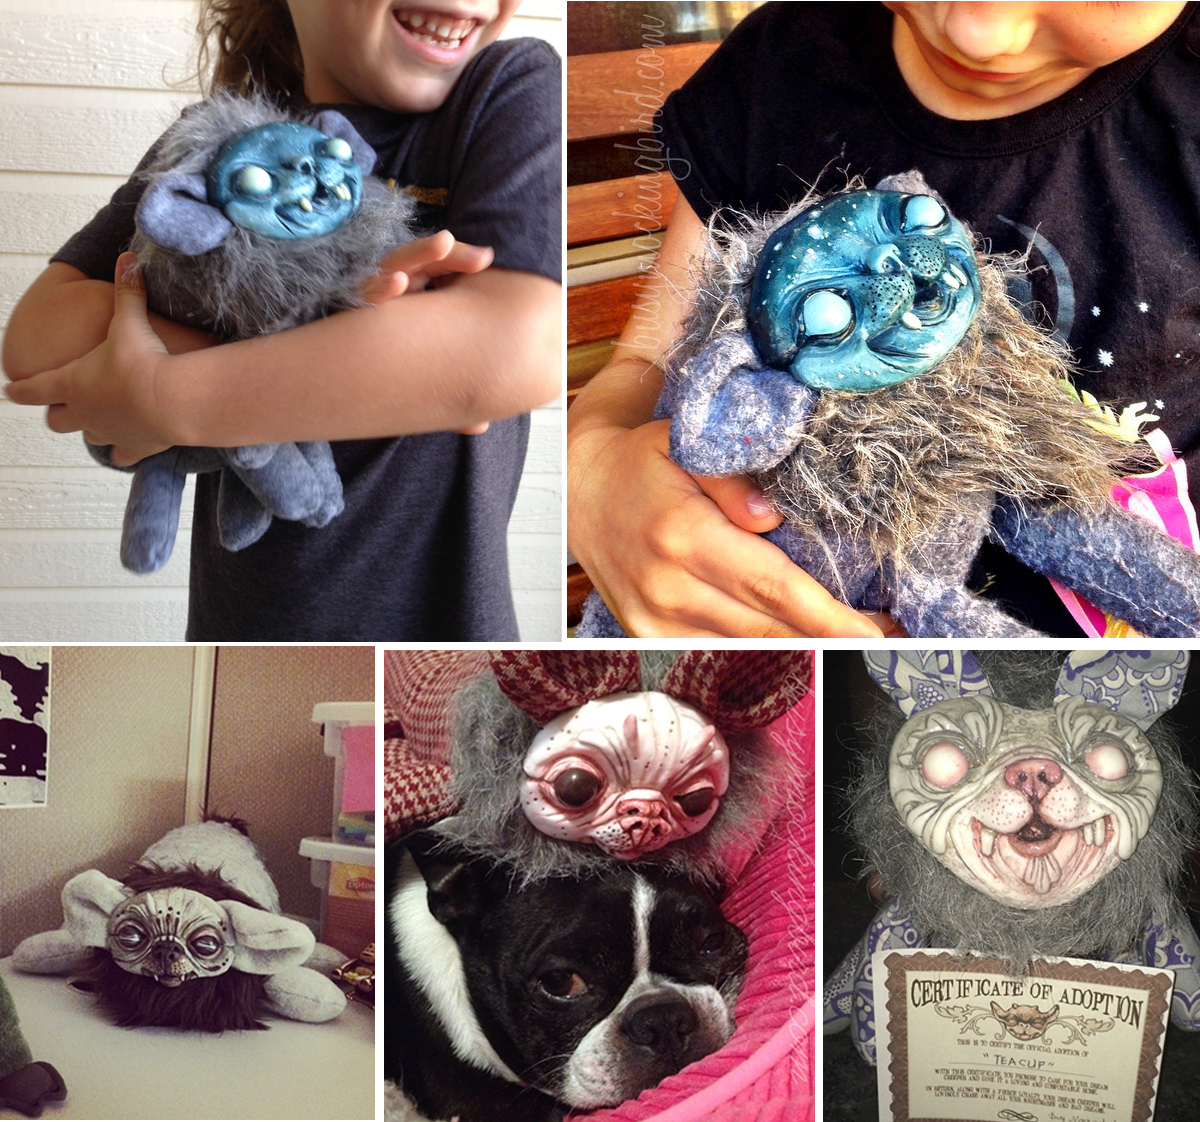
Myla loves them all, and we have made an agreement that she can’t keep every one, but she can be a part of finding them new homes. She helps me name each one and usually gives them a kiss on the nose when they’re on their way to their new families.
And although they’re weird, Myla loves them immensely. I’ve gotten some sweet notes from people about their enjoyment of the little Creepers. I know they’re strange, but something about them makes me very happy.
Even though I do my best to show them in pictures, they’re really best enjoyed in person. SOOOOOO….I’d like to let everyone know that I’m signed up for Alamo City Comic Con in San Antonio, Texas from Sept 11-13! Stan Lee’s gonna be there, you guys! And Hodor! Ron Perlman! Michael Rooker! Walt, Jr. from Breaking Bad! A bunch of people from Walking Dead and all sorts of other people!
I’ll be selling the creepers, as well as the little monster jewelry I make:

I’ve had a few wonderful photos of them being worn, and I love seeing them in action!

Anyway, I hope you enjoy hearing the whole process! While it’s a fun one, I sometimes think people don’t know how much work goes into them. I have people asking me for discounts…but if you don’t see the work that goes into things, it might not mean the same thing to you.
So if anyone’s in the San Antonio area and wants to check us out in person, I’d love to see you! I’m not sure where these little guys fit in in the “art world.” I’m not sure if they fit in at a convention, but I hope we’ll at least have fun and make a few people smile.


These are so so amazing and it’s lovely to see the amount of love that goes into them.
Thanks for sharing your process. Such fun to see how you do your magic! I’m recovering from an unfortunate encounter with a cement floor a couple weeks ago, and can’t get into my studio to make anything. So, I’m living vicariously.
Posts like these make me wish I was crafty.
Looks like you’re doing more monsters with black eyes – I could totally go for one of them!
These are beautiful. If anyone has seen Tinker Bell neverbeast, these little monster’s look just like the neverbeast. I love them.
They are so damn cute!!! Love these! Thanks for sharing how you make them as well, very interesting.
These little guys are awesome…what a creative idea, these would rival some of the critters seen in Jim Henson movies like The Dark Crystal or Labrynth. Truly cool!
I agree. The first thing I thought was “Labyrinth”. They look awesome. And so well made!