DIY Printable Tattoos

YOU GUYS!! Did you know you could make your own temporary tattoos from doodles you already HAD?!? …Okay, well I didn’t. But I experimented with them, and here’s how it went down.
First off, I’ll warn you that I only tried two brands–one was HORRIBLE and the other was not too shabby. But neither one of them came out like the ink ones you get at the store or in a pack of gum–instead of transferring the ink, they both had an adhesive backing to them, so it’s basically like putting a very very very thin sticker on your arm. Or like letting Elmer’s glue dry on your skin. (I have super sensitive skin that doesn’t like adhesives, so for freaks like me, that might be a problem.)
 I used this brand, which says you should use it with this special die-cutting machine, but you TOTALLY don’t have to (Sorry, Silhouette). You take your images, flip them, and print them out. There’s a plastic sheet you rub onto it once it dries, to sort of hold the adhesive down. Then you have to cut out your “tattoos.”
I’ll warn you that NOT cutting closely around the image means you’ll get adhesive everywhere there’s blank space, as you can barely see in this closeup picture: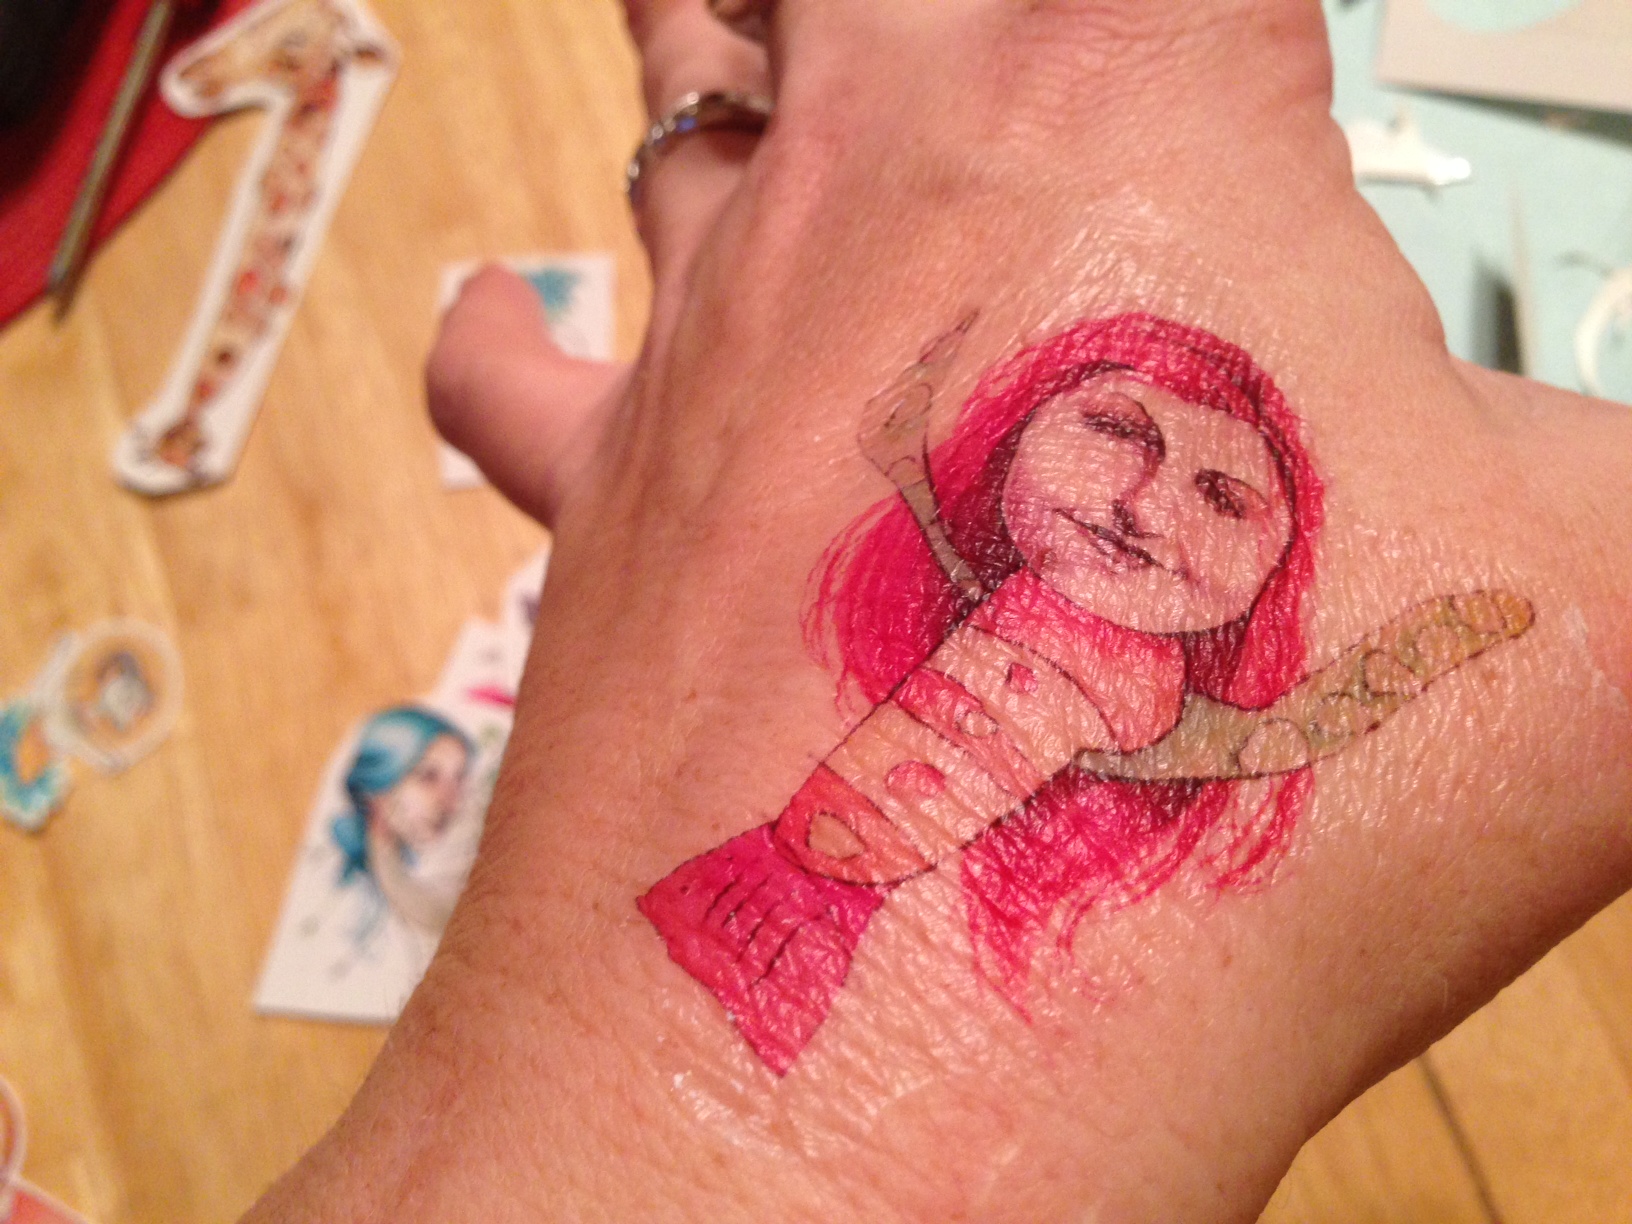
Not cool. So take my word for it, and just cut closely around your image.

The rest is like a regular temporary tattoo: peel off the plastic sheet, and place it face-down where you want it on your skin. Again, a word of warning: You’re essentially putting a very very very thin adhesive on your skin, so if you have super hairy arms, you might want to opt for a less-hairy spot.
Wet the back of the “tattoo” and peel it off.

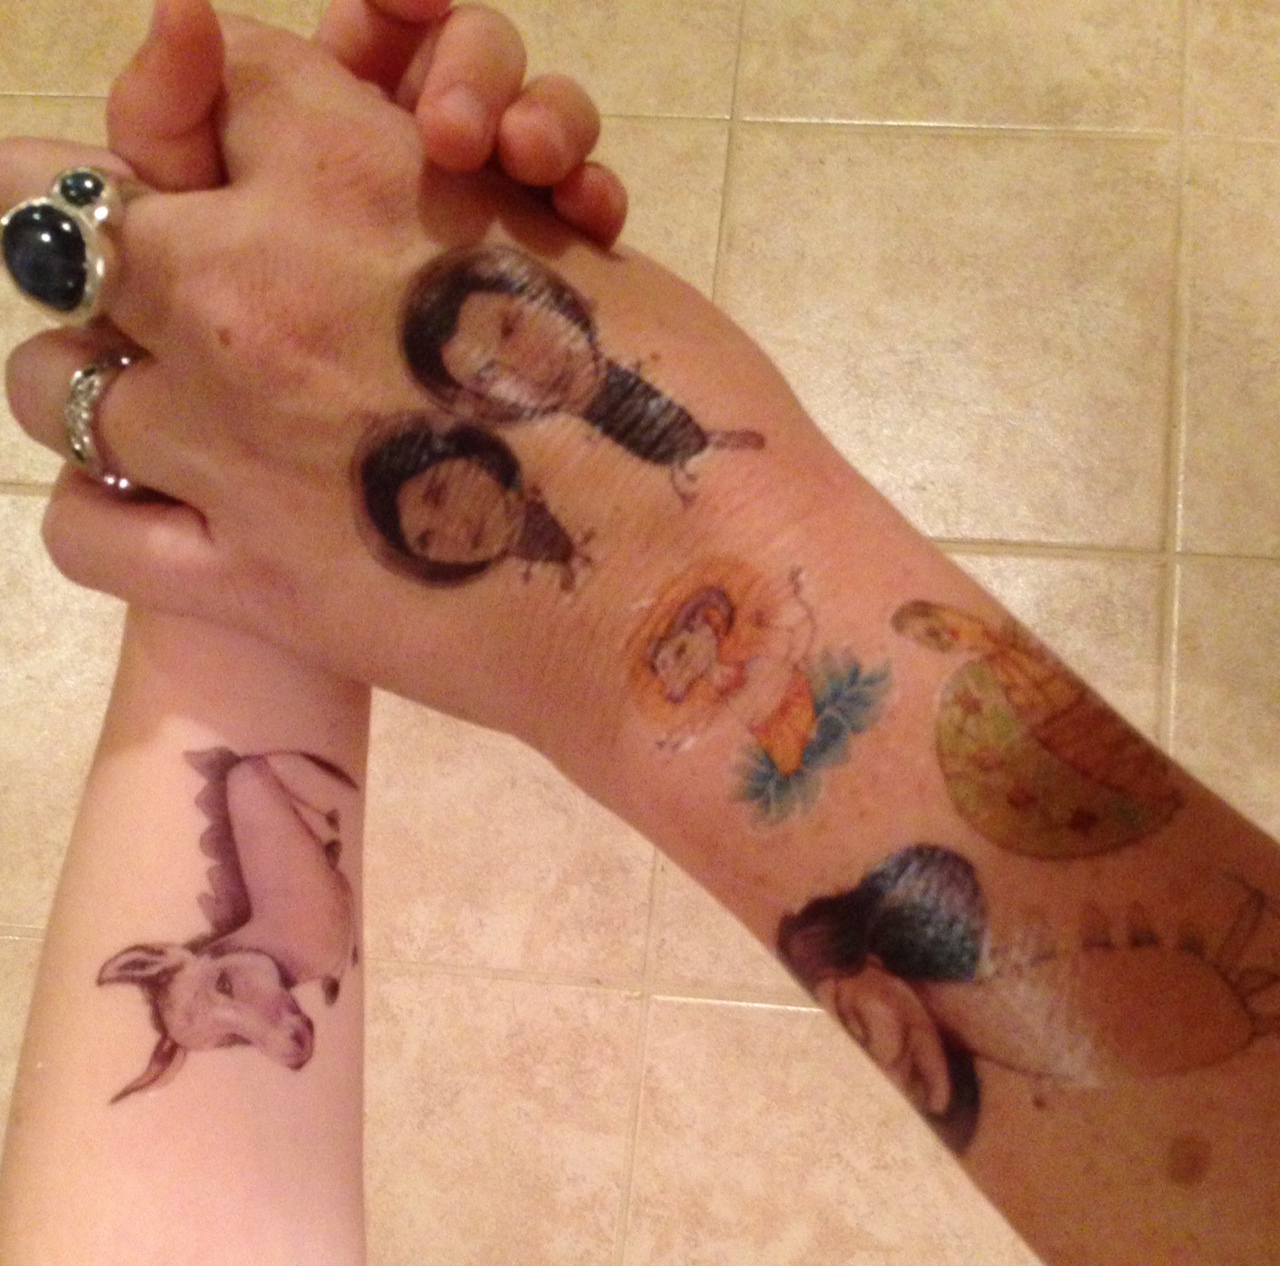
And temporarily cover yourself in your own awesomeness! Woohoo!
…And a Happy New Sketchbook

Do you sketch? I do. A lot. I have drawn in lots and lots of sketchbooks. There’s such a good feeling of potential inspiration on the gaining of a new sketchbook. But for me, doing so means involving myself in a bizarre sort of ritual: I MUST decorate the cover. Usually, it is with whatever I happen to be inspired or influenced by at the time. But here’s the catch: if the cover doesn’t turn out so well in my eyes, I have trouble drawing in that sketchbook, and it ends up being a total waste of perfectly good drawing paper.

I know, I know–that’s silly, right? Well for me, it’s true. There’s something to be said for making your surroundings, and the place you like to “nest” aesthetically pleasing. It lights little sparks in your mind, gives you the warm fuzzies, and encourages you to try new creative things. “Come on in!” it says. “Welcome! There are so many awesome things to see!” But mess up the front of that sketchbook, and it says in a nasty little voice, “Those things you like to doodle? They are not very good. Don’t bother, because it will just look horrible.”
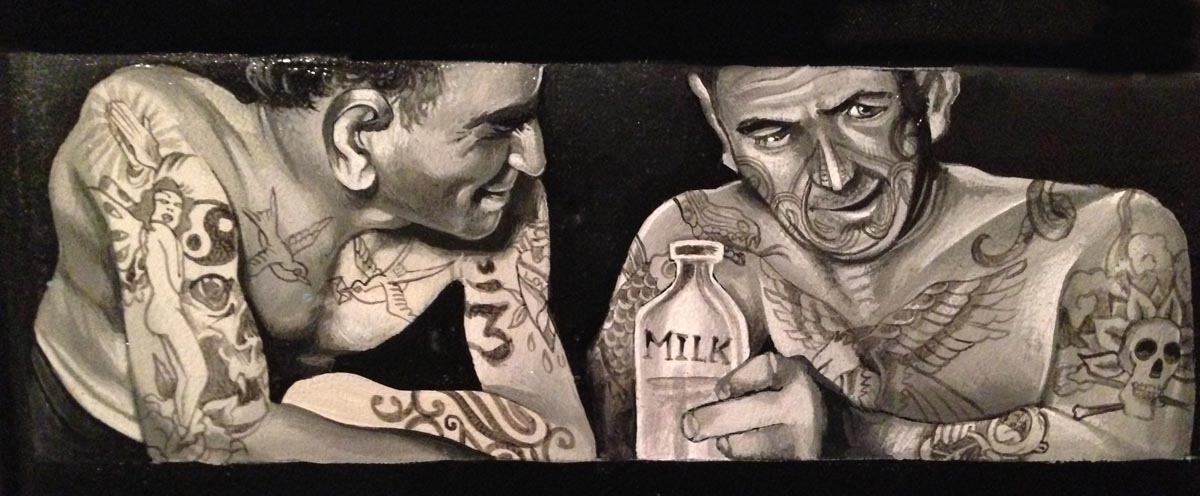
I have decorated new sketchbooks with a variety of doodles and paintings over the years. These little tattooed “milk men” were from a time when I was very influenced by some vintage tattoo books.
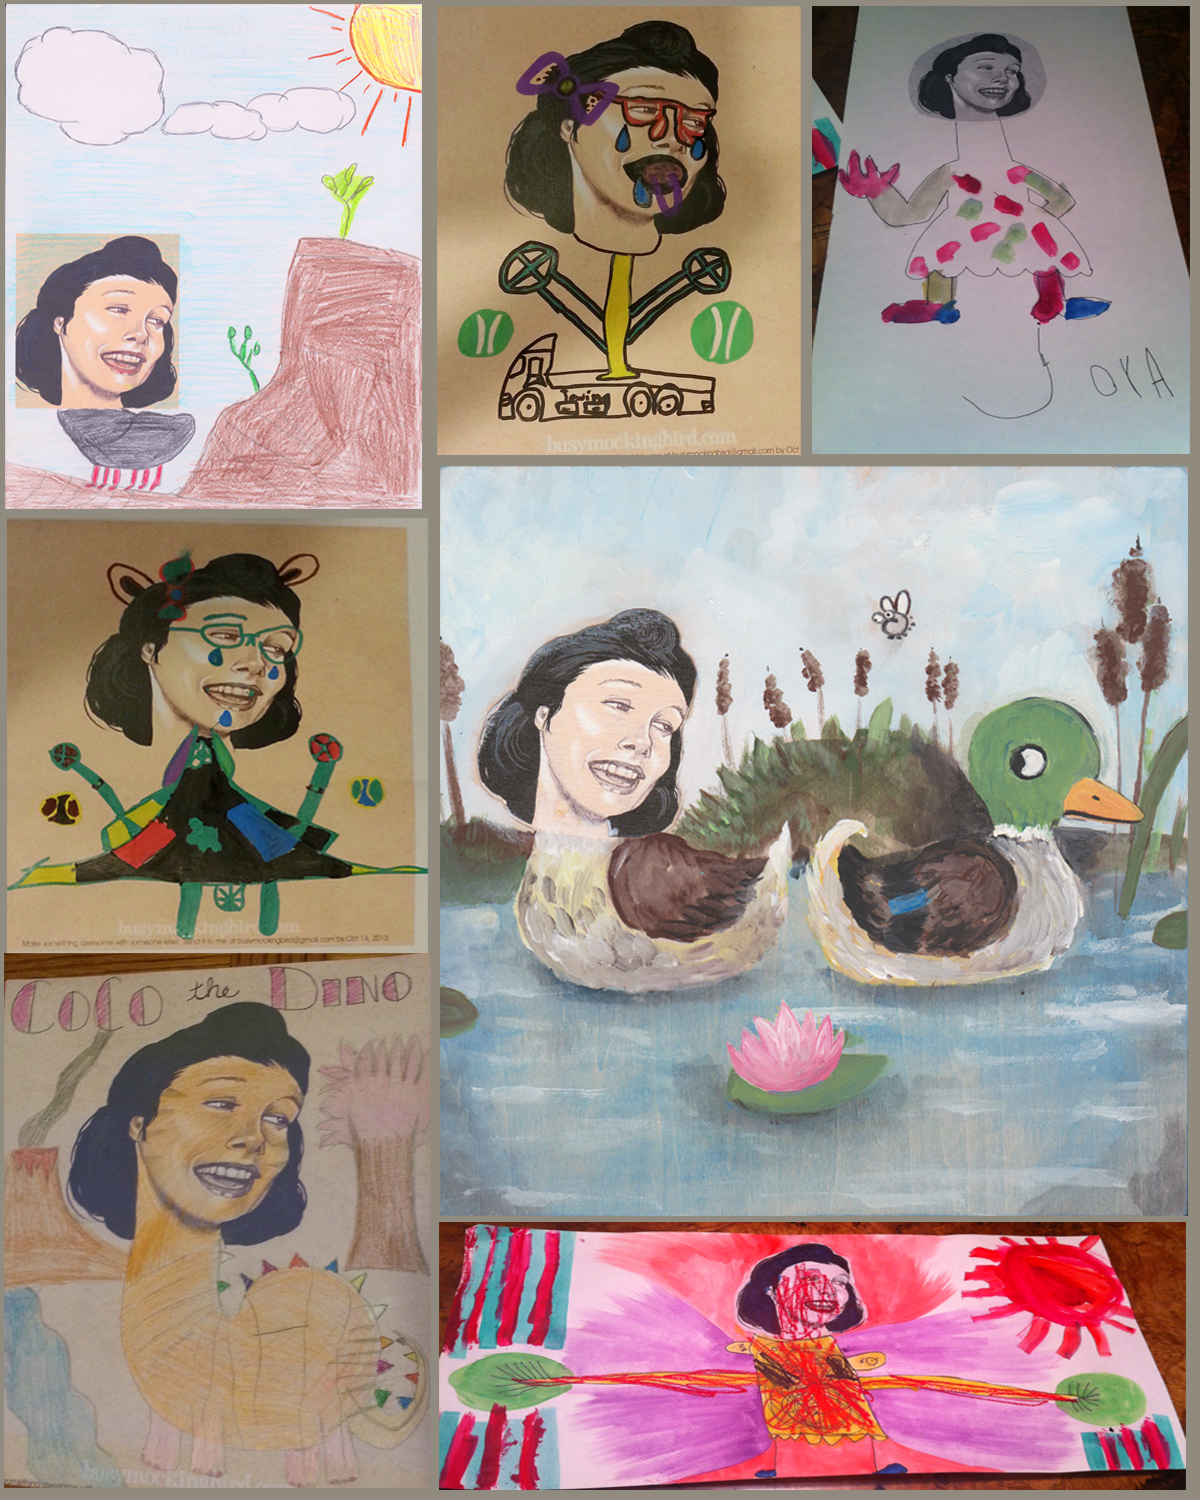
And this octopus lady? Well, I’m not sure WHAT’S going on with her, but I’ve always really loved her eyes. And what a friendly smile, amIright?

One time very recently, our daughter saved a sketchbook from near doom. I had been trying desperately to rescue this drawing by adding highlights and more “tribal” hair, and patterns and all sorts of whatnots, when she came over and asked me if she could help me by adding “highlights in her hair.” Knowing what lay on the line, and the potentially sad fate of this sketchbook, I let her, and with three simple brush swipes of white in her hair, she completely saved it.

As you can imagine, over the years, my ever-growing collection of sketchbooks had built up and was responsible for a fairly large chunk of our military moving weight. (For non military folks, a quick explanation: the military allows only so much weight per family it will ship when you move to your next duty station. My love of books and my sketchbooks have been a fairly decent chunk of that weight for a good part of our marriage….) So much so that it was almost weighing ME down to keep those old sketches around. In a way, some sketchbooks are like looking back at a snapshot of your life at the time. You see the ups, the downs, the inspirations and the failed attempts at drawing, mundane grocery lists, mental notes, favorite quotes. All the little snippets of day to day life that someone like me (who usually has a sketchbook within arms reach at all times) might have.
So one year, I decided that except for a few special sketchbooks, I would take only the highlights from all of the sketchbooks from all of the years, and make a scrapbook. I took my favorite things, even the little snippets and sketches and notes, and compiled them into one huge scrapbook. It was a little intimidating at first to consider throwing anything away, but in a way it felt sort of good to get rid of all of that extra weight, to throw it away forever, and have something to show for it; something that felt good. Something that made that little voice say, “HEY! Some of these are pretty good! See–maybe you’re not so bad after all!”


…So it’s almost the new year! And I have a new sketchbook. And whatever I decide to put on the cover, I want it to be a good one. I want it to make me feel happy, to feel good. I want it to inspire me to do better, to be better. …So, metaphorically speaking….what would you put on YOUR new sketchbook?
Keep ’em Coming…
Contest entries are coming in from all over, and they’re so awesome! Have you entered yet? …Looks like you all are having a lot of fun with it, and I want to see MORE! One more week to enter! If you want to give it a shot, head on over to the last blog post and try it yourself. Good luck and most importantly: have a great time with it!

Another Back-To-School Idea: Custom Clothes!

I’m not a big one for character clothes, and sometimes it’s hard finding kids’ clothes that don’t have cutesy sayings all over them. So in getting ready for the first day of school, consider customizing a plain ol’ dress or shirt! You can usually find pretty inexpensive plain clothes any ol’ where, hiding in the kids’ section of WalMart or your local craft store–shirts for around $4 or a little dress shirt (like the purple one above) for around $9.
A tricky, fun tool to have is this fusible, iron-on web. The directions are very easy, written on the back side of the package. Super easy.

Simply stick the web like a sticker to the back side of the fabric you’d like to fuse to your clothing (in the case above, a brachiosaurus and pteranadon my daughter wanted on her dress shirt). Then draw the design on your fabric and cut it out (it’ll have the fusible web stuck to it). Then iron it on your clothing, and BOOM you have a customized piece of clothing of whatever you like!

You could do this for all sorts of things. When I was in roller derby, we’d customize all sorts of things for ourselves. It’s not just for kids! Backpacks, bags, pants. So far, it seems to have held up after several washings, and with living through the wear and tear of a 4-year old. No sewing required, but I’m sure if you wanted to get crafty, you could embellish with beads or embroidery. So have at it! Get creative!
(On a side note, if you want to get your kid involved, I’ve also let ours go crazy on a $4 shirt with some Sharpie markers. Now it’s one of her favorite shirts!)

Kneepads!

I have this habit of customizing pretty much everything. I can’t stand a blank canvas, and I get even more excited to customize something FUNCTIONAL. So when I got a new pair of SCABS kneepads, they were not only awesome for my knees during falls (since an injury was jacking them up), with their white kneecaps, they were just begging do be doodled on….so I grabbed my trusty Sharpie markers and got to work.
Now this is one of those projects you do just for fun, because if you know anything about derby, you know those things are gonna get CREAMED. Point in fact: Here’s a picture of them in action:
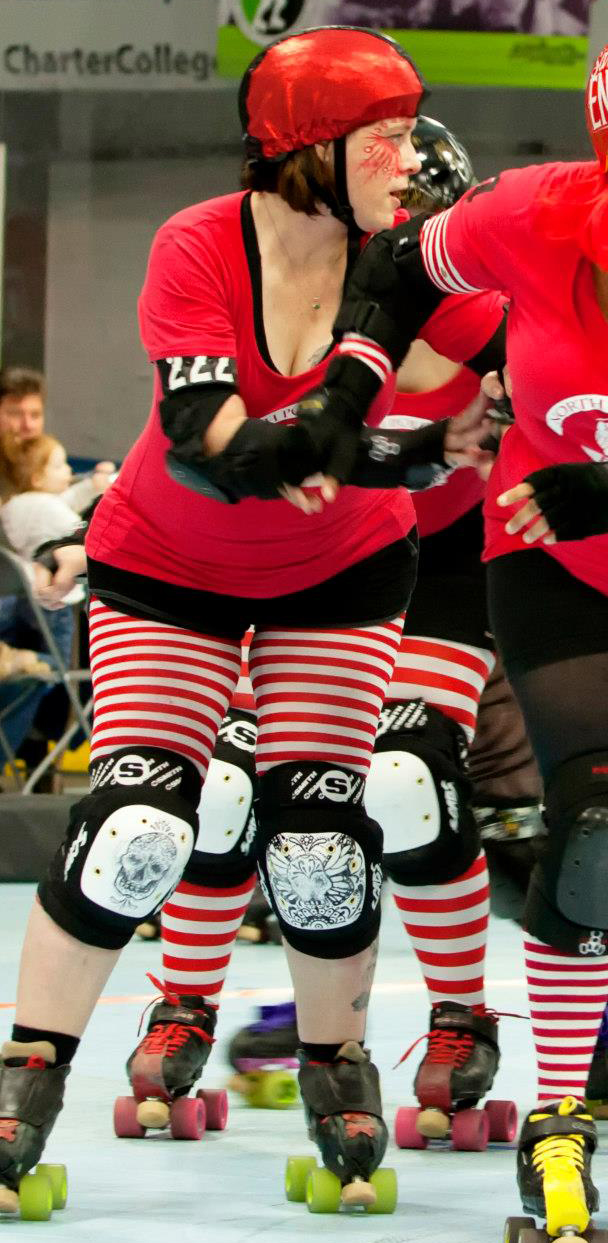
And this is a pic of my newly customized kneepads after just one bout:

But you know, those doodles were fun while they lasted, and why not? I love to see people customize the things they own. To not accept them straight out of the box, to get creative and funky with them, even if it’s for a short time. What can YOU customize today?
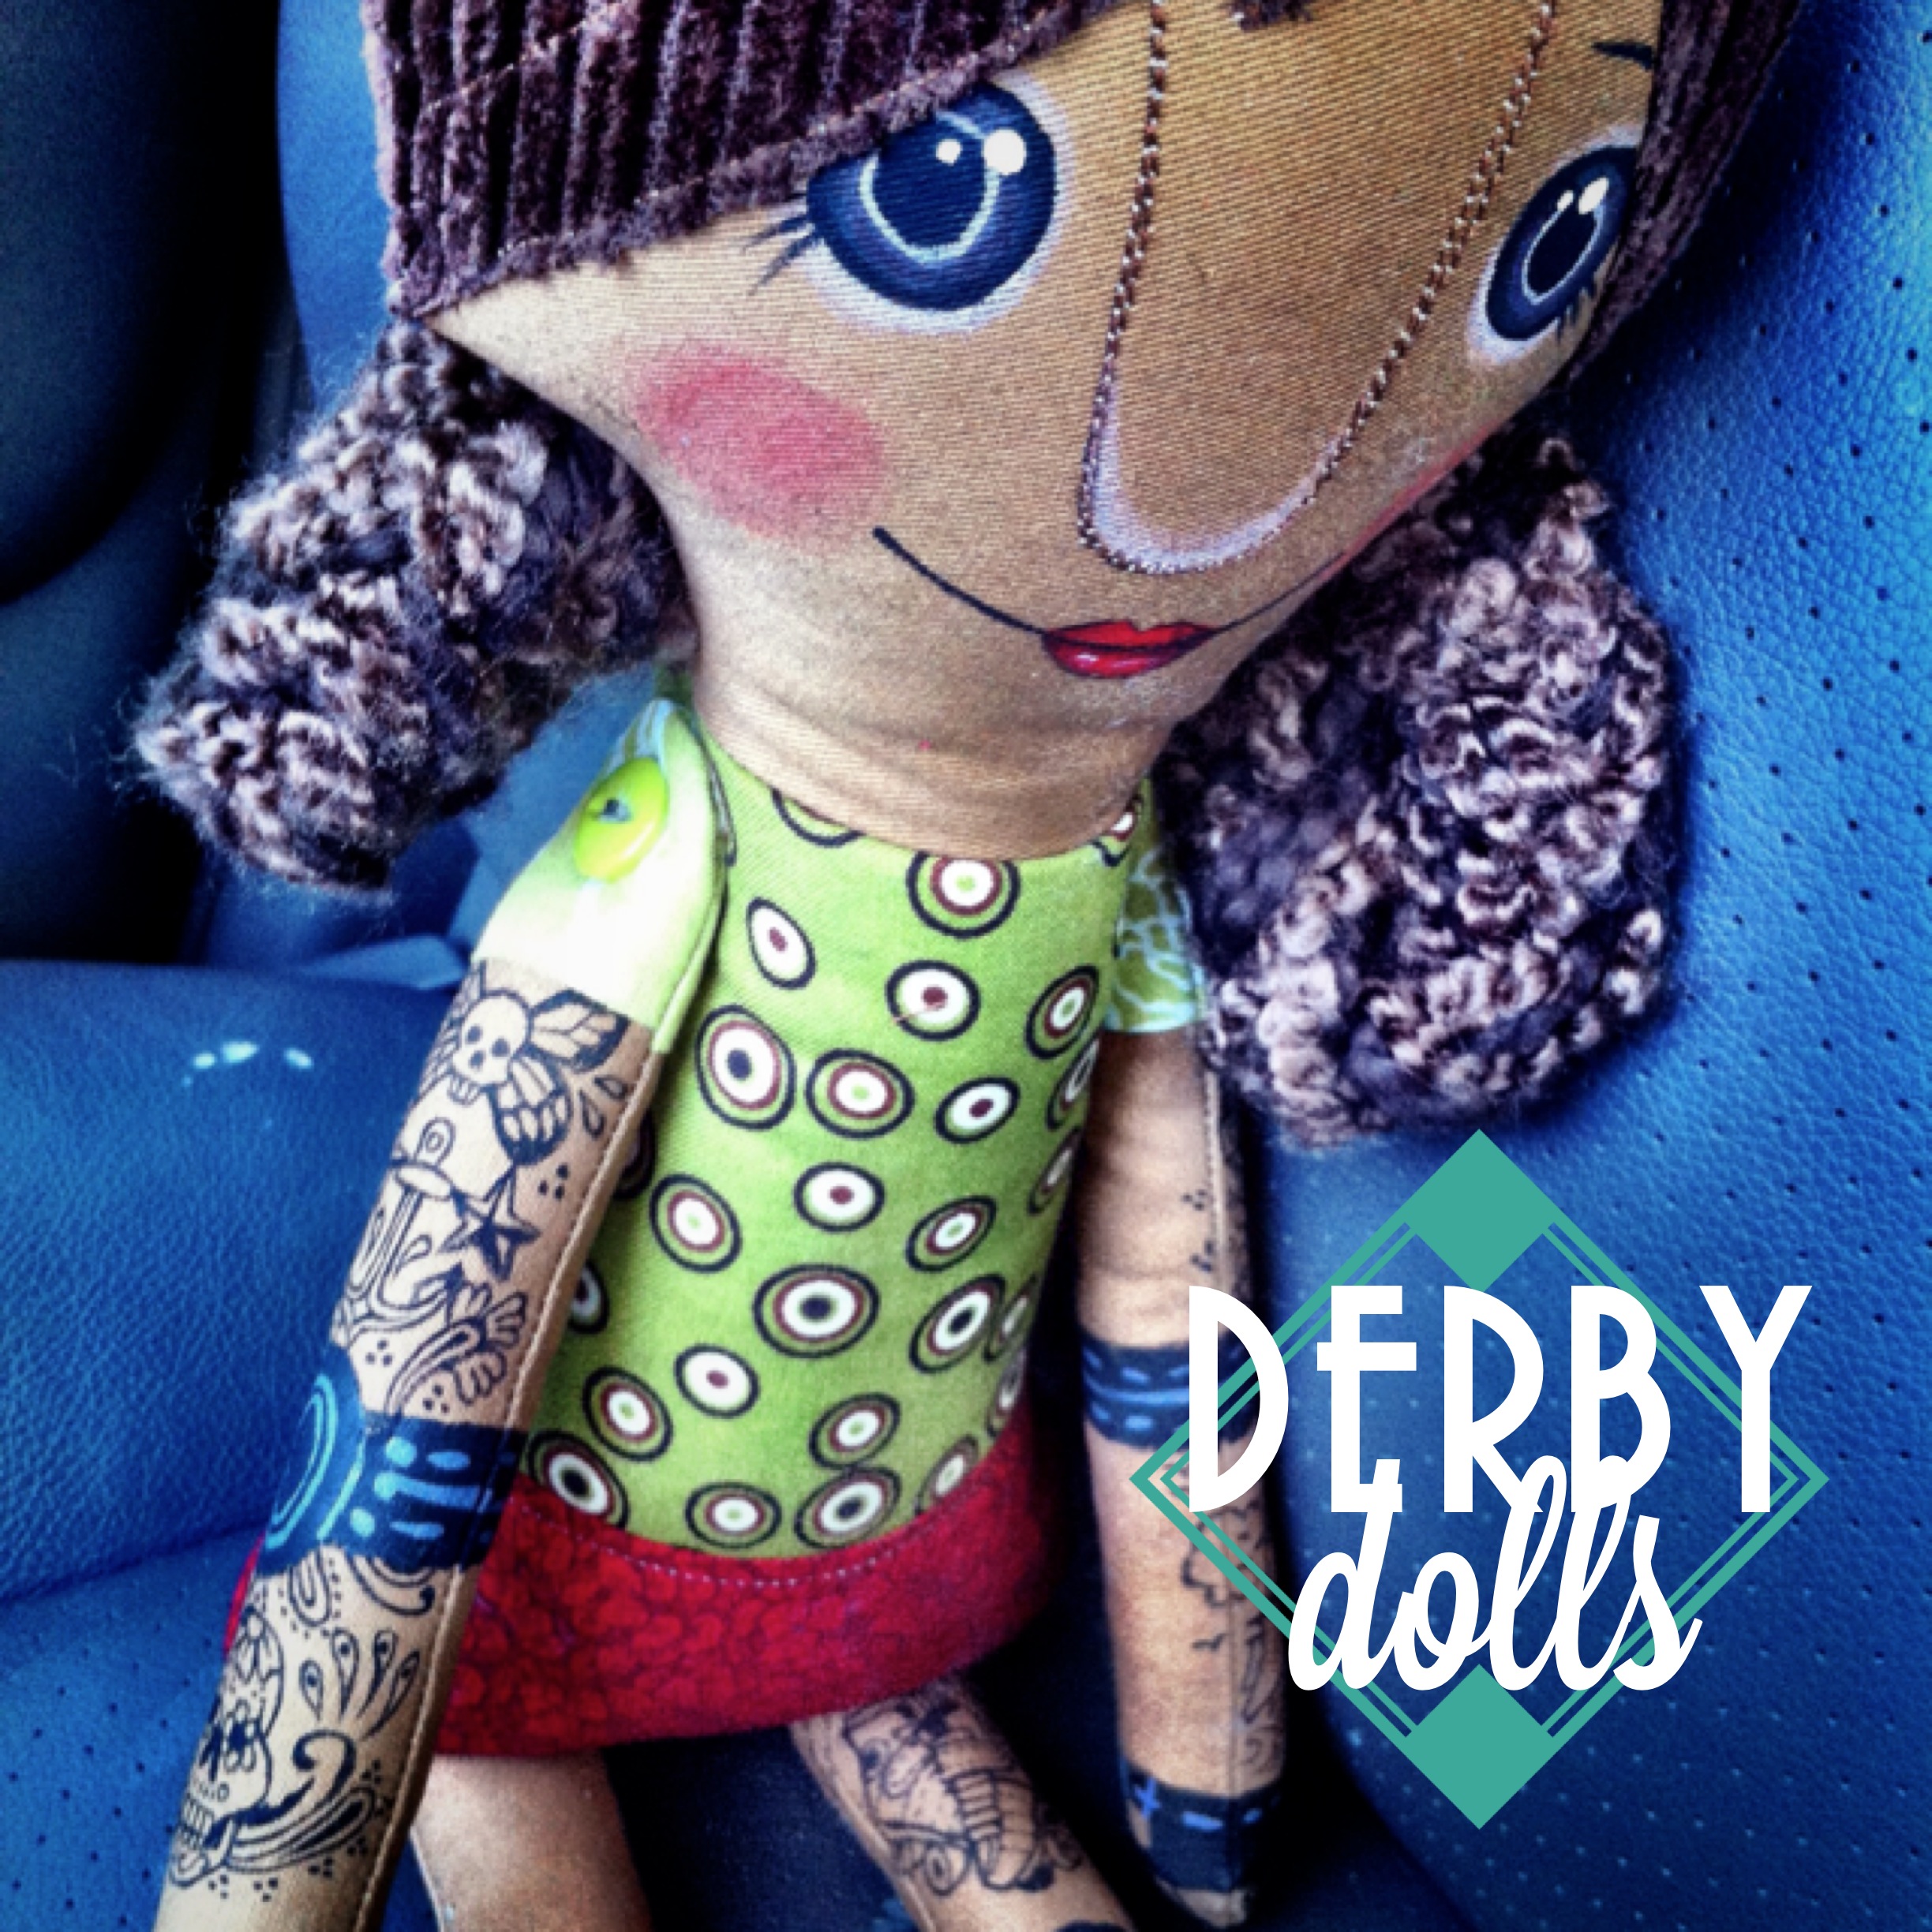
Derby Dolls
I know I do a lot of posts about derby, but this one is pretty crafty, too…
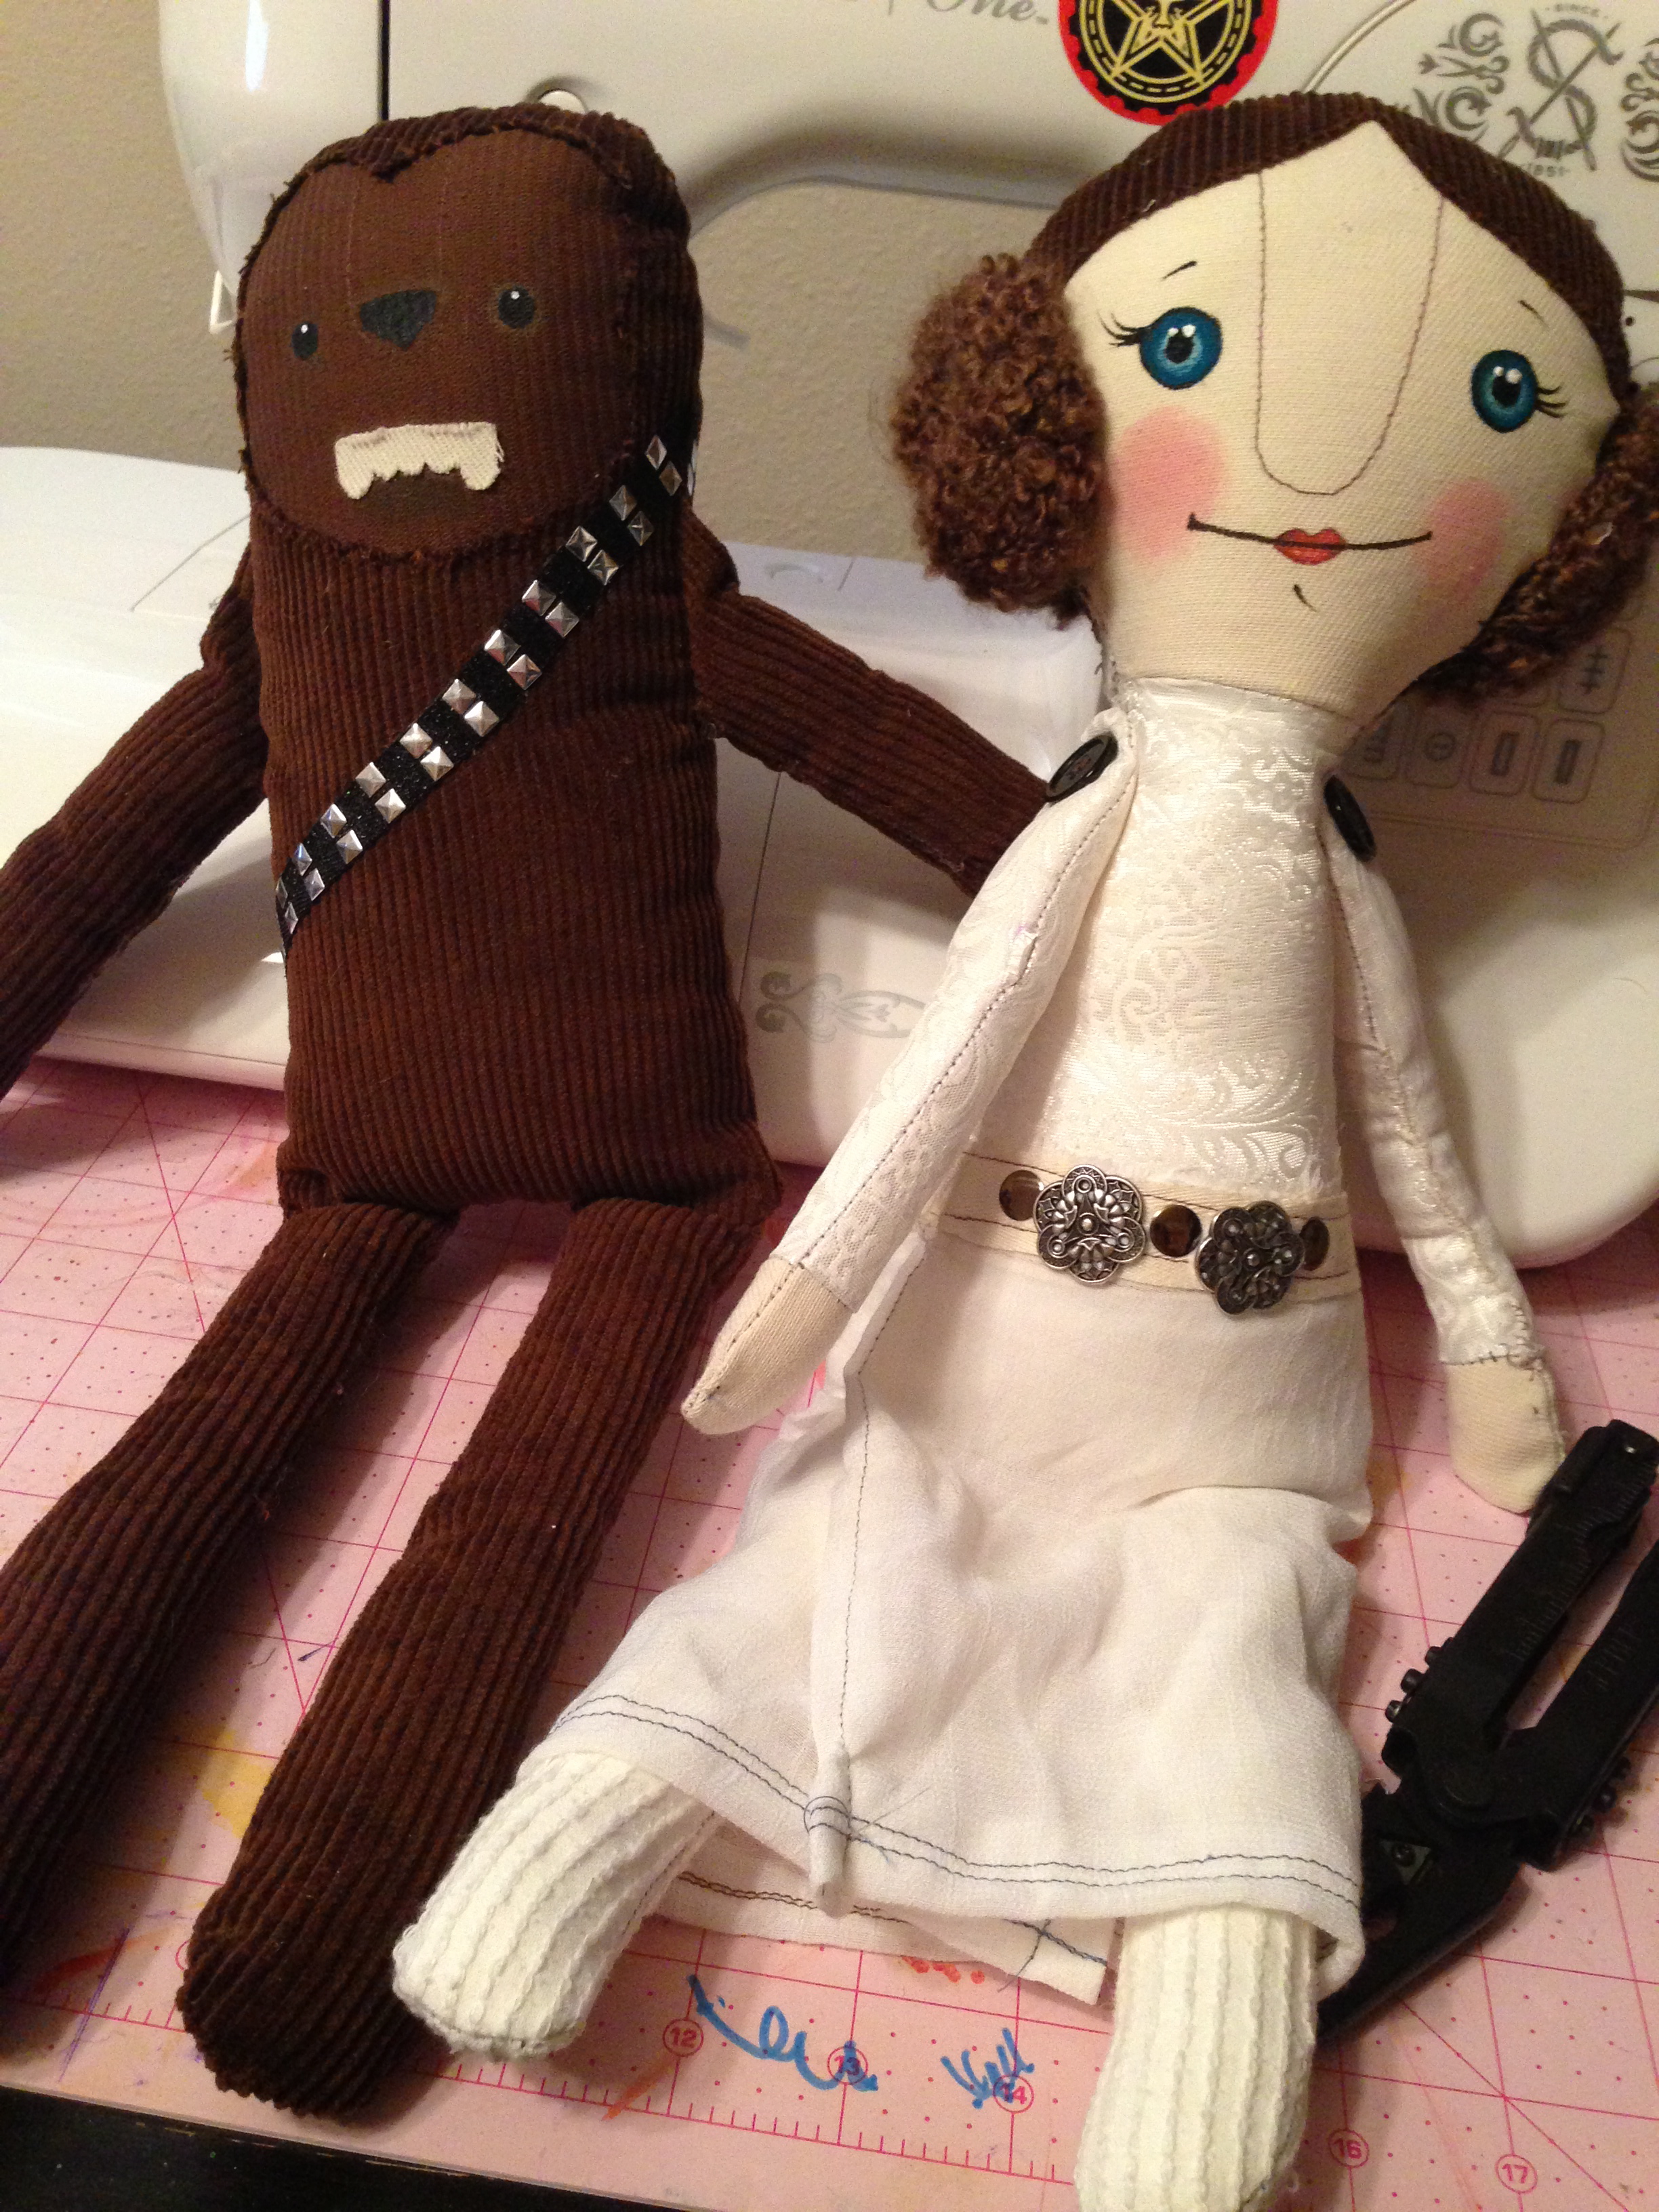
With just a little tweaking and customizing, I can do a lot with a single pattern. I’ve bought a lot of patterns from MMMCrafts on Etsy, and the one I’ve had the most fun with is this Little Red pattern. I’ve never actually made Little Red, but I used the same doll pattern to make a sweet Princess Leia doll for my Star Wars-lovin’ daughter (separate Chewie found here, by the way).
But when my very good “derby wife,” Sunny (also the early founder of my derby team, NPBT), was moving out of state, I wanted to make her something cool & quirky & special.

Since she has short hair, I just left off the ponytails. I handpainted our team logo on her “shirt,” but I’ve done similar things where you can use iron-on transfers with computer paper and just iron on a logo.
Since our colors were red, white & green, I made the bottom half a different color to look like derby shorts. She has several tattoos, but I added several more to decorate her arms all up. I used acrylic paint for her face and tattoos, which (if you’ve ever gotten it on your clothes by accident you know) stays on fabric really well.
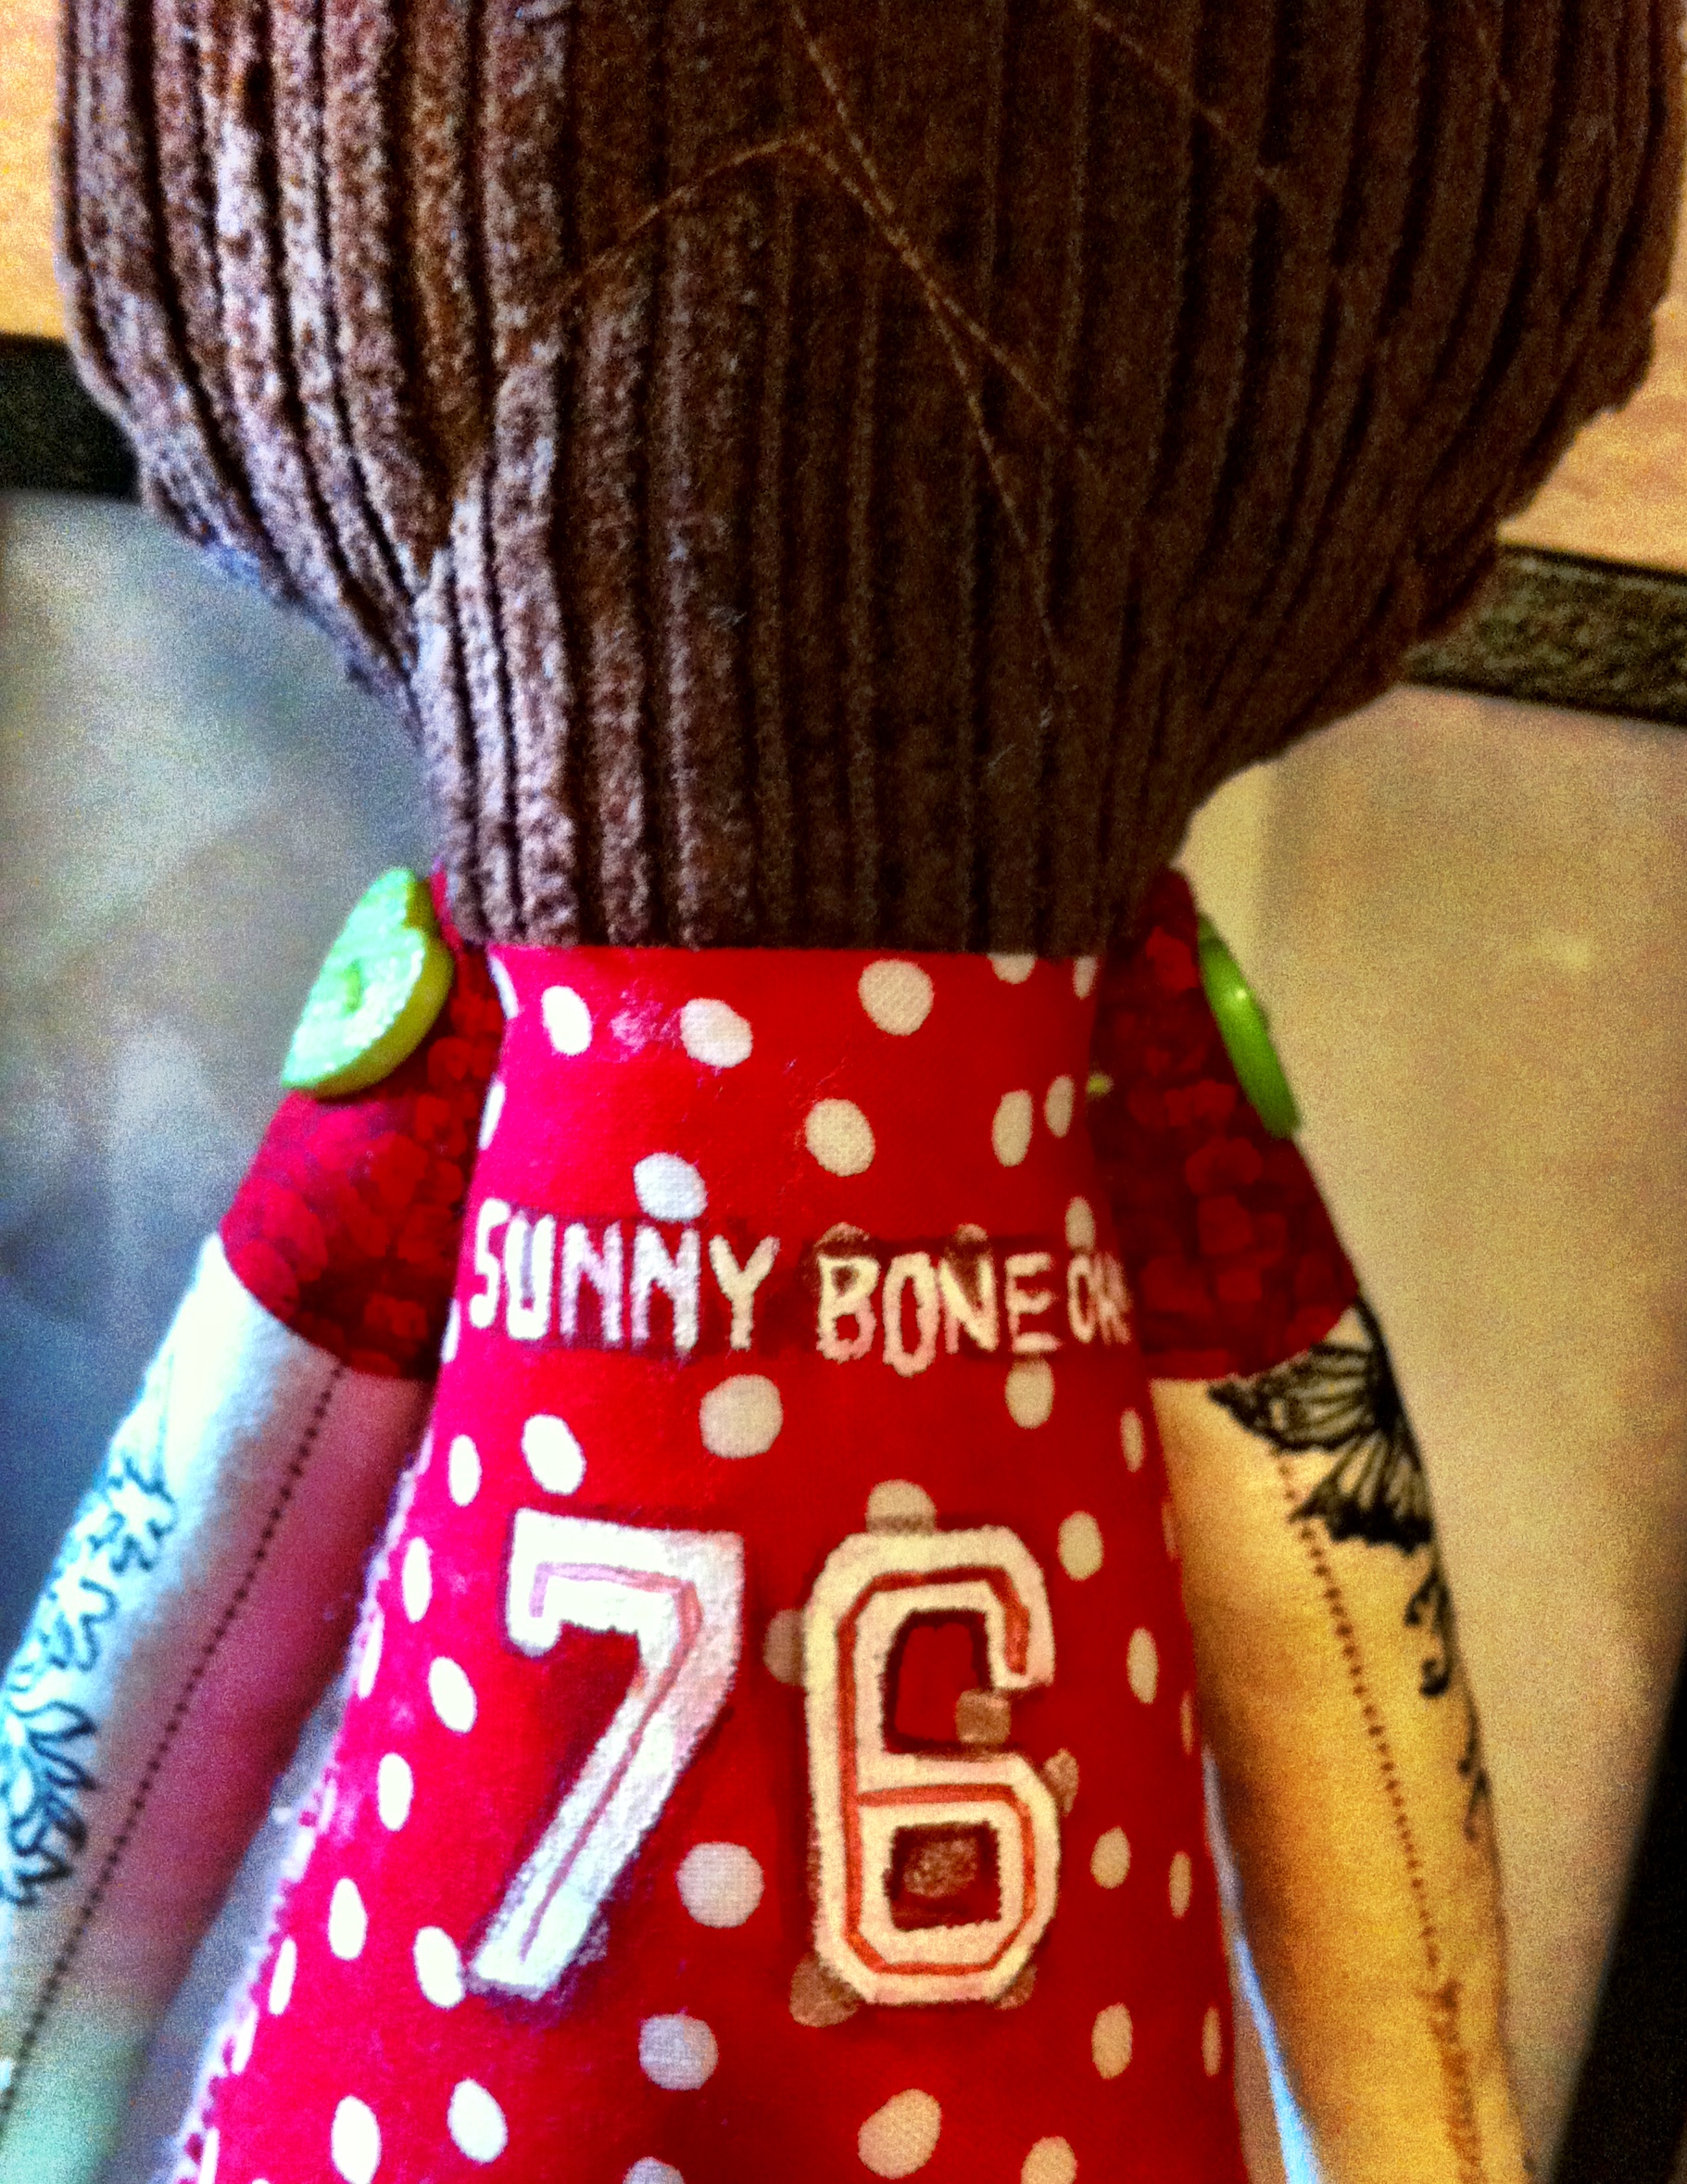
I put her number & name on back, made cute little wheels out of buttons and paint, and painted on the kneepads and wrist guards. The high socks are just a strip of fabric instead of doing one solid piece for the leg, as the pattern said.
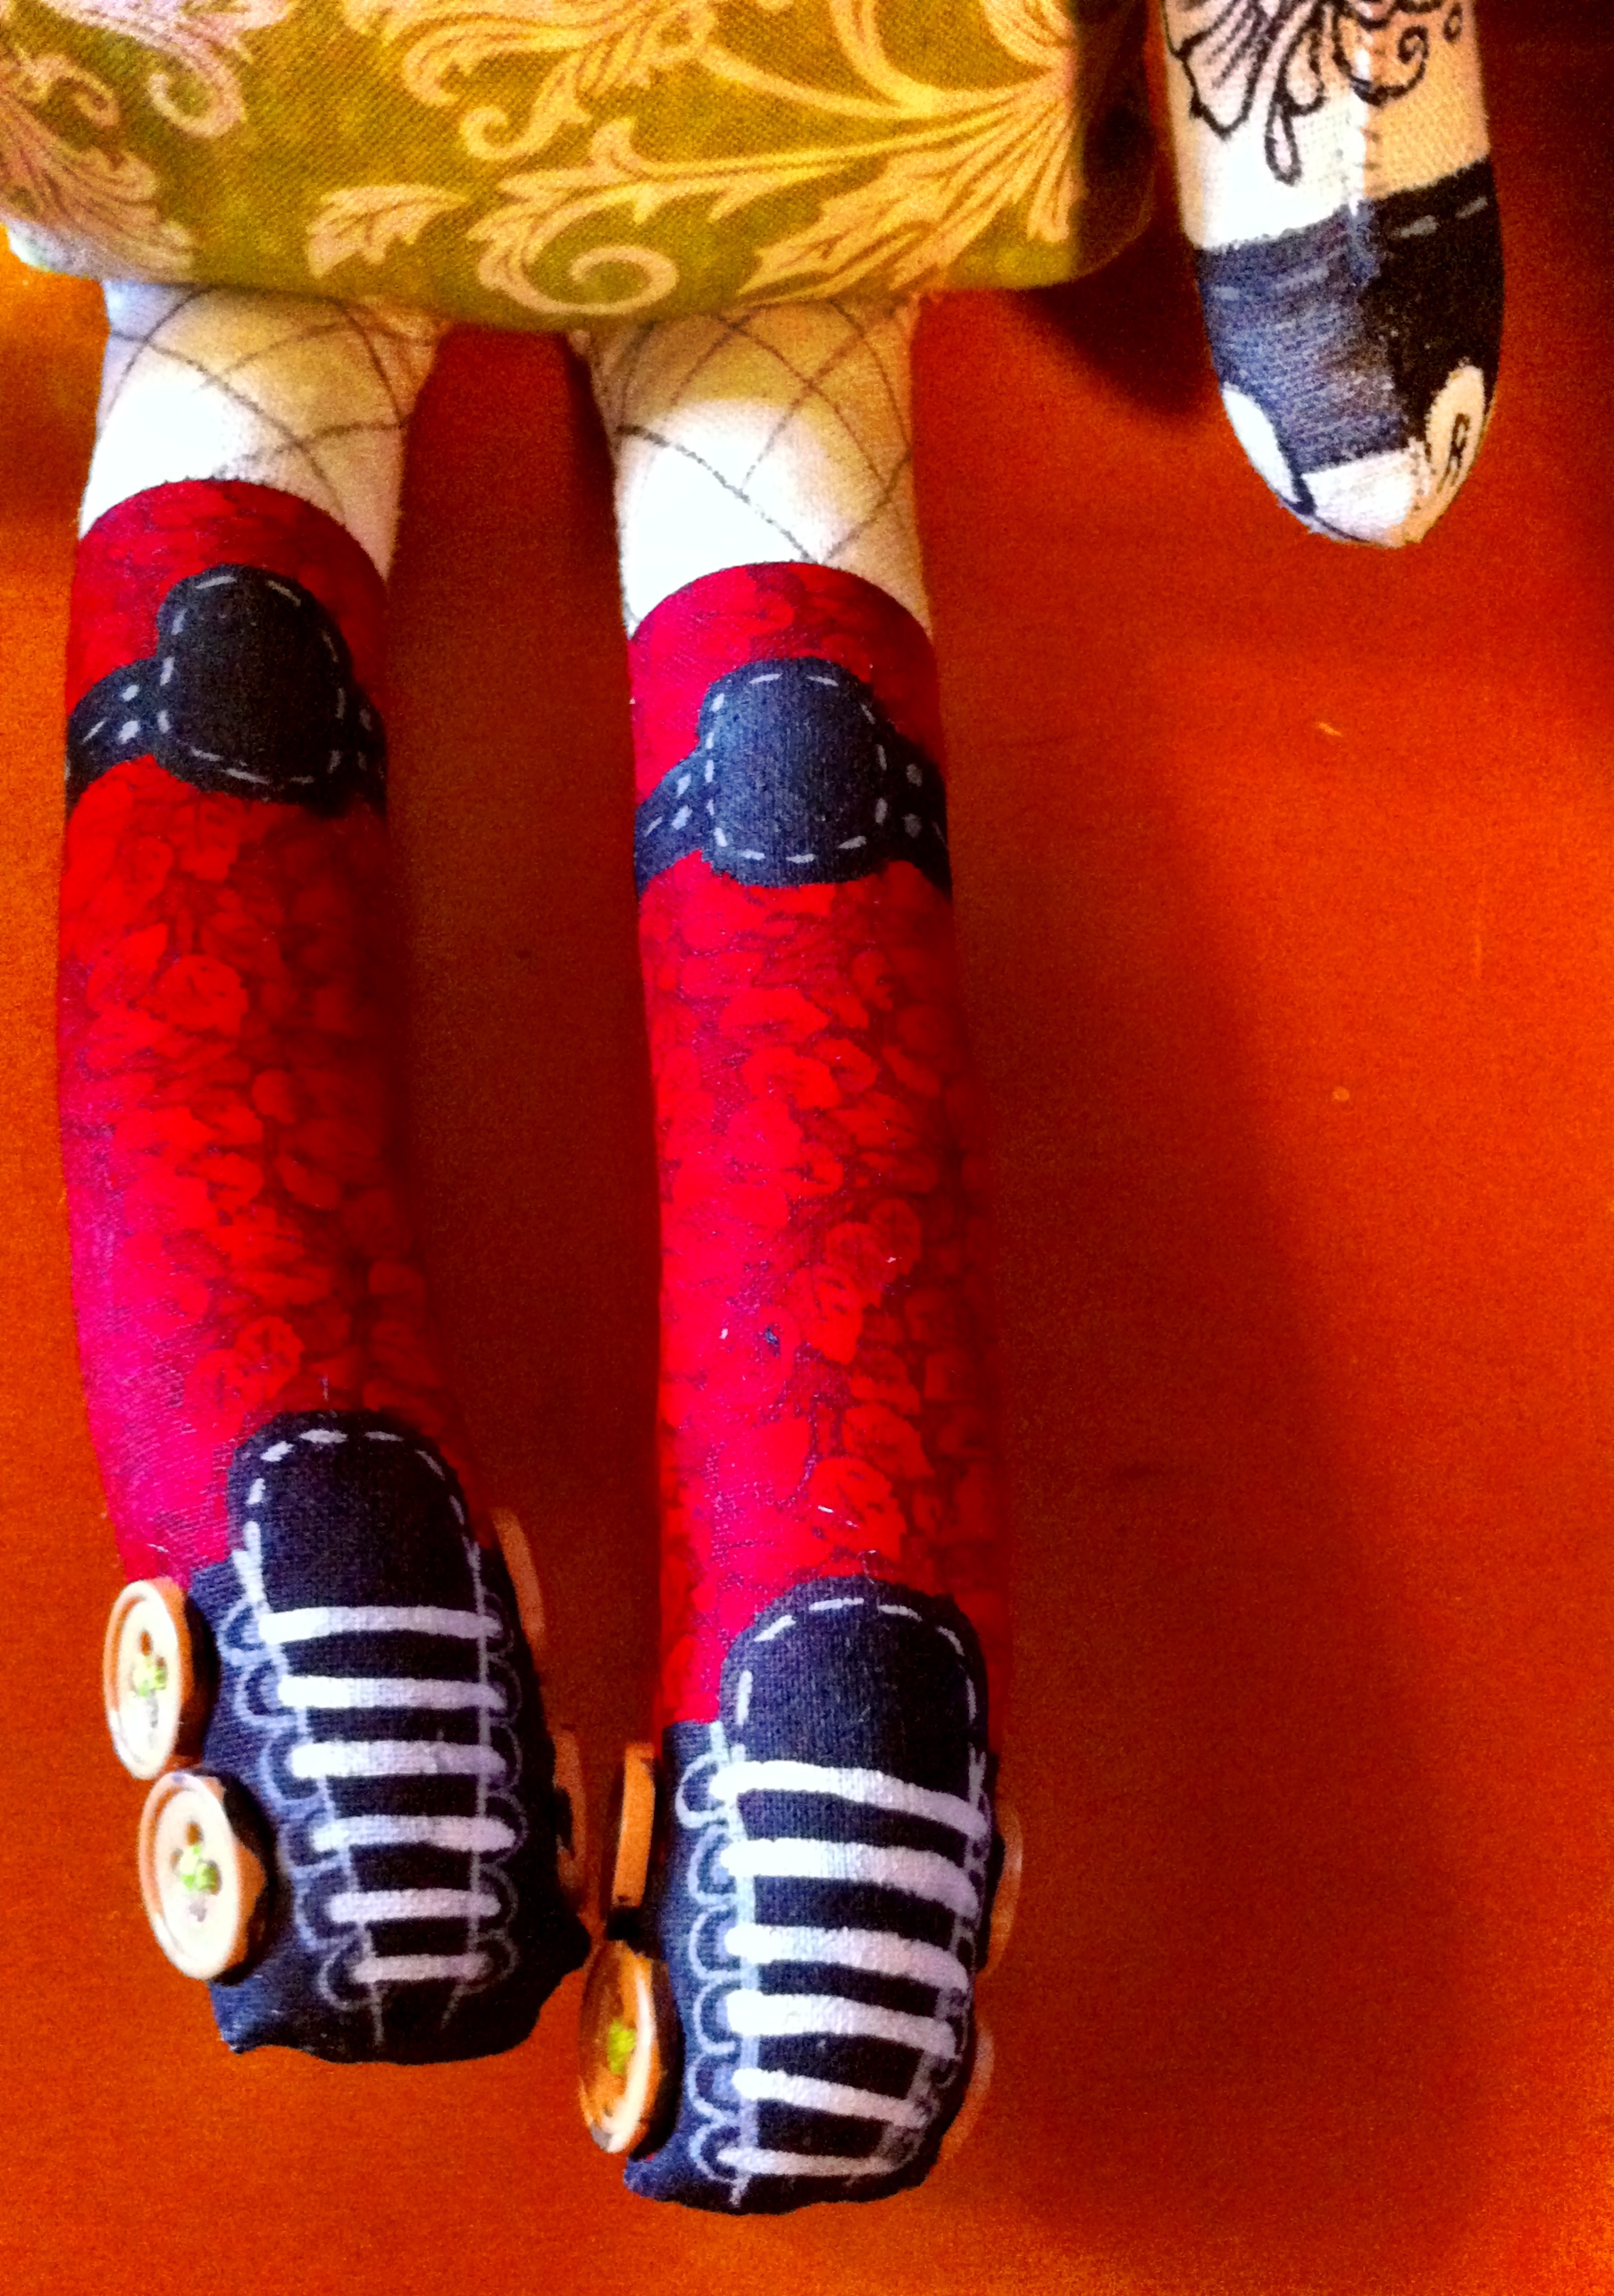
I liked it so much, I had to make one for myself! Uh…I mean, for my daughter.


If I had a long, long time to spare, I’d maybe consider doing custom orders, but they sure do take awhile, and I might have to charge a bit for them. For now, give it a try it for yourself! It doesn’t even have to be derby-related. I think it’d be COOL to have a doll that looks like your friends or family….
DIY Customized Helmets

When I was in derby, my desire to customize pretty much everything I own found a nice snuggly spot in helmets. Derby girls often decorate their helmets in all kinds of awesome stickers and artwork, so I started making custom helmets for the ladies (and dudes) on my team. My favorite (and the quickest) way to decorate helmets is with paint pens, which you can get at any craft or art store. Get lots of them, because they run out of paint quickly, and sometimes you get duds that don’t work well. Thick point is best–fine-lines pens will take FOREVER. But don’t get those ones with the mega-marker tips, or you won’t be able to get ANY detail in there.
First off, if you’re working with an older helmet, clean off any dirt or residue from the helmet. No sticker goo. Rubbing alcohol works well for this. New helmet, no problem, just wipe it down a little and get started. Glossy helmets work best. You can paint on a matte helmet, just be warned that when you spray it with sealant at the final step, it will most likely turn a little glossy, so if you’ve got your heart set on a matte-looking helmet, you can choose to leave off the final spray…it’ll just not stay on as long and probably need some touch-ups. I usually like to print references to look at while I work, and doodle it on freehand. Sometimes I’ll find a fancy font and print out what I want, and then freehand it using the printout as a reference.

I’ve done lots of helmets this way, using simple color combos, varying shades of paint pens. Sometimes when they get older, pen paint changes color a little, and you can get two shades of the same color (as in the celtic clover above). Often, the person I’m doing it for will give me a rough idea of what they have in mind, but usually they just let me go crazy with ’em. Since skate helmets are around $35, and you have to replace them now & then, it allows players to have options in the helmets they wear. Some will wear certain ones to practice and others to bouts, etc.
If you mess up while you’re painting with the paint pens, you might be able to salvage it with a paper towel soaked in rubbing alcohol. Usually, it’ll wipe away oil-based paint pens pretty easily, and allow you to correct your mistake.

I usually put the players’ name on the right side of the helmet (facing the crowd, in a bout), and the fun design on the left, facing in. Sometimes I’ll put the number on there somewhere (back or side). Some ladies prefer the numbers off….not that it has anything to do with being less visible to the refs or anything. 🙂
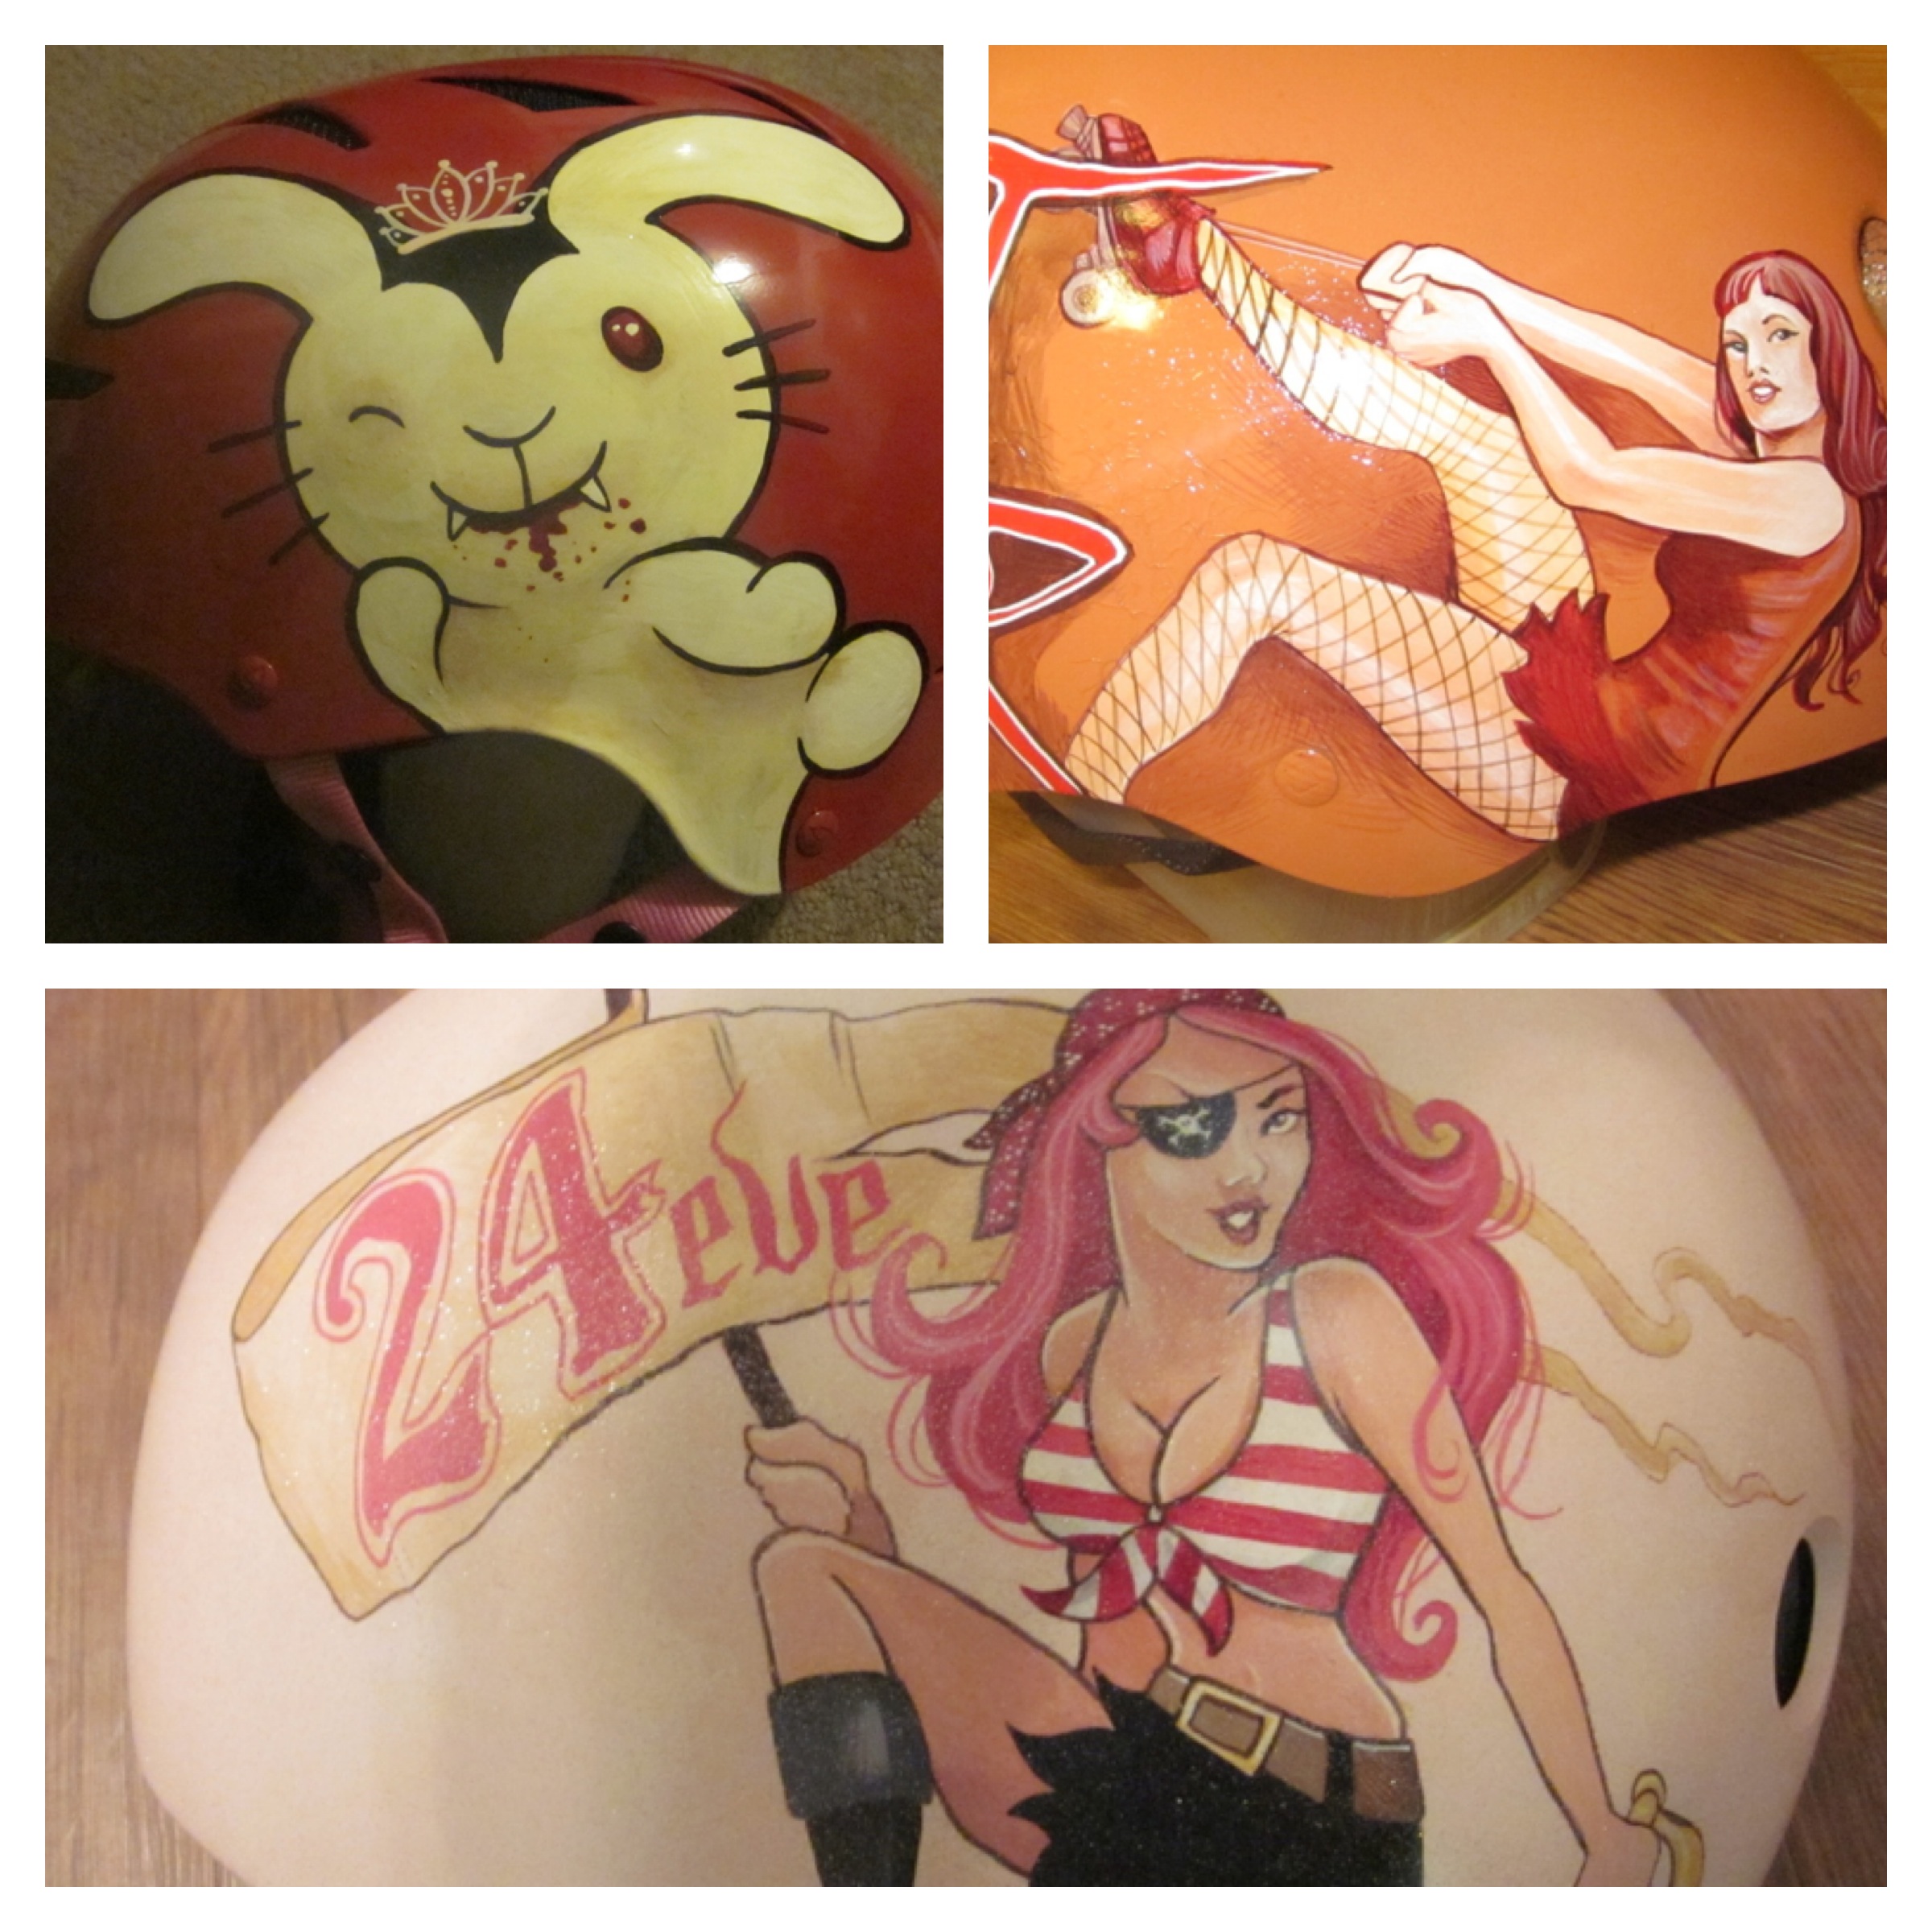
I’ve also handpainted a few helmets, although this requires MUCH more work. I use acrylic paints for them, and go to town. Handpainting allows for much more detail and artistic license, but honestly, is a little too “fine” for derby, which can really bang up a helmet.
Whether you handpaint a helmet or use paint pens, your best bet for durability is to finish it with SEVERAL coats of acrylic gloss varnish, which you can get anywhere that sells spray paint. It’s a clear gloss spray that “seals” the helmet in a coat of varnish to protect it. Be warned: I have had some problems with spray paint underpainting or acrylic handpainting warping and bubbling with some sprays, and I’ve never found a rhyme or reason why (never had a problem spraying over paint pens, though). After you’ve sprayed your helmet evenly and completely, let it dry, then spray it again….and again…and again. Hopefully, that’ll be enough to protect it through at least one bout! But hey–they look good all scratched up, too…. 🙂

