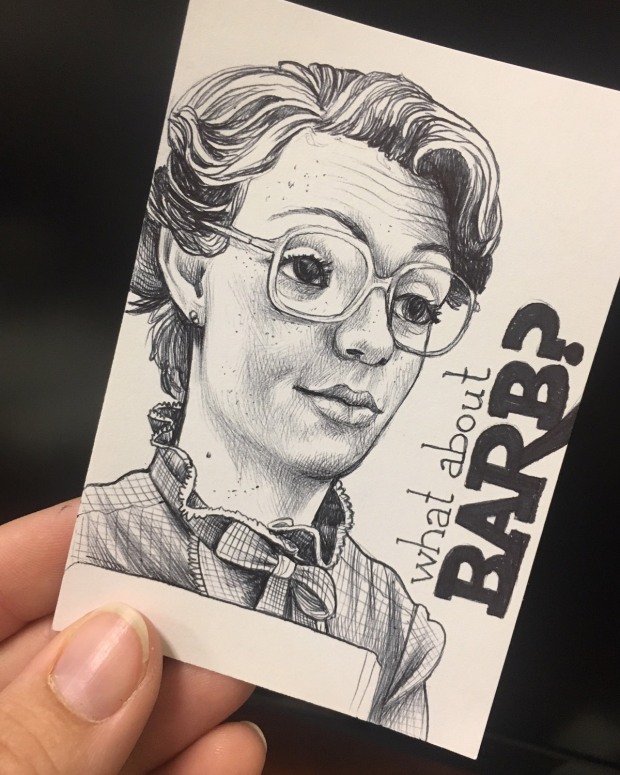
What About Barb?
Recently, while doodling a little, it struck me how often I nearly crumple and toss away my idea completely, and thought I’d walk through the process of how I draw a face. I won’t give you instructions, really, as there is plenty of that out there (and practice is the best art tool) but more walking through what the process is for me, so you can see that it’s not always a basket of lovely, sweet-smelling perfectly-drawn roses.
Sometimes I think of it as resuscitating a dying patient. Will it make it? Is it going to survive? Or will we lose it to a scribble, right there on the drawing page?
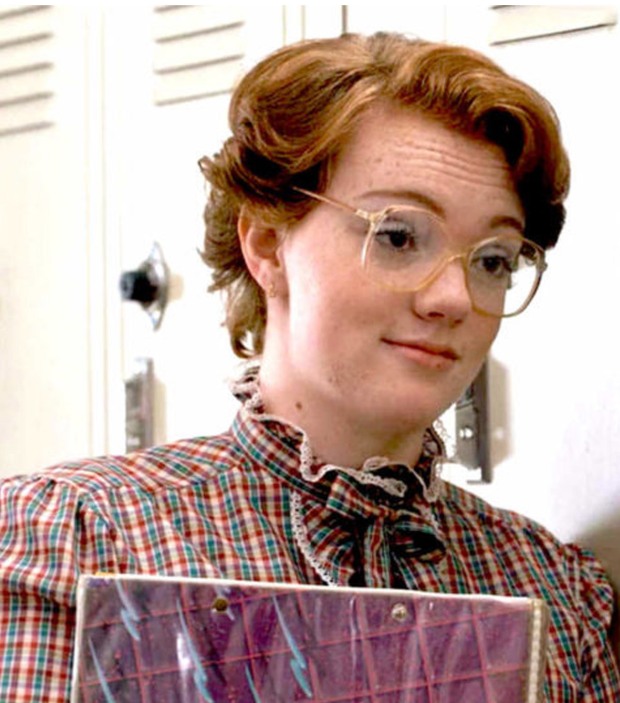
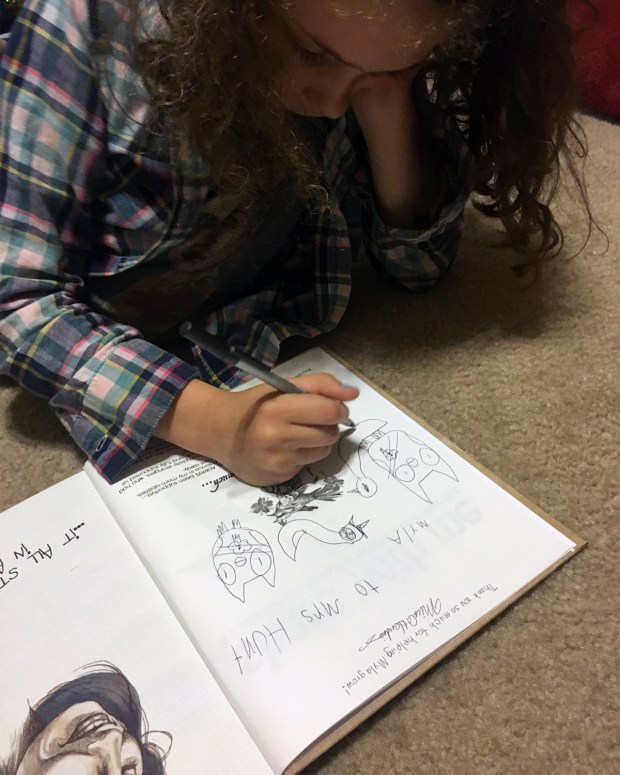
So I’ll start with a Barb. Barb is from the show Stranger Things, and I like her because I was a lot like her at one point in my life, I think (geeky and sweet…and apparently not popular enough to warrant a complete town-wide search). So I felt like drawing Barb.
People often ask if I use references, and to that, I say HECK YES. I nearly ALWAYS use references. It’s fun. It’s okay. The thing is, my goal is not photorealism. I don’t WANT it to look exactly like the photo–that’s what photos are for. So absolute realism is NOT what I strive for. I start with a photo for reference, but I make changes as I see fit, and sometimes mix several reference photos to combine.
There are many ways to calculate proportions of the face, some of which are admittedly VERY helpful. But once you know them, I find that the fun comes in just drawing it as it comes.
I start with an eye. Since she has glasses on in this one, I like fit to the eye in that space the way I see it, the way it measures up to that space, and sort of gauge where the other eye is from there. The edge of the nose usually lines up with the inner corner of the eye, so somewhere around there is where it goes. And the corner of the mouth usually falls where the middle of the eye is.
Those are helpful guidelines, but as I say, I play off them, I don’t use them as law. Knowing the rules and then playing with them, I think, is what gives something your own personality, your own style.
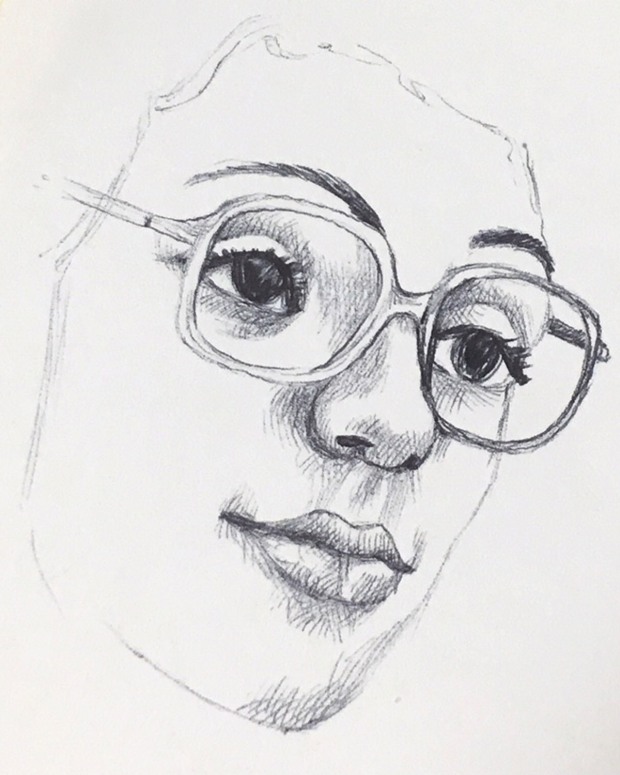
Often, just a few little tweaks make a big difference. For example, the chin in the first picture below juts out more than I’d like, so some shading below it (as in the reference) helps it blend in more in the second photo below.
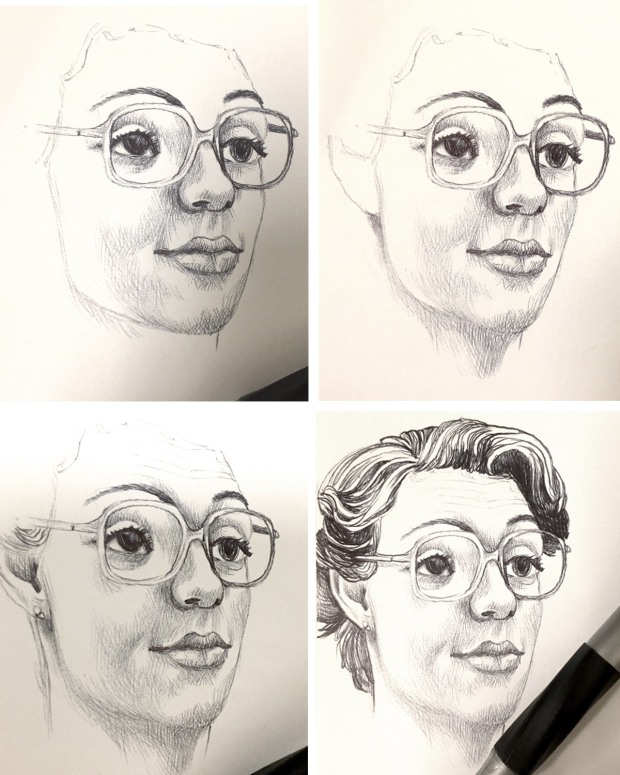
Even still, I find my proportions are always quite wonky–with the eyes I draw, one is almost always unintentionally larger than the other….but to me, that’s okay. Like I say, it gives it personality. See the eyes there in the bottom right drawing? A little shading in there helps straighten them up a bit…
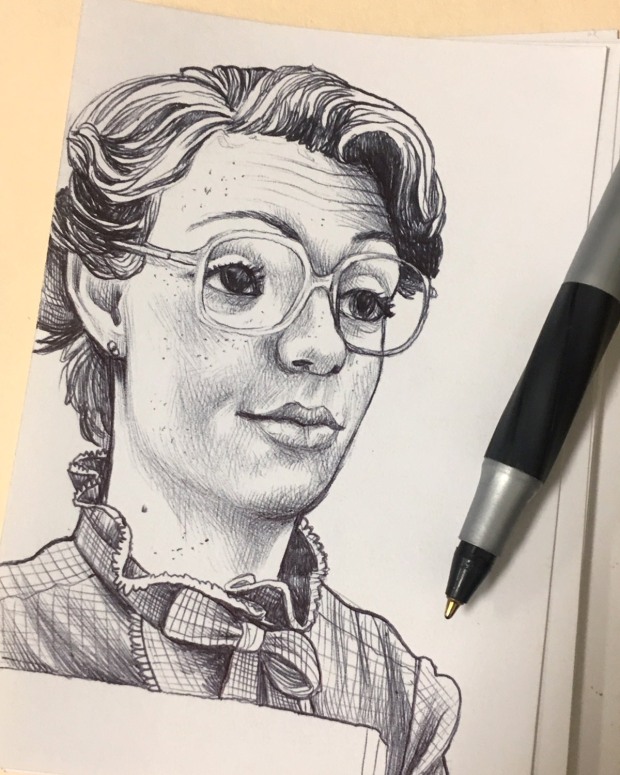
The question is when is distortion TOO much? There are times, to be sure, that it just doesn’t work, and I toss it and throw it away. But to me, that’s the fun of the process. It’s fun to see if you can piece a face together little by little, piece by piece. There’s something relaxing to me in not creating something photorealistic. So by all means, study the face, study facial musculature, and study drawing proportions of the face and body. And then take that, and play with it. And have FUN with it!
I also get asked a lot about the supplies I use, and that’s what I love so much about ballpoint pen: it’s NOT fancy. It’s easy and fun. I can paint in watercolors on top of it, and I can paint in acrylics on top of it. Does it bleed? Not really–but admittedly, the paper has a lot to do with it. Multimedia or watercolor paper is the best and can hold up to a lot of water and paint and blending without bleeding. Regular drawing paper is toothy and porous, and not really meant for liquid mediums, so the pen might bleed on that surface. You don’t need a lot of expensive supplies to create good art, but so much lovely things happen when you use good paper!
Anyway, the best advice I can give, is practice. If you want to get better, you’ll do it. You’ll try new things, and you’ll find your own techniques. You’ll do it all the time, and it won’t even FEEL like practice. It’ll be FUN. And the more you do it, the more you’ll learn what works for you, and the better you’ll get.
Easy Dolls
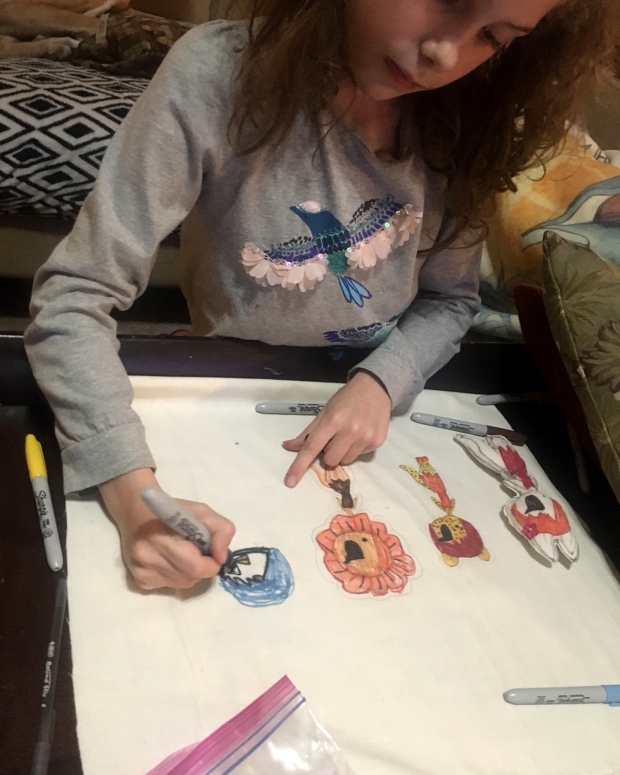
I’ve had my daughter come up with doll ideas in the past that have been fairly complicated, and required a great deal of my attention. But a few days ago, in an attempt to keep her occupied in something creative (rather than vegging out on her Ipad), I suggested she DRAW her own simple pillow-dolls.
“I can DO that?!?” She questioned. Of course! And the best part is, it takes minimal mom-effort. 🙂
I started with a bolt of inexpensive off-white muslin fabric I had. I have no recollection of how I obtained this fabric (I think my mom once sent it to me), but it’s been around a long, long, time, and I use it for EVERYTHING.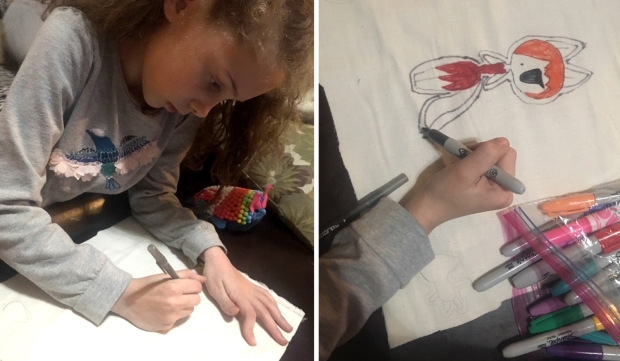
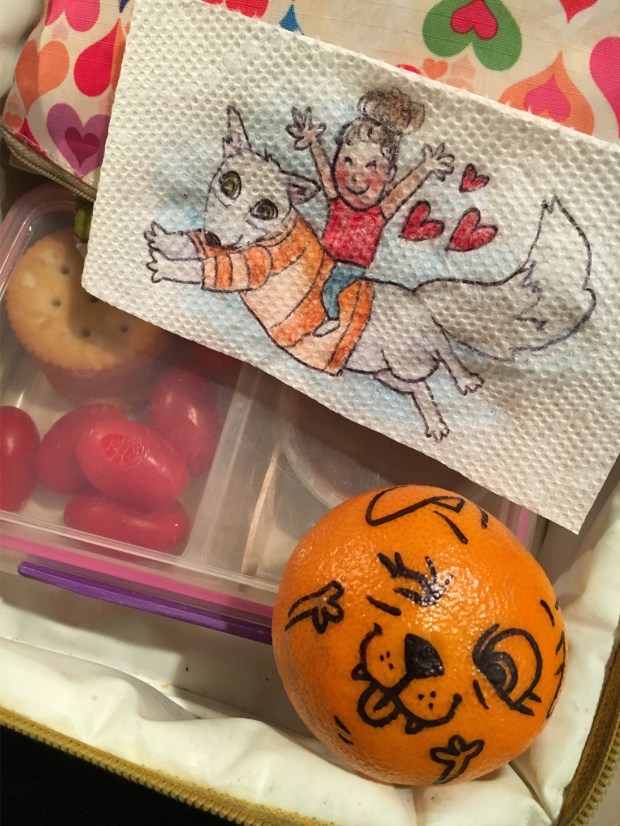
I grabbed our bag of permanent markers, and told her she could draw away, keeping in mind that it had to have a seam around it, preferably simpler than the drawing, to make sewing easier and more sturdy.
Once she did that, I took her to the sewing machine, where I had her help guide the fabric (she’s still learning to use it herself), and with the fabric doubled over, we just stitched all around the outline, leaving a gap on the leg to stuff it.
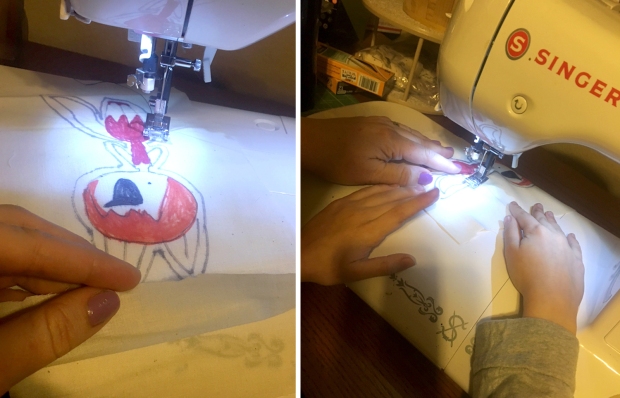
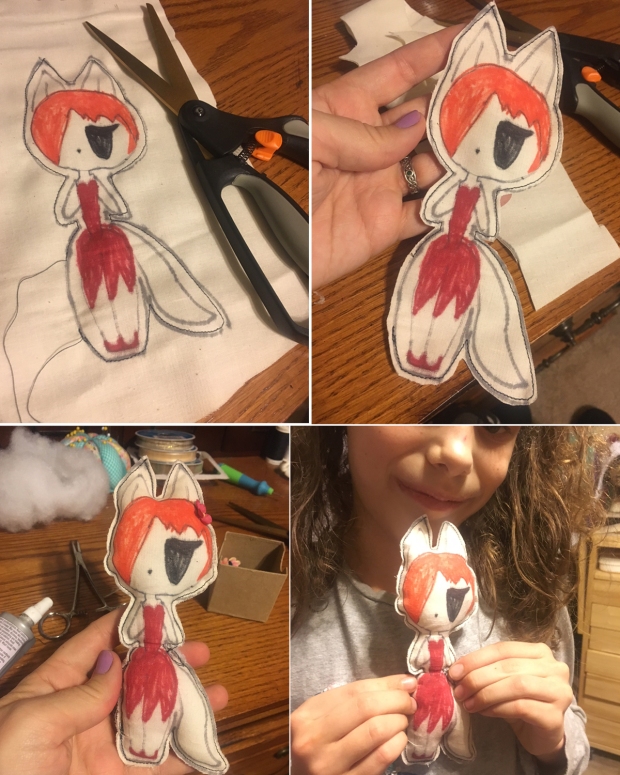
I figured this would be much easier than dealing with flipping a doll inside out, as you do with more detailed works, and this was VERY exciting to her. We cut out the doll around the stitching (see the gap in her leg? That’s where we stuff), stuffed her, and then completed the stitching with the machine.
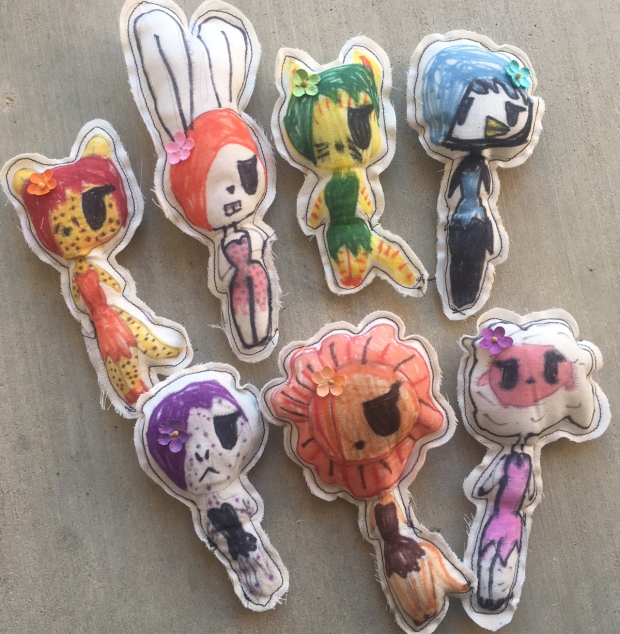
She was SO excited! You’d think we’d never made dolls before. “Why didn’t you ever TELL me we could do this??” she asked excitedly. I reminded her that I had tried to get her to do this MANY TIMES over the years, but she always had WAY more complicated things in mind. Anyway, apparently times had changed, and she was enthralled, immediately sitting down to draw more.
And they were lovely! She said she wanted to call them “SweetKitties,” and asked if she could put them up for sale in my Etsy shop for $5 each. I had intended to offer them here, but surprisingly, they sold out within an hour of posting them!
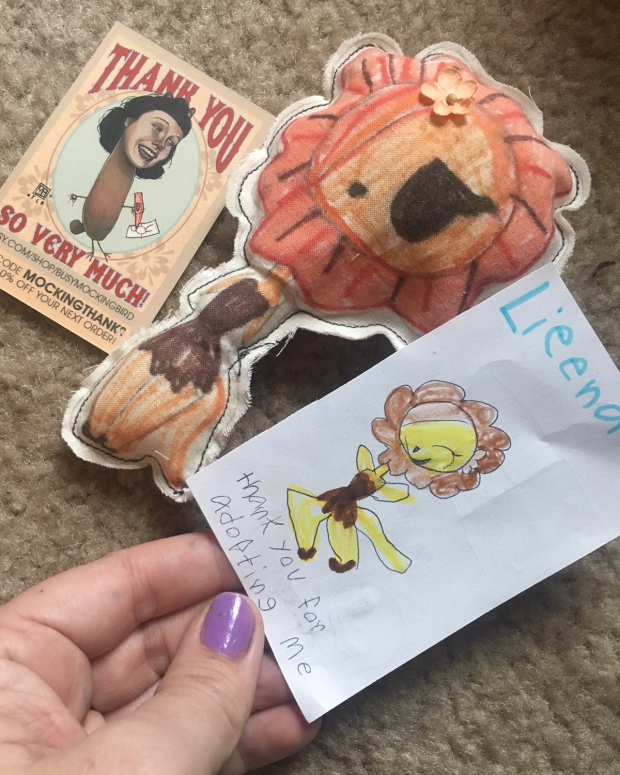
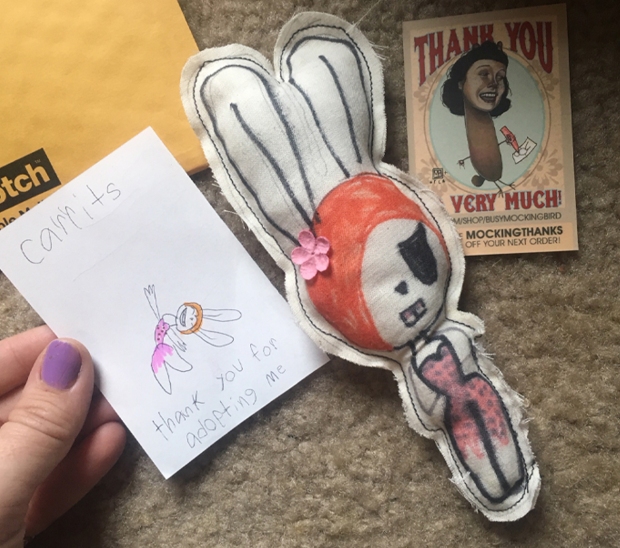
I am so grateful to have so many sweet and generous people that read our blog pages and social media supporting our art, and I’m grateful for each and every one of you reading these words right now. Her excitement that someone actually bought her SweetKitty dolls was thrilling. She helped me package them up, even making little “adoption cards” for each of them (like I do with my Dream Creepers).
Someone suggested she should put catnip in them so their cats could carry them around, but she worried that a cat would tear them up. She says she’ll make more (because people so kindly asked if she would), but as kids don’t always have the attention span for dedicated business, we’ll see how it goes!
In any case, it was heartwarming to see so many people be so encouraging and supportive towards and 8-year old kid. I had initially made this post to share the simplicity of making fun & easy dolls with kids, but it really truly was endearing.
In any case, if you don’t sew, you could always do what our stuffed animal-loving kid did before this most recent project: make the front and backs out of regular ol’ paper, stuff them with wadded up scrap paper (or toilet paper) and tape all around the edges. BOOM–instant doll!
So make something fun, and easy, and get those kids CREATING!
Plastic Pumpkins
A million years ago, when Myla was four years old, we bought a plastic pumpkin (because the husband was deployed, and I didn’t have the energy to scoop the guts out of a real one). I got out the permanent markers like a good mom (ahem), and let my daughter go to town on it.
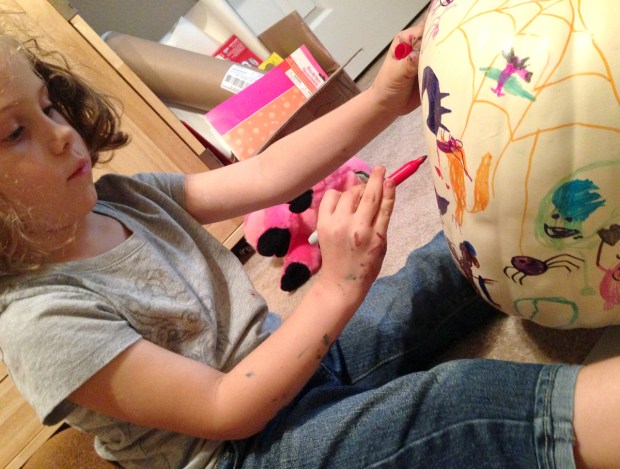
I drew a face on it to get her started, thinking she could add things to it. Instead of adding features to the face itself, she drew characters (mostly Batman–her favorite at the time). Which was still pretty cool.
This year (because I just don’t like the mess of a real pumpkin), we were looking at Halloween decorations, and instead of buying a new one, I went back to this old pumpkin, made sure I had a bunch of photos of it, and then painted right over it with acrylic paint.
And once again, we sat down outside with our markers in the warm autumn…sunshine (this is Texas, y’all), and filled it with all sorts of Halloween goodness. I thought this time, we’d draw characters that I could paint with more detail later (which Myla thinks is sort of like magic).
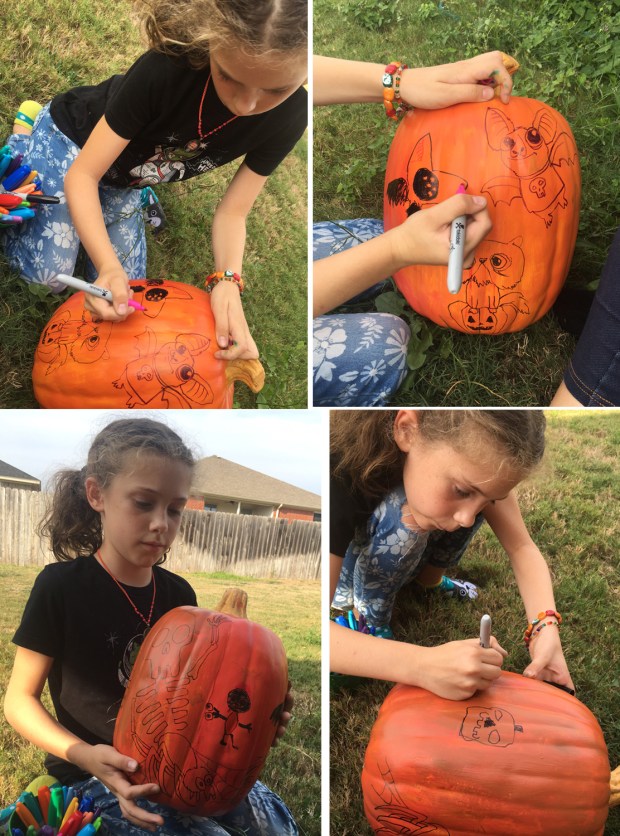
Once it was done, I used my acrylic paints to give it some quick paint detail. It’s a pumpkin, so I didn’t go TOO crazy with detail, but I had fun making the little doodles we drew come to life. (MWHAHAHAH! IT’S ALIIIIVE!!!)

It occurred to me that there was a pretty empty area to fill, and instead of drawing something new, I filled it with a quick lighting bolt, which is SUPER easy, and I’ll tell you how to do it, “step to step” (as Myla used to say).
Step 1: Draw a big ol’ wiggly line that takes up the area you want to fill. Step 2: Add another big ol’ wiggly line if the area is a wonky shape. (It doesn’t matter too much what it looks like–it’ll look fine when it’s done.)
 Step 3: Draw wiggly lines coming OFF of your wiggly lines in random places, to fill out the wonky space. End the line in a sort of “branch” Y or V shape (depending on how you see it). Step 4: Keep adding little wiggly lines off of your wiggly lines. It doesn’t look great close up, but from a distance, people will get the idea. and BOOM! You’ve got lightning!
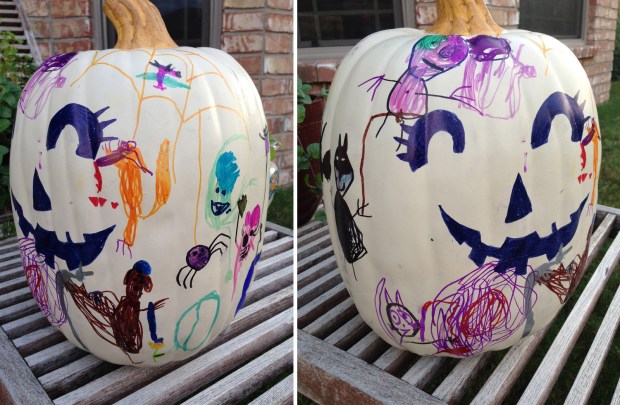
And it filled out the blank spaces in our pumpkin pretty well. Other space-fillers included spirals, rays coming off of the character, and spiderwebs….
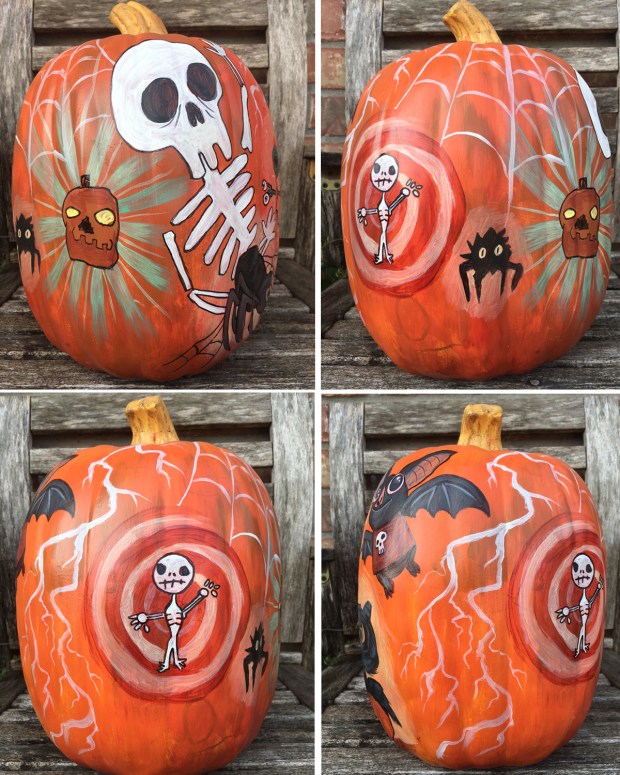
(Myla later asked me why her skeleton was on a target…I was actually going for a sort of Twilight Zone-ish sort of spiral, but I guess a target is sort of spooky too, right? RIGHT?)
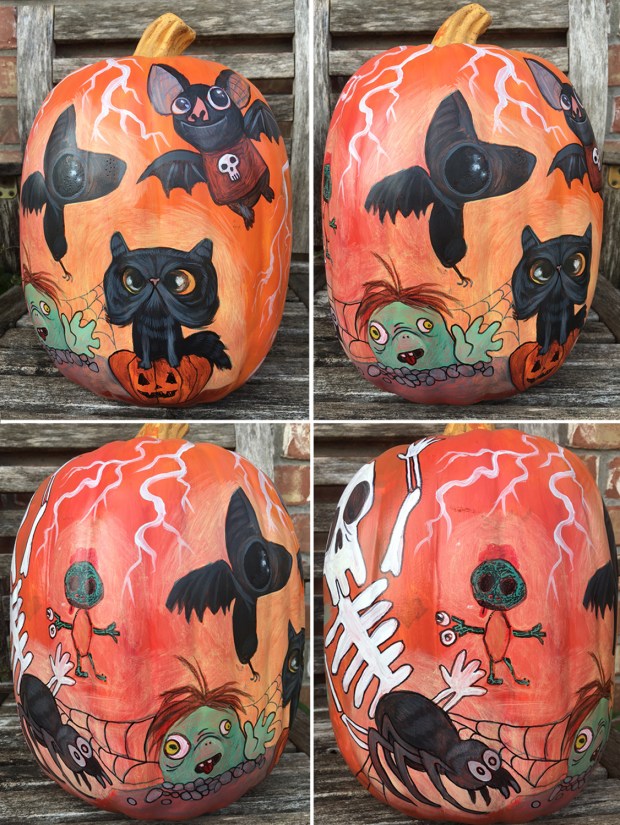
And there it is! You’ll notice my drawings are pretty indistinguishable from my 8-year old’s, despite my being a grownup, not to mention a fairly experienced illustrator. This is because Myla draws fast, and I have to draw fast to keep up with her. Which is why my “zombie” looks sort of like a green potato waving hello. That’s how I roll sometimes.
But the important thing is, we made a memory! We spent time doing something fun together without some grandiose end plan. Sure, we didn’t get pumpkin goo all over our hands, and we didn’t have to watch it decompose and liquify into slime this whole upcoming month, but we had fun drawing on our plastic pumpkin together, and we have a pretty cool keepsake for awhile now. And that’s totally okay, too.

By the way, if you’re into it, the kid and I will be participating in our own version of Inktober: drawing a spooky thing every day for the whole month of October. You can join us, and post your own thing on your own pages, too. No one wins any awards or anything, it’s just for fun to see if we can do it. We tried last year as well, but failed. We only really succeeded a couple years back–and you can see all our 2015 Inktober drawings HERE.
But this year, we’re READY! We can DO it! We’re probably going to do some other activities as well, because we love Halloween. So keep an eye out for our projects on Facebook and Instagram!
Happy upcoming October, everyone!
Don’t Lose Your Magic
The other day, Myla and I had a great idea to give our old Gnome House a reboot. We made it when she was around age four, and it’s gotten pretty old and dusty. We went to the craft store, picked up a few things, and got everything ready.
Overflowing with ideas, Myla excitedly said, “oh, we could put a little blanket in there, and some flowers, and remember how the gnomes came and made little footprints and even left us a little note?”

And then her face froze. “Or….” she said very carefully, with starling clarity. “…Or…did YOU leave the note?”
I was a little startled. I make a point not to EVER lie to my daughter about important things, and while I love magic, I’ve always hated to “lie” about those traditional things like Santa and the Tooth Fairy. But somehow, as a parent, you get sort of peer-pressured into doing all that, right? I’ve always made a point to tell her “it’s real if you BELIEVE it’s real.” But deep down, I always assumed she knew it was all pretend. I used to even ask her “do you want to know the truth, or the story?” …and she ALWAYS very seriously chose the story.
She said, “I wasn’t sure if it was real. But there was a NOTE, so….that was you?” Urg. My heart sank.
If you’re a long-time reader of this blog, you might remember the Gnome House story, and how we talked about how magical things were real if you believed they were real.
I had always told her that Santa was more an IDEA, and that you can make your own Christmas by doing nice things for others. And then, what did we do? We left cookies and milk for Santa.
When she started losing teeth, SHE came to me, excited that the tooth fairy would leave her a coin. So what could I do? I left a coin, and a little receipt that said “thank you! -Tooth Fairy.”
A couple of years ago, her classroom had an Elf on the Shelf, and I was SO grateful, thinking I had escaped THAT dreaded curse. Until we walked into a store, and there they were: HUNDREDS of elves for sale, waiting to sit on shelves. She GASPED saying, “we can adopt our OWN?!?!?” So what could I do? I had to start putting that dang elf into goofier and goofier situations for her to discover every day of December.

So, as we dusted off the old gnome house and decorated it, we talked a lot about magic. I told her that I had offered her the truth SEVERAL times, and she didn’t want it. Of course she preferred the fairy tale, who wouldn’t?
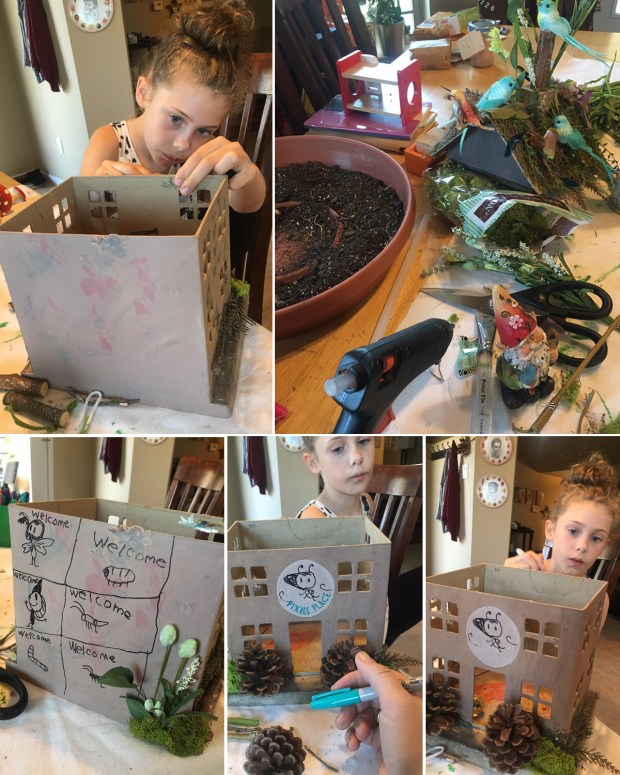
We painted over the old art, and filled it with new, and I talked to her, like a grownup. Like I always do.
First, I asked if she was sad. She said no, not at all–that she was just a little confused. She was just trying to piece it all together.

I said, I really don’t like to not tell you to the truth. And I don’t want you to think I am lying to you. But there are magic secrets as a parent that you sort of go along with it. Because kids are born with special magic, and parents REALLLY don’t want kids to lose that. Because as you get older, and more cranky about things, you start thinking everything’s terrible and nothing is fun. When you become a teenager, you sort of lose that magic for a moment, and don’t believe in it anymore, and everything seems like it sucks.
Magic is hard to see. Bad things are MUCH easier to see. But here’s a secret: If you look around and you can’t find any magic, you can CREATE your own! And that’s why parents do things like that. So kids don’t lose their magic. Life would be boring without any magic…

We talked about other things, too. It wasn’t ALL serious. There were lots of giggles and goofiness. It wasn’t an after-school special TV drama or anything.
I told her that as artists, we’re very lucky, because we have EXTRA magic. We get to paint it, sculpt it, animate it, and show it to other people who might not be able to see it themselves. We get to help keep that magic alive in people.
She seemed to happily accept all of this, but I felt my heart break inside a little. I don’t remember when I first navigated this stuff myself, but my parents handled it well, because I don’t seem to have any lifelong trauma from it all. But I still can’t help but imagine that I heard her heart break a little.
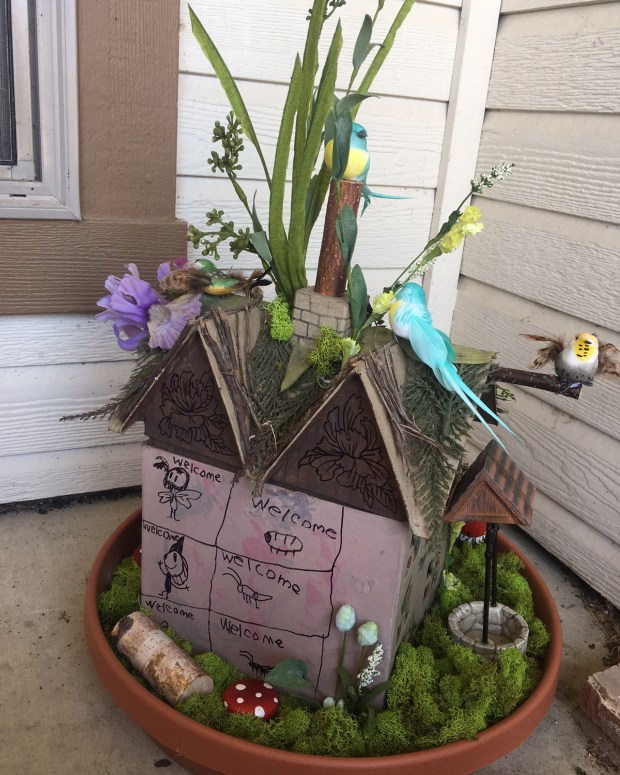
We finished our gnome house, which she called “Pixies Place,” where all things are welcome. She only wrote a few of them on the list, but you get the idea.
The next day (after talking to both my husband and then my mother as to what to do), I took her out for ice cream, and we talked more about it. I said, “here’s the thing: now that you’re old enough, YOU get to be a magic maker for other people. I kept the magic around for you as long as I could when you were younger. Now that you’re older, you keep the magic for other kids.” “And sometimes, even for grownups who have lost their magic!” she said. And that’s exactly right.
My mom had a great idea, of maybe a “symbol” of graduation, or initiation into this sort of “big kid club,” so I gave her a little necklace I used to wear as a teen…a little fairy with a glass bead ball. It looked like magic to me, and seemed to fit the situation perfectly.
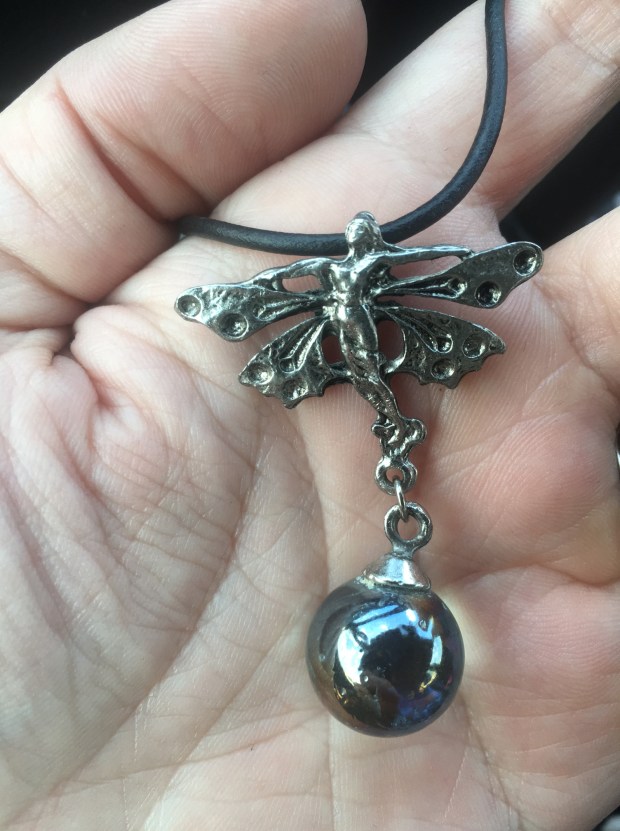
She said if you looked closely, you can imagine all sorts of colors in it–for all of the holidays, and all of the magic. She seemed pretty happy and proud. I was glad.

And I hope that’s enough. I want her to have that special magic, but she does need to know that sometimes YOU are the one that makes the magic, and that’s okay!
You really do have to LOOK for that magic as you grow up, because it gets harder and harder to find the older you get. And if you get to the point where you just can’t find it, you have to MAKE some magic yourself. It’s the best we can do.
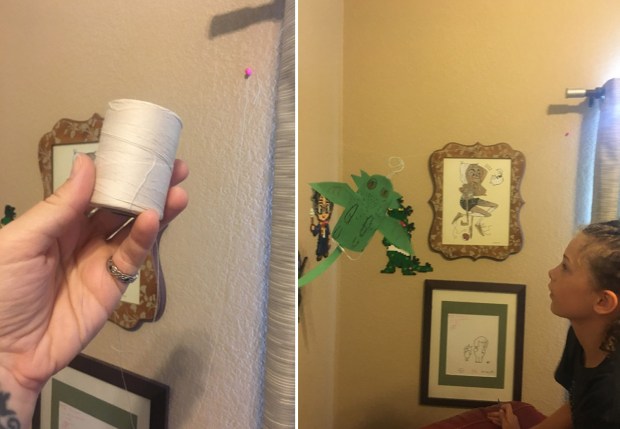
Easy Fliers
When we first moved into our Texas house, I asked Myla (who was 3 years old at the time) what she wanted her new room to look like. All she said was “green and pink dinosaurs.” So that’s what we did. And although her room has changed a little over the years (mostly, getting filled to capacity with stuffed animals and art projects), the little hanging pteranadon I made from cardboard still hangs in the corner by her bed.
On weekends, we do a lot of art projects, so recently, Myla and I decided to make our own hanging fliers. I had a sheet of foam core (but cardboard works too), tape, markers, and an xacto blade. And aside from a bit of string, that’s pretty much all you need.
We started by drawing our creatures onto the foam core with pen. The wings took a little help, as I was planning on having them slide through a slot in its upper back. If you’re not up for that, you can just do half a wing, flip it over, and trace the other side, and just tape it to the body. But not a lot of precision is required, really.
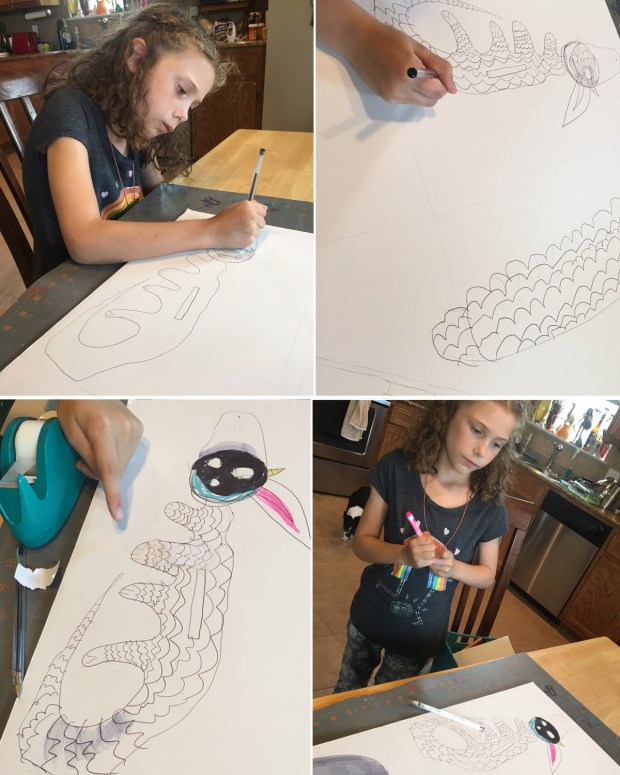 I took on the Xacto cutting myself, as I really didn’t feel like taking Myla to the E.R. for slicing her little kid-fingers off (keeping in mind that I might risk doing the same to my adult-fingers–I am quite clumsy). Once the creature was cut out, I gave it to her to draw on the other side, so her creature would be visible from all angles.

While she decorated the back side of her dragon, I hurriedly cut out the mockingbird I’d drawn, and hastily colored the flip side of mine (because she is a kid and works three times as fast as I do).

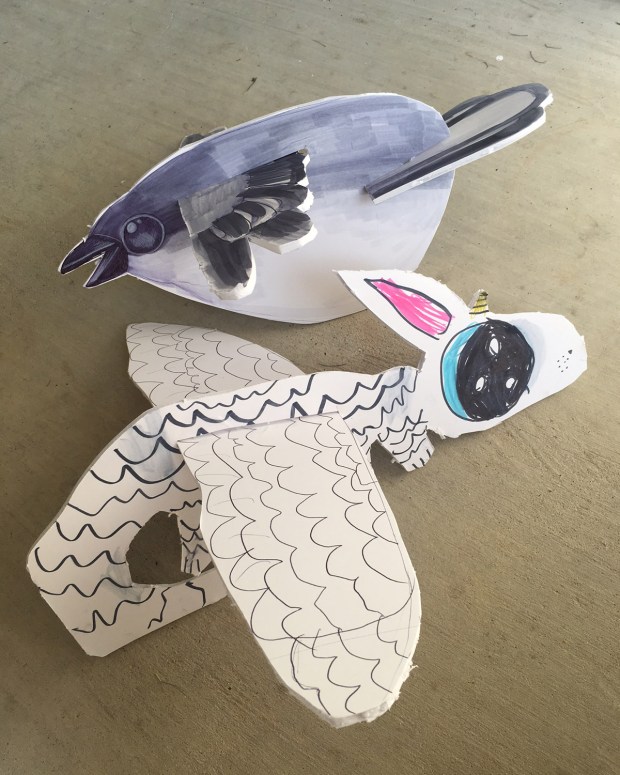
Next, we put their wings through the slots, and taped them down. BOOM–our own creature fliers!


Here’s my finished chubby mockingbird, which I can then tape a piece of string to and hang from wherever I like.

And here it is with Myla’s dragon…
You can also make little fliers on a much smaller scale…While digging through old blog photos, I found this little project from ages ago, where we had made tiny palm-sized fliers one weekend, just using cardstock, scissors, and tape.

So there you go! If you’re looking for a quick & easy project to do with the kid (or to do for your own room), they’re fun and don’t require a big supply list. You could even use old box cardboard from the recycling bin (which is what I did with the pteranadon).

So play around and see what you come up with! And if you do, please show me on our Facebook page!
Dracarys…
Recently, I was contacted by Education.com, asking if we’d be interested in trying out one of their many learning projects… They sent us one called “homemade airplane,” which is an airplane made from a hanger, that can “fly” on a zipline….and it looked like a pretty fun project with a fairly small supply list, so I decided to give it a try.

…Of course, we always have to add our little spin. So when I introduced the idea to Myla, she instantly wanted to make it into a dragon instead. WHOOPS okay, that’s fine, we can work with that. So here’s basically how we did the project:
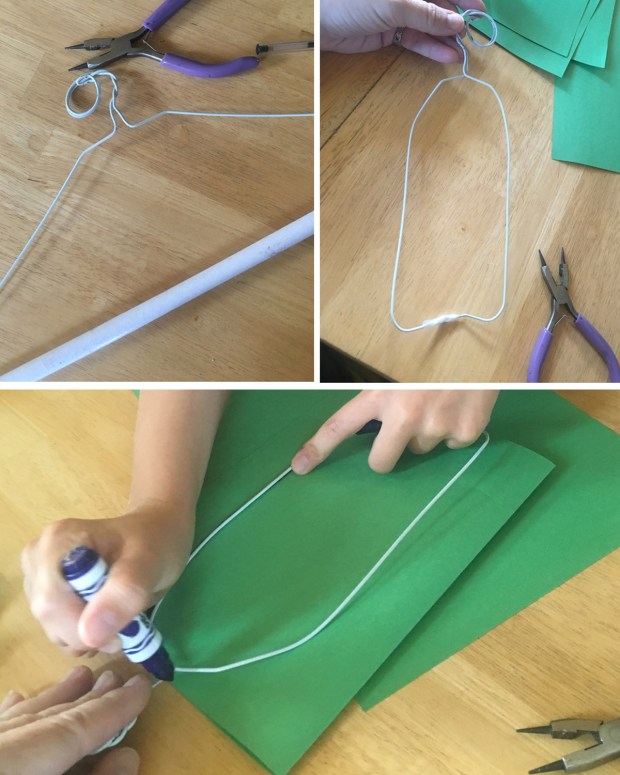
1. Find a wire hanger. This proved to be quite a difficult task, as we apparently threw out all of our wire hangers in a fit of rage one day, but I found ONE hiding in the back of my closet, behind some party dresses I’ve never worn.
2. Bend the wire handle into a loop, and be sure it’s closed, as this will be what it slides down on the zipline.
(This is where I noticed that the bottom of my hanger was only connected by a wonky weak little cardboard tube which broke not long after I touched it, so I bent it into a different shape altogether, and Myla taped it together because scotch tape solves all of her problems.)
3. Trace it onto paper & cut out two. Whatever your shape is, trace it onto a folded sheet of paper so you have a front and a back.
4. Decorate it. While I hot-glued the bent-up hanger onto the back side of the paper, Myla decorated the front.

So now he looked like this:

…which she said looked ridiculously duck-like, and decided she needed to give him some head-fins.
5. Hot glue that junk. Glue it all to the hanger. Myla added the head-fins, wings, and a tail to hers.

And BOOM this is the final dragon. Pretty cool! And aside from the gluing, she pretty much did it herself.

So here’s where it springs to life.
6. Get some fishing line…or other such thin thread. The instructions said “fishing line,” but despite my massive craft resources, I couldn’t seem to find any, and decided to give this very thin thread a try. Pin it between two walls with pushpins, and BOOM you have a flying dragon, ready to decimate battlefields and lay waste to various enemies.
…Or, just fly around a corner of your room looking cool.
So there it is! Education.com has lots of other fun learning activities on their site, and I think a free sign-up gets you lots more access.
So have fun storming the castle!
(Side note: “Dracarys” is the command that the Mother of Dragons–Daenerys Targaryen, from Game of Thrones–gives her dragon Drogon, that compels him respond by shooting flames from his mouth, destroying her enemies. So, that’s nice.)
My Painted Vans
This past Mother’s Day, I had heard from another artist that you could customize Vans shoes with your own artwork…so I decided to treat myself to a pair of customized Vans with our art on them, and I was so excited! …Until I got a message saying my order was cancelled, because of artwork issues–apparently, if the art is anywhere else on the internet, they assume you may have stolen the image–and I couldn’t get it to upload again.
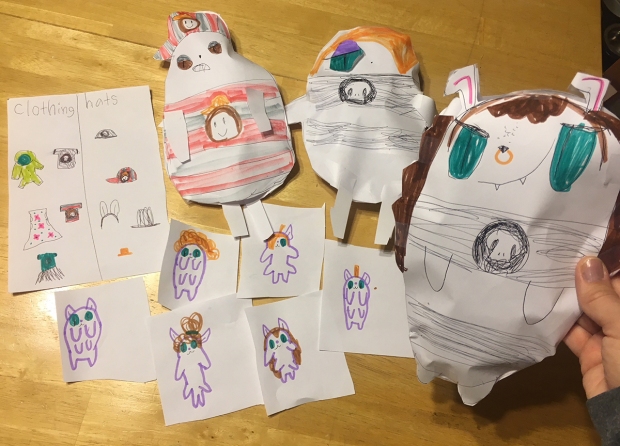
The artwork I had chosen was a painting Myla and I did about letting your weirdo flag fly, which is up in my etsy shop… To me, it represented something we always try to teach her: to be yourself, and be proud of all the weird things that make you special.
 It was based on this picture I had taken of her, by the way, when she had built herself a paper astronaut helmet, spaceship, and bat sidekick. Because I’m constantly amazed at her creativity and uniqueness, and I want her to always be proud of it.
 In any case, when the Vans order came back cancelled and I couldn’t get it to upload despite my best efforts, I was SUPER disappointed.
…Until my husband suggested I just get a pair of blank Vans and paint them myself. So that’s just what I did.
As often happens when I am furiously gripped by a project I am obsessively compelled to do, I did absolutely no research ahead of time, and started by doing what I THOUGHT was a good idea: smoothing out my painting surface with clear matte gel medium. Maybe if I had taken a little time to research, I’d have left that step out (as I’ll explain later), and just painted directly onto the blank canvas shoes.

But I didn’t, and painted onto the surface I had treated with the clear gesso. I had to alter the composition of our artwork a bit to get everything to fit on there the way I wanted, but I considered that a good thing–that I could change it up to perfectly fit the shoe space.


One of the upsides to painting the shoes myself (as opposed to using the customizer on the Vans page) is that not only could I alter the composition to make everything fit, but I could also put a different image on each shoe (the Vans page only puts the same image on both shoes).
So here’s what my final pair looked like:

Yay! They really make me smile.

Now, remember when I said I’d probably leave out the clear gesso? Here’s why:

See all those cracks? I’m not sure, but I think if I’d left that step off and painted directly onto the shoe canvas, it might have clung to the fibers more tightly, and not have cracked so easily. Who knows? In any case, it’s not so bad–it’s not TOO terribly noticeable, and I can touch it up if it starts looking too bad.
So that was my mother’s day splurge! That–along with spending the day with my husband and little munchkin doing fun things–made for a pretty darn awesome Mother’s Day!

C’mon, Grab Your Friends…
This year, Myla decided she wanted her birthday party to be Adventure Time-themed…and I was TOTALLY down with that. Because I’m a pretty big fan of Adventure time. And all of the characters. And songs. And everything.
I always look forward to the cake, because even though I stink at cooking a meal, I can bake the heck out of a cake. And when I decorate, I pretend like I’m on Ace of Cakes or something, and do my best to make it special.
I started by sculpting these Marceline and Marshall Lee figures from Sculpey, and building a little cardboard ax guitar and bass for them, since Myla requested they be the centerpiece.

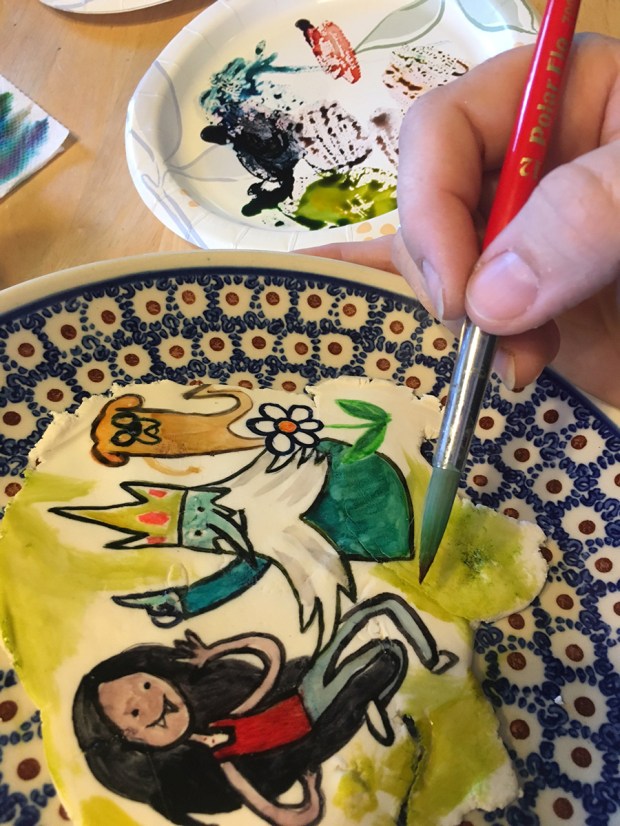
And although I know kids aren’t a huge fan on fondant, I had read that you could paint on it with food coloring, so I gave it a try…
I started by rolling out a little plate full to practice on, and gave Myla a plate full to let her try it, too. I had read that you can put food coloring onto a plate like paint, but instead of water (which makes fondant gummy), you can mix it with vodka (don’t worry–the alcohol evaporates!). So we gave it a try, and it was SO MUCH FUN. It wasn’t even a struggle–it was just like painting with paints!

Once I decided it was going to work out pretty well, I settled on that as the final decorating method for the cake.
The night before her party, I baked, iced and cooled the 2-story cake. I broke a chunk out of it, which thankfully I could piece back together and glue down with icing, since it’d be covered in fondant. And since I’m terrible at fondant, it was full of wonkiness and lumps, which I promptly covered up in more decorative icing. BOOM.

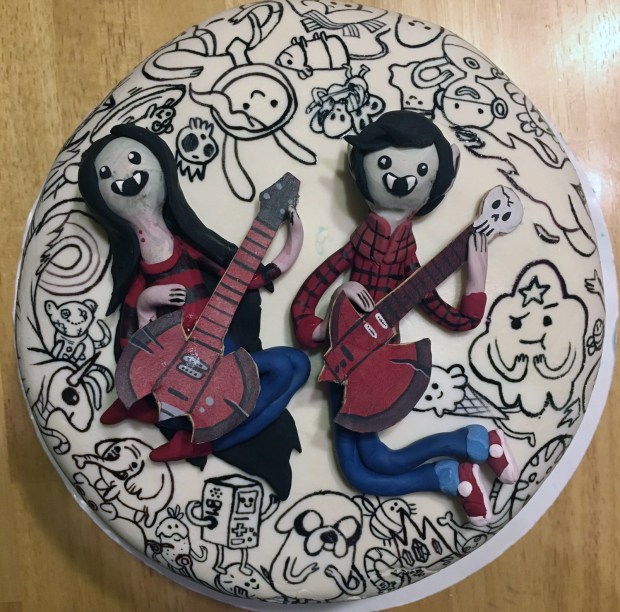
Next, I waited til the kid was in bed so I could reeeeeally focus (plus, I told her that the final cake should be a surprise), and got down with painting TONS of characters all over the cake, around the clay figures. (I realize cake pros would cringe that the centerpiece isn’t edible, but I’m an artist, and I do what I want.)


I had intended to color it all, but as I started working, I realized I really really liked it in just black outlines, so I went with that…

(I swear, I love SO many of the characters on this show, and they’re SO much fun to draw….)
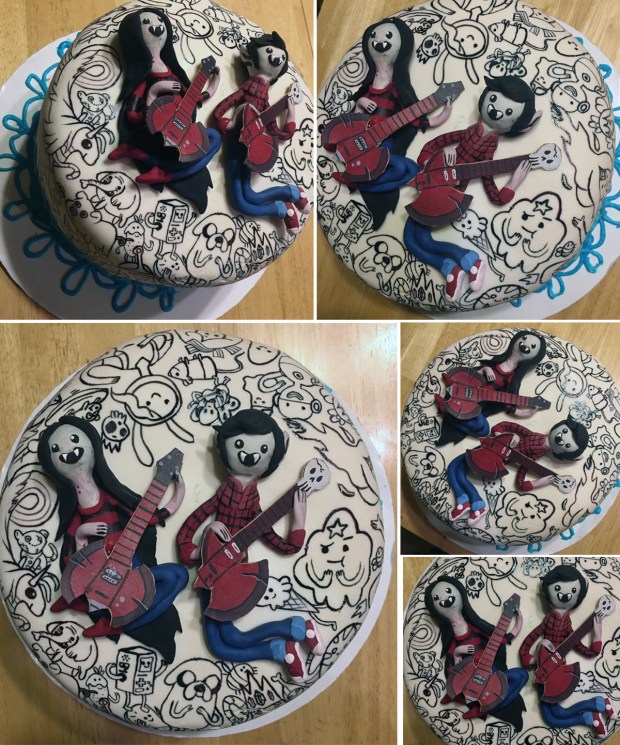
So there it is!
We blew up some purple balloons, which I decorated with Sharpie markers to look like Lumpy Space Princess, and downloaded these fun Adventure Time character masks from HappilyAfter Designs on Etsy.
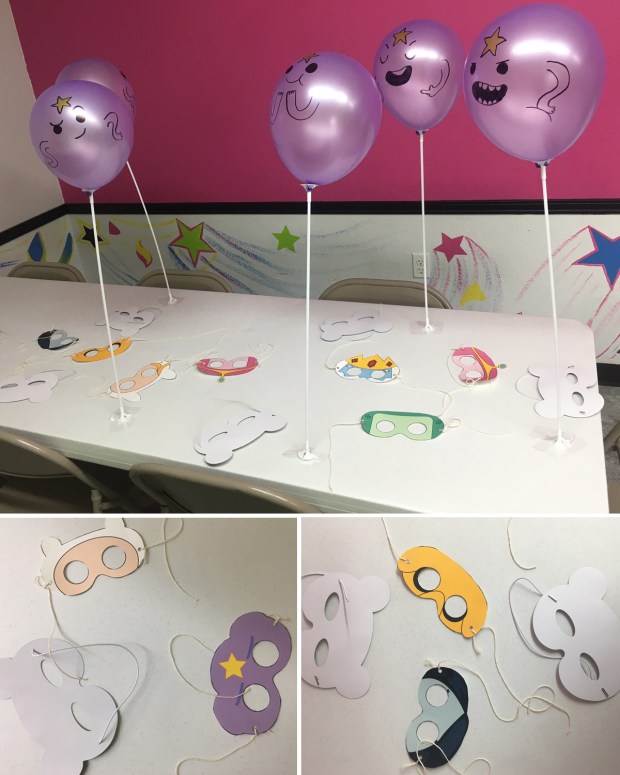
I got several little goodies for the take-home bags, like Adventure Time slap bracelets and figures from Ebay, little individually-wrapped burger gummies, and random dollar store things. I also got some blank wooden beads and painted very simple character faces on them, and tossed them in little snack bags with random handfuls of beads and necklace string so people could build their own necklaces.
The least expensive goody bags at the craft store were these blank white ones, so I kept up the plain character theme, and drew them again on each bag, in Sharpies.

And that was that! Along with a few helium big balloons we bought online that my husband filled at a flower shop and a plastic table cover, it made for a pretty good Adventure Time-themed party!

Myla chose to have her party at a gymnastics center, where they have trampolines and a huge foam block pit with a rope swing over it. The good thing there was that they gave the kids an hour to play, a half hour to eat cake & ice cream, and then they boot you all out of there! So cool. No big cleanup, no mess at home, no all-day event. And the kids get worn out! WOOHOOOOOO.
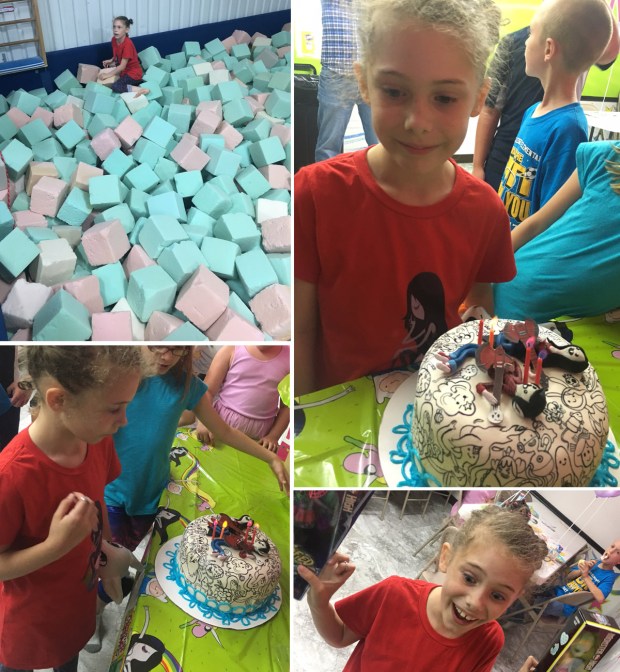
And the cake? Yeah, the cake was a hit. Yay!

And remember my birthday sewing story a few posts back? Well, I took the fox pattern I bought from DolphinWing and made Myla the little arctic fox character who wears an orange shirt that she’s drawn for awhile and created herself.

(I think the dog approved. I’m not sure.)
So aside from all the party planning and prep, the big news is that WE HAVE AN EIGHT-YEAR OLD ON OUR HANDS, PEOPLE. She’s still so sweet and kind, smart and creative. I couldn’t ask for a cooler kid.

She’s a funny little goofball who still loves to draw and create, and had the best birthday week ever! Happy birthday, Myla!

Thank you, Teachers!
As Myla’s 2nd grade school year comes to an end, I wanted to send her teacher out with a proper thank-you gift. Teachers work HARD, and although there are a million ideas online for teacher gifts, I try my best to give something functional that someone can actually use. So here’s a quick and easy project that I hope will be a special gift…
First, I went to our local craft store, and got an inexpensive blank tote bag, They have all kinds of canvas totes–I chose this thicker one with a strong handle and a blank canvas pocket on the outside.
Next up, I grabbed a handful of Sharpie permanent markers, and had Myla draw all over it. Since her teacher had a running Dr. Seuss theme all year, Myla filled the front with some of her favorite characters.
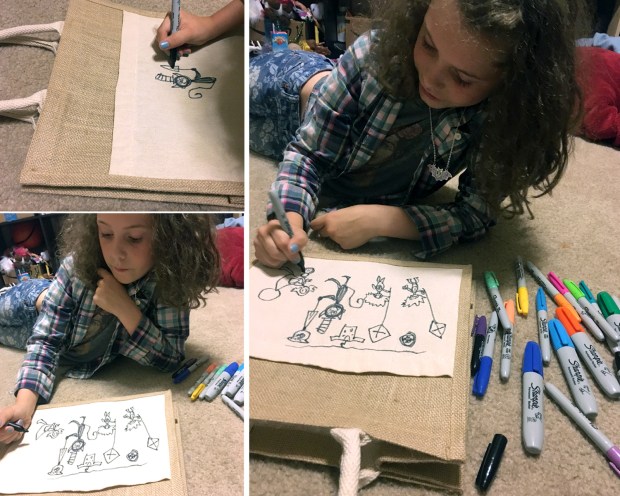
First, she drew the outlines in black, then filled it all in to make it colorful…and don’t forget to sign it!
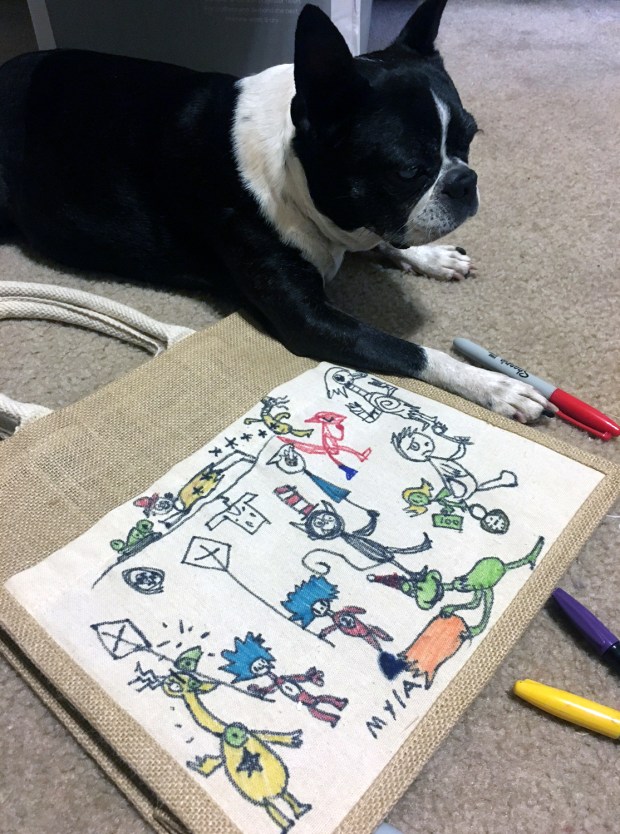 *Artistic dog assistant optional.
Next, you could put in some stationery supplies, pens, and folders, but we chose to put a signed copy of our “Share With Me” book of collaborations. If you don’t have time to order one of ours, you could maybe throw in a few kid’s books to donate to the teacher’s next classroom.

And there you go! Easy peasy, simple to do, and hopefully a good, functional gift that will be a lovely keepsake reminder to show teachers how much their hard work is appreciated.

So show your teacher some love before the school year ends! And here’s to a great start of summer, and the hopes that we can keep our kids busy and active til next school year begins! 🙂
Birthday Pony
One of the times being crafty comes in handy is for birthdays…
So when my husband told me of his friend’s little girl’s My Little Pony birthday, I shuffled through patterns for this one I had used ages ago, when Myla wanted an all-black and pink MLP for christmas…

Back then, I had found this wonderful MLP pattern by Dollphinwing on Etsy. She even has patterns for different manes, tails, and extras…

So I pulled out the pattern again, took a trip to the craft store to pick out fabrics, and started building a custom MLP for a very girly 3-year old.
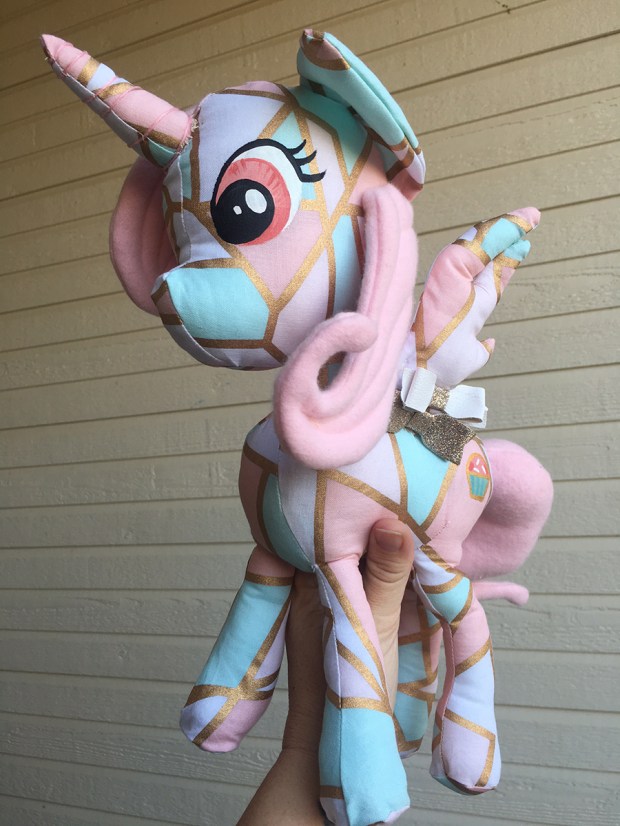
Looking back, I probably should’ve gone with the minky fabric like the pattern suggested, as it tends to hide any stitches and flaws pretty well. Regular cotton fabric is MUCH less forgiving, but I think it turned out okay!

I purchase little hair clips to hold up the wings that they could remove later, and put in the little girl’s hair. I handpainted the eyes in acrylic, and let my daughter name it and choose a cutie mark I could paint on.
She chose “Cupcake,” and I painted a cupcake cutie mark on its bum–which is funny, considering the gift bag I had grabbed, and didn’t realize until later (and Myla had no idea) was purely coincidentally DECORATED IN CUPCAKES:
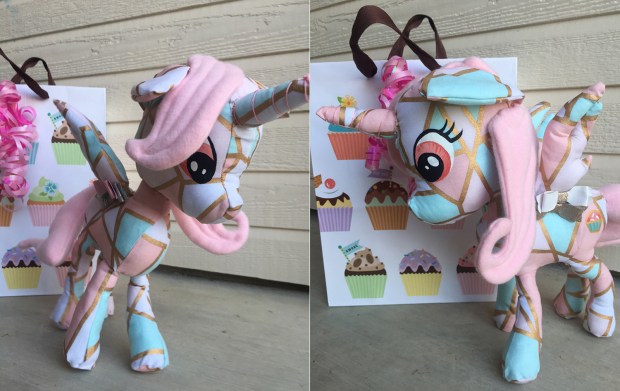
So there you go! It went over very well at the birthday party. Surrounded by tons of store-bought MLP toys and clothing, this custom handmade one brought a kid-hug and a big happy smile.

So head on over to Dollphinwing! She has no idea I’m sending you, but I like to share great things when I have a chance…she’s got a fox pattern there that I just purchased. Myla’s birthday is coming up and since our kid is a stuffed animal junkie, I will most likely use it to make a doll of the arctic fox character that Myla came up with. I’ll keep you posted!
Happy crafting!

