DIY Printable Tattoos

YOU GUYS!! Did you know you could make your own temporary tattoos from doodles you already HAD?!? …Okay, well I didn’t. But I experimented with them, and here’s how it went down.
First off, I’ll warn you that I only tried two brands–one was HORRIBLE and the other was not too shabby. But neither one of them came out like the ink ones you get at the store or in a pack of gum–instead of transferring the ink, they both had an adhesive backing to them, so it’s basically like putting a very very very thin sticker on your arm. Or like letting Elmer’s glue dry on your skin. (I have super sensitive skin that doesn’t like adhesives, so for freaks like me, that might be a problem.)
 I used this brand, which says you should use it with this special die-cutting machine, but you TOTALLY don’t have to (Sorry, Silhouette). You take your images, flip them, and print them out. There’s a plastic sheet you rub onto it once it dries, to sort of hold the adhesive down. Then you have to cut out your “tattoos.”
I’ll warn you that NOT cutting closely around the image means you’ll get adhesive everywhere there’s blank space, as you can barely see in this closeup picture: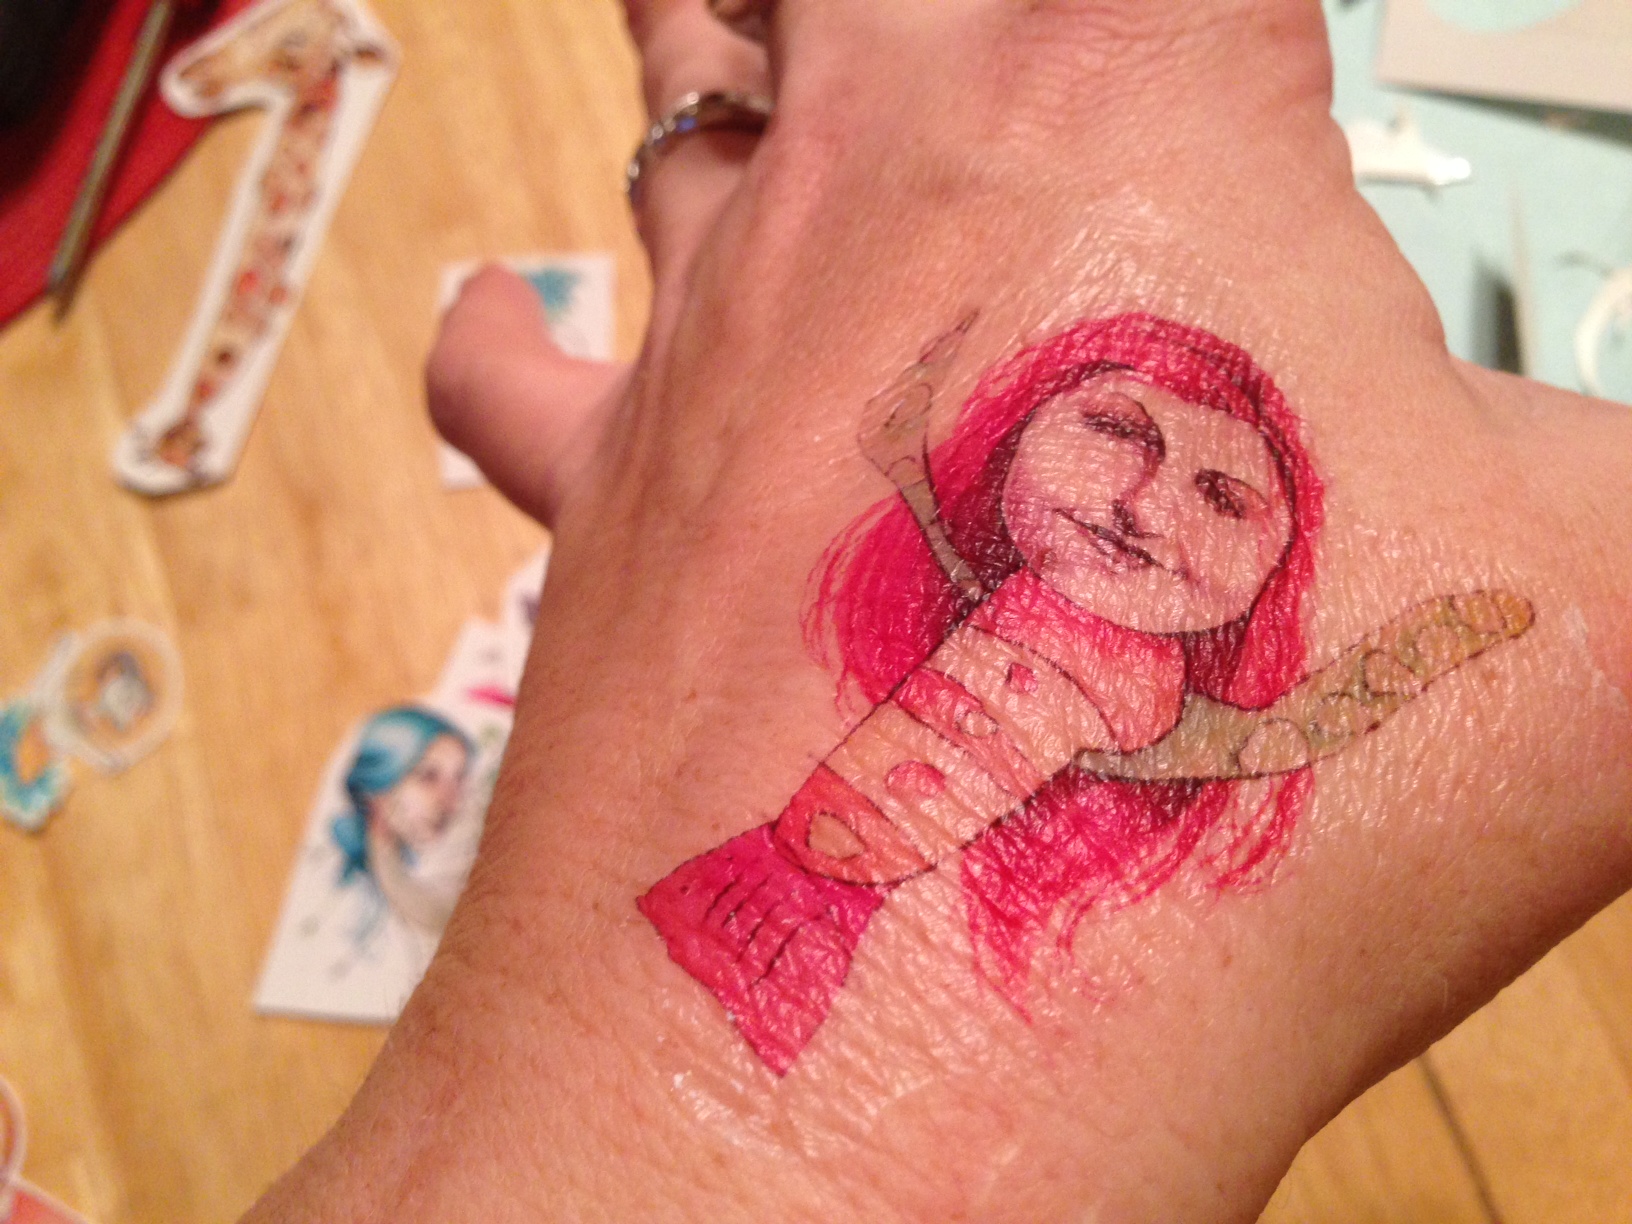
Not cool. So take my word for it, and just cut closely around your image.

The rest is like a regular temporary tattoo: peel off the plastic sheet, and place it face-down where you want it on your skin. Again, a word of warning: You’re essentially putting a very very very thin adhesive on your skin, so if you have super hairy arms, you might want to opt for a less-hairy spot.
Wet the back of the “tattoo” and peel it off.

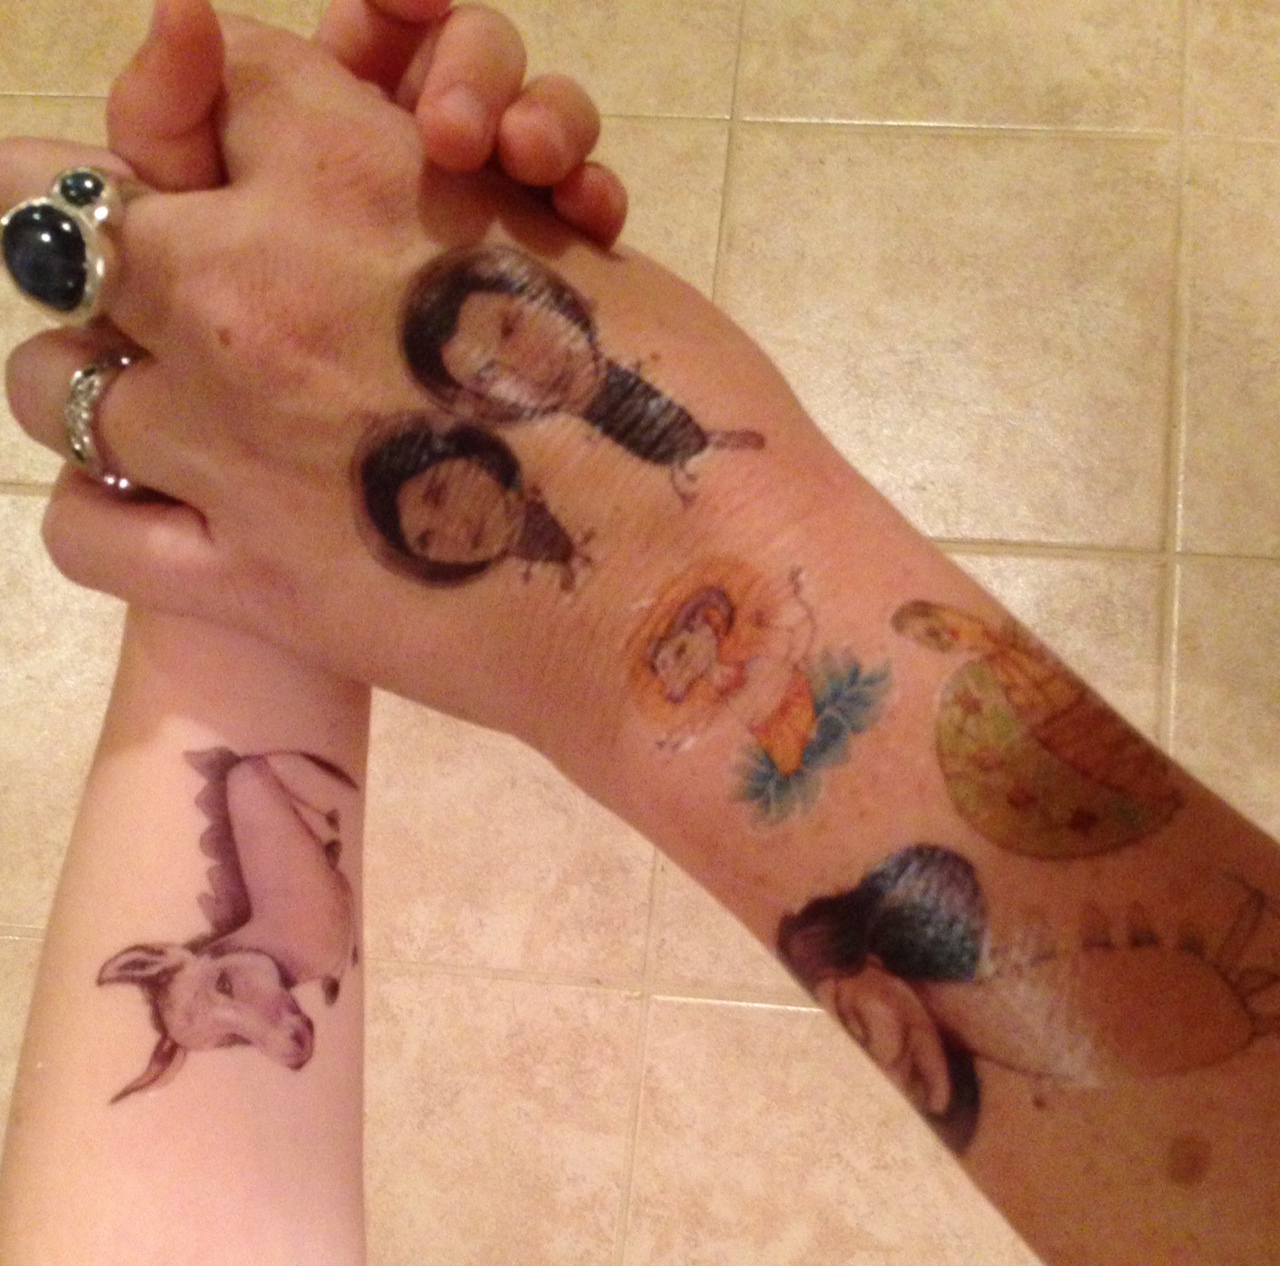
And temporarily cover yourself in your own awesomeness! Woohoo!
On Santa and Gnomes
A word of warning: This post is a little long, but it has a point. Hang in there.
Christmas is weird. It’s a strange time for a parent, and strange time for a kid. What you believe and don’t believe? Now THAT is the question. My parents always taught me that Santa was more about an idea, a spirit of giving. That there WAS a St. Nick, but now we sort of carry on the magic and spread the love around. And all that jazz.
(Now it’s a bit of a hike to get from Santa to building a gnome house, but please stick around and follow me, here…)
I always felt weird about flat-out lying about a big man sneaking into our house in the middle of the night (bringing toys or not)…especially since my husband’s deployed and she’s ALREADY worried about “strangers.” I found it hard to sell that when it didn’t really make a whole lot of sense, did it? I couldn’t really ever get into the “Elf on the Shelf” idea for the same reason.
So when our VERY practical daughter asked me about Santa, I told her the same thing my parents did. And she was silent. Which usually means she’s mulling it over. So I wasn’t surprised when later she asked the same thing: “Is Santa real?” I got the feeling that she wasn’t happy with my previous explanation, so I tried again in the same way, adding an explanation that it’s fun to PRETEND that he’s real. She silently mulled it over once more, and still later asked me again: “Some kids at school say that Santa is NOT real. Is that right?”
Finally, torn between explaining the real story of Santa and going along with a “lie,” I asked her: “Well, what do YOU believe?” And she thought about it awhile, very seriously contemplating it, and finally said firmly, “I think he’s real.” “Okay,” I said. “Then he’s real.” I’m not sure she entirely convinced herself, but she enjoyed the idea.
The Santa Debate brought questions of other anomalies. “Are fairies real? Are aliens real? Witches? What about gnomes?” To each I would respond, “I don’t know—you know, I’ve never SEEN one, so I don’t know if they’re real or not. But what do YOU believe?” She asked me about the kids at school, and I said, “People believe all kinds of things. And since nobody knows for sure, then nobody is wrong. You believe what you believe, and you let other people believe what they believe.”
So somehow, we got on the topic of gnomes.
I told her a story about how when I was a kid, my parents took my sister and I on a walk in the woods, and my dad helped us construct a little bridge across a tiny stream with sticks and dental floss. Days later, when we came back to check on it, someone had left a note saying, “Thanks, good job!” We joked that the gnomes had left it. Our daughter loved that story, and suggested we build a gnome house and that maybe if we did, they’d come visit US. I sort of agreed to it, but didn’t think much else about it, dismissing it as one of the hundreds of project ideas she has in any given hour. But days later, and she was still persistent.
So we built a gnome house.
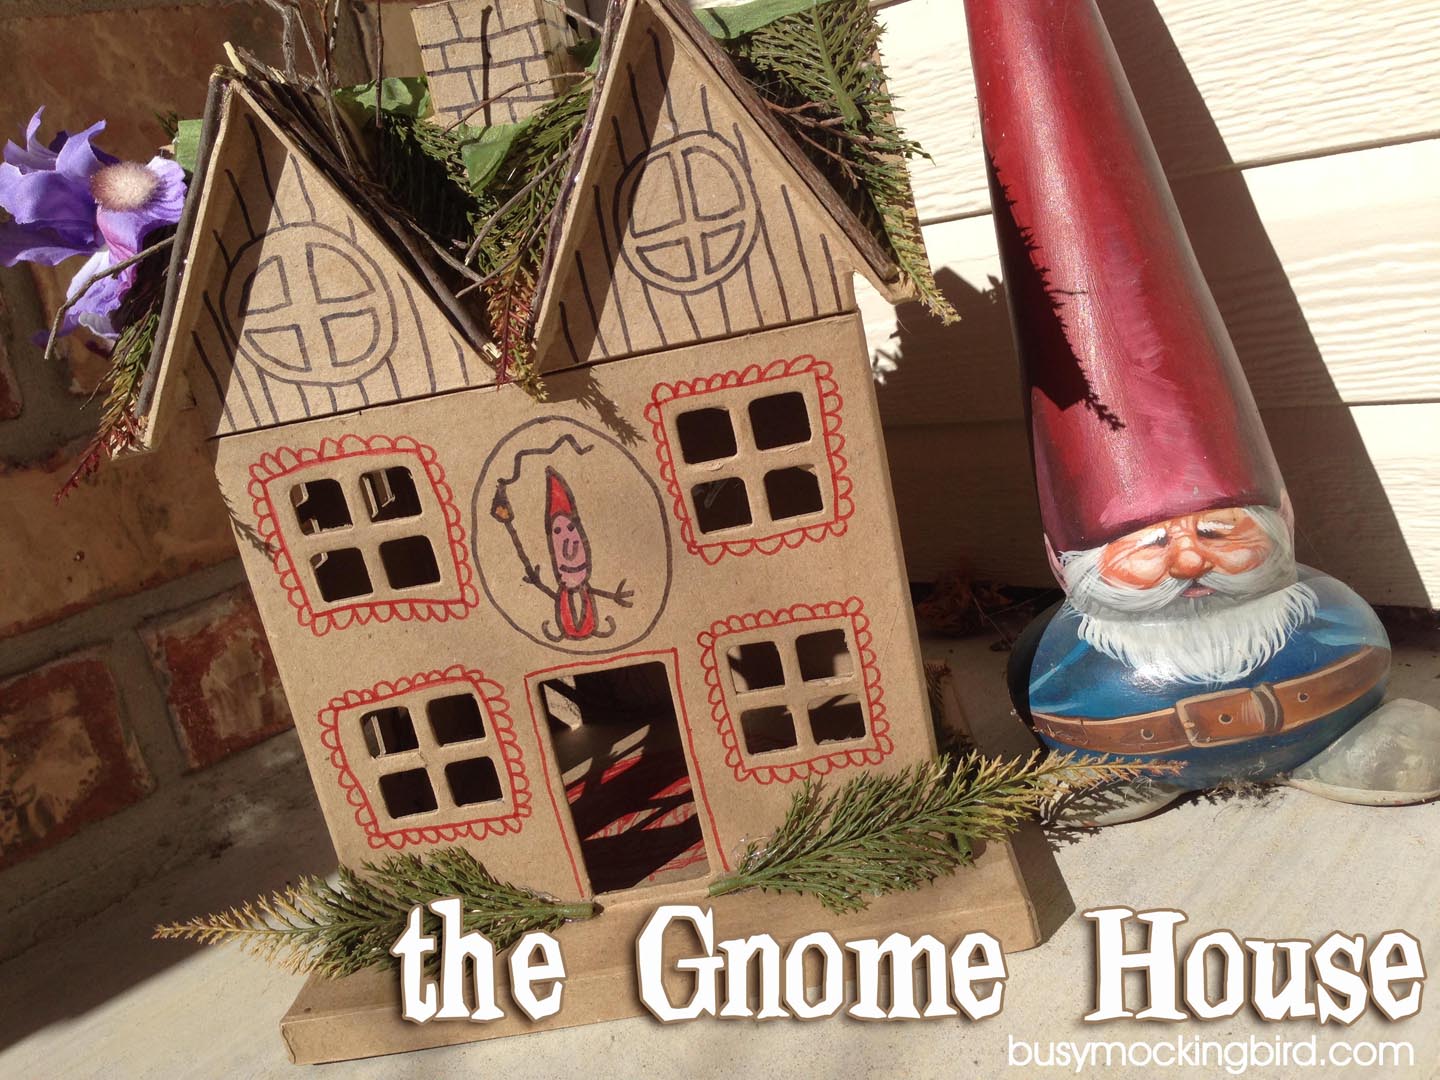
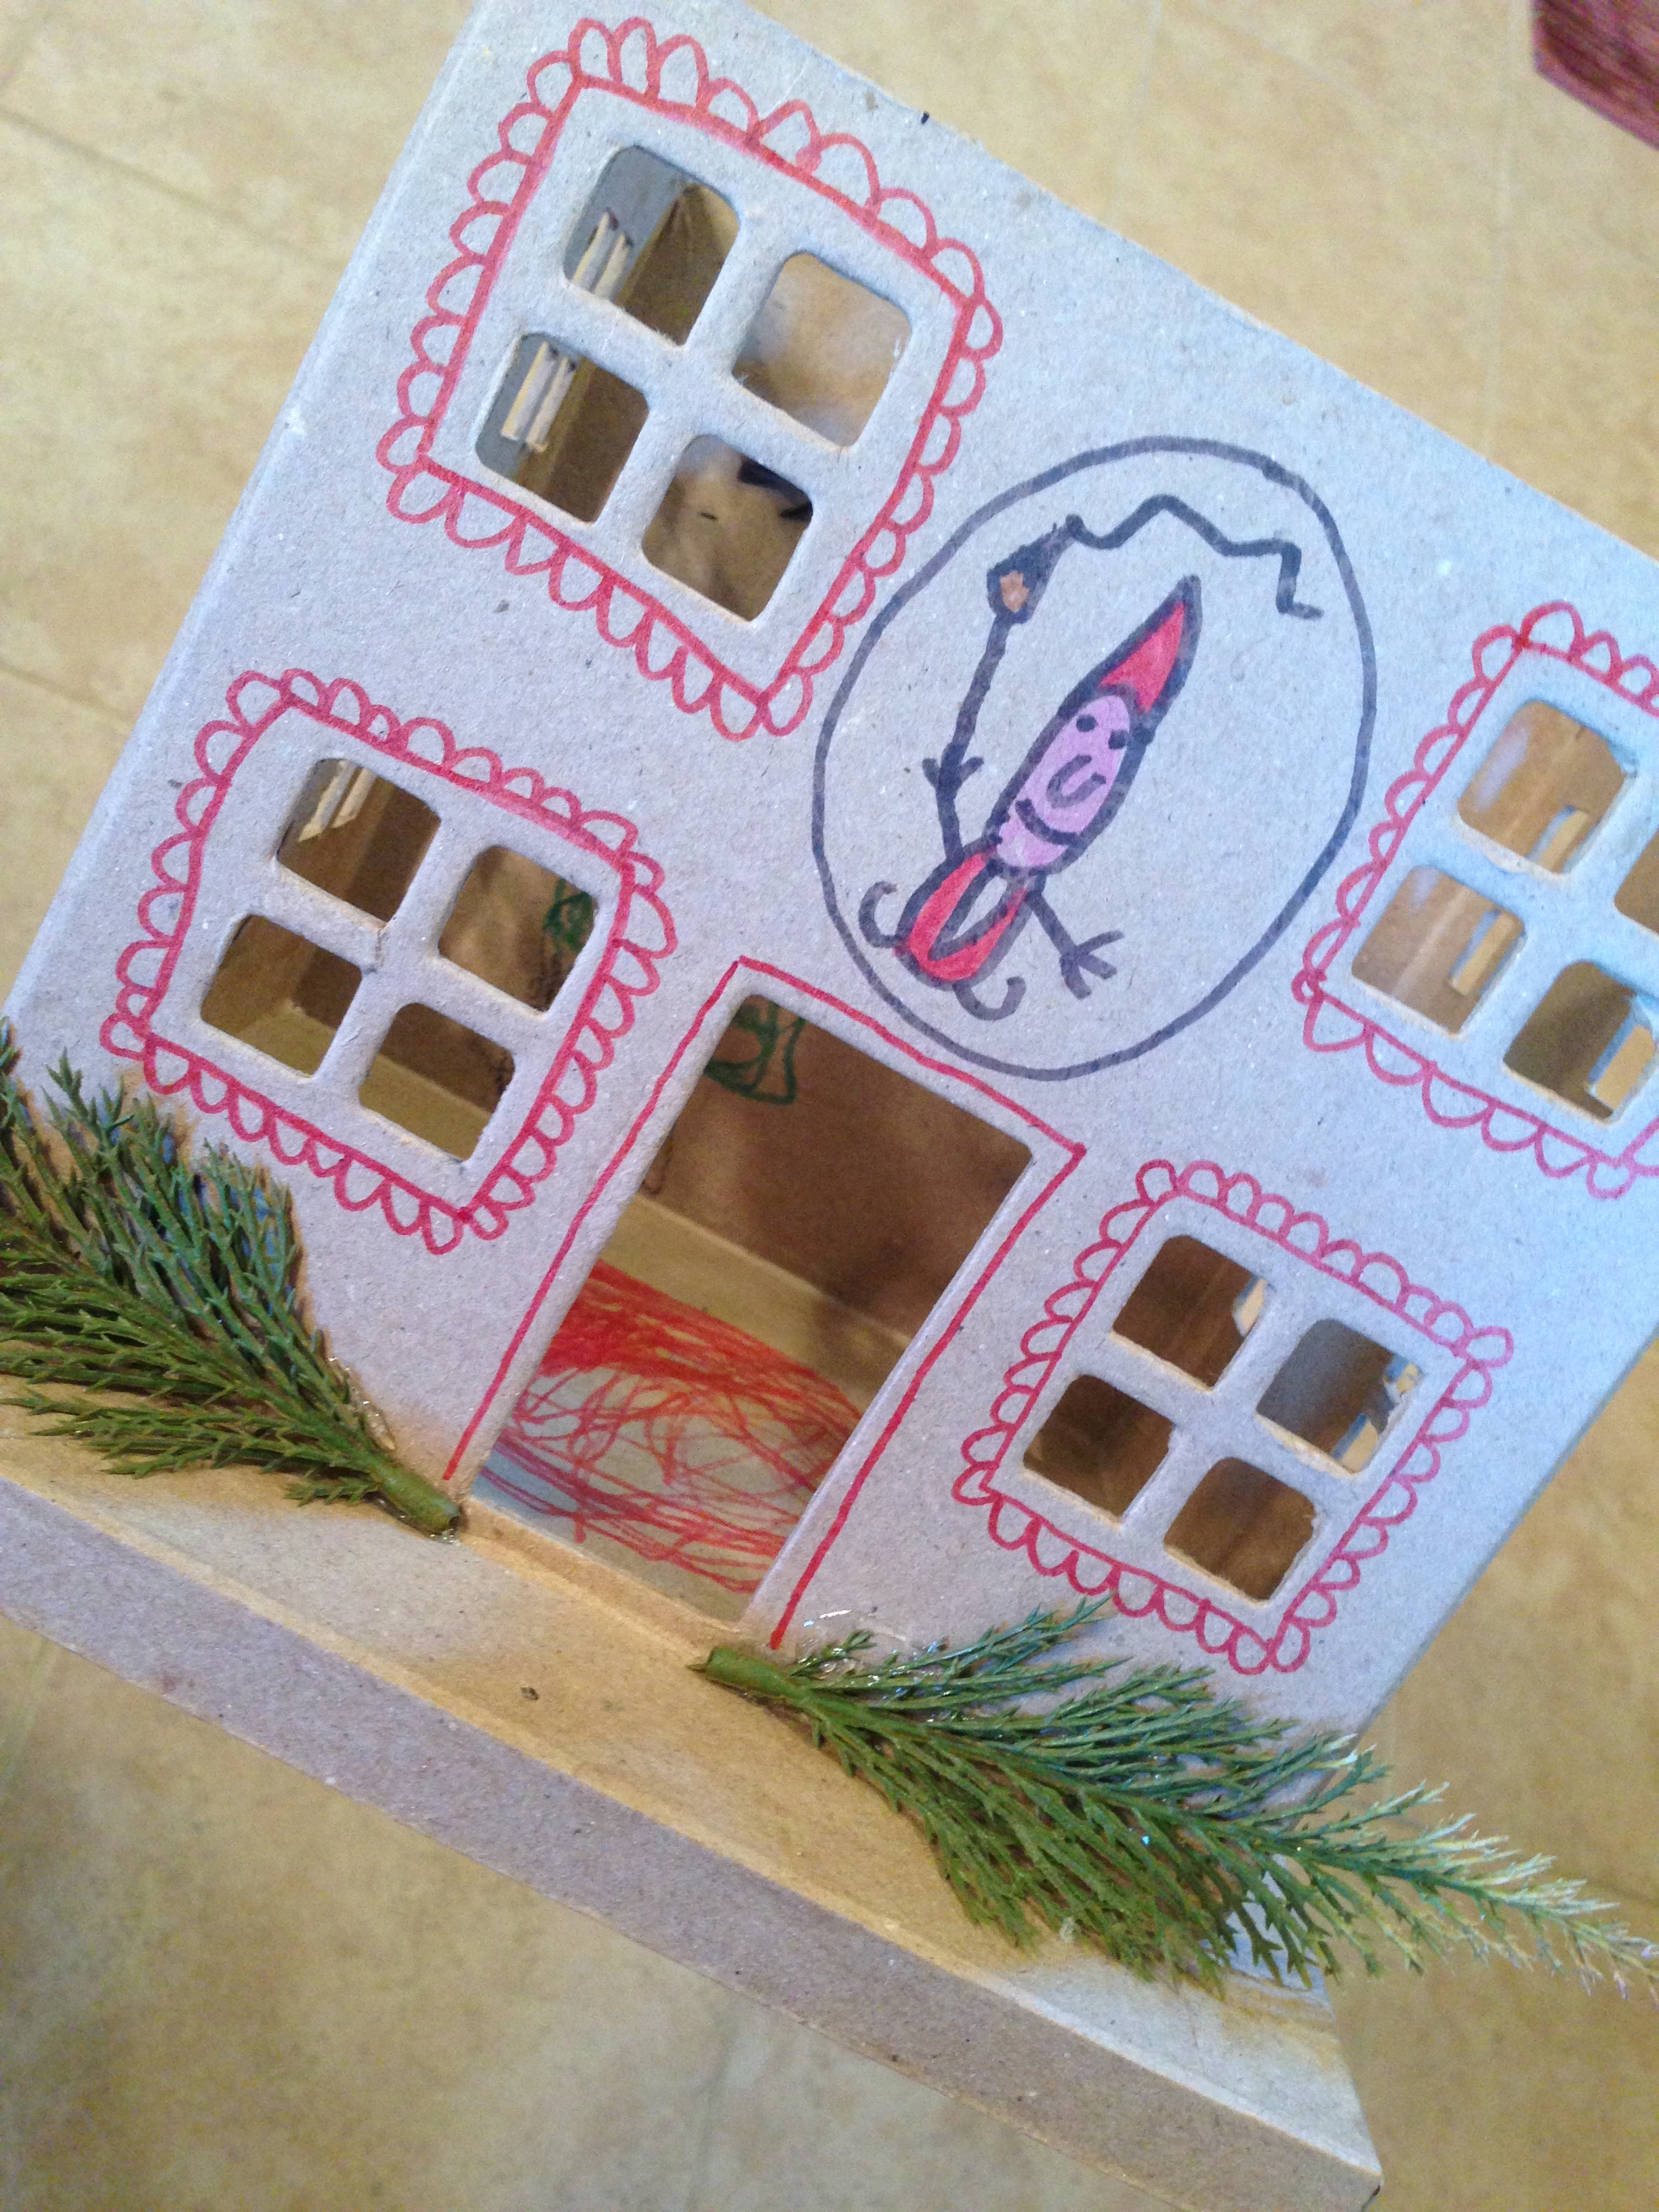
It was a fun little project, and we got all our supplies on a quick visit to the craft store. She was excited picking out stickers and decorative things to go along with it. I went the easy route and started with those pre-made papier-mache houses you find at the craft store for $5. While she happily decorated it with markered gnomes, I hot-glued sticks and fake plants to the roof. 

She drew all over the outside, and filled the inside with a doodled Christmas tree (probably influenced by the fact that ours is still up. Don’t judge.) and other stickers & doodles. And the front door was headed by a cute little “painting gnome.” 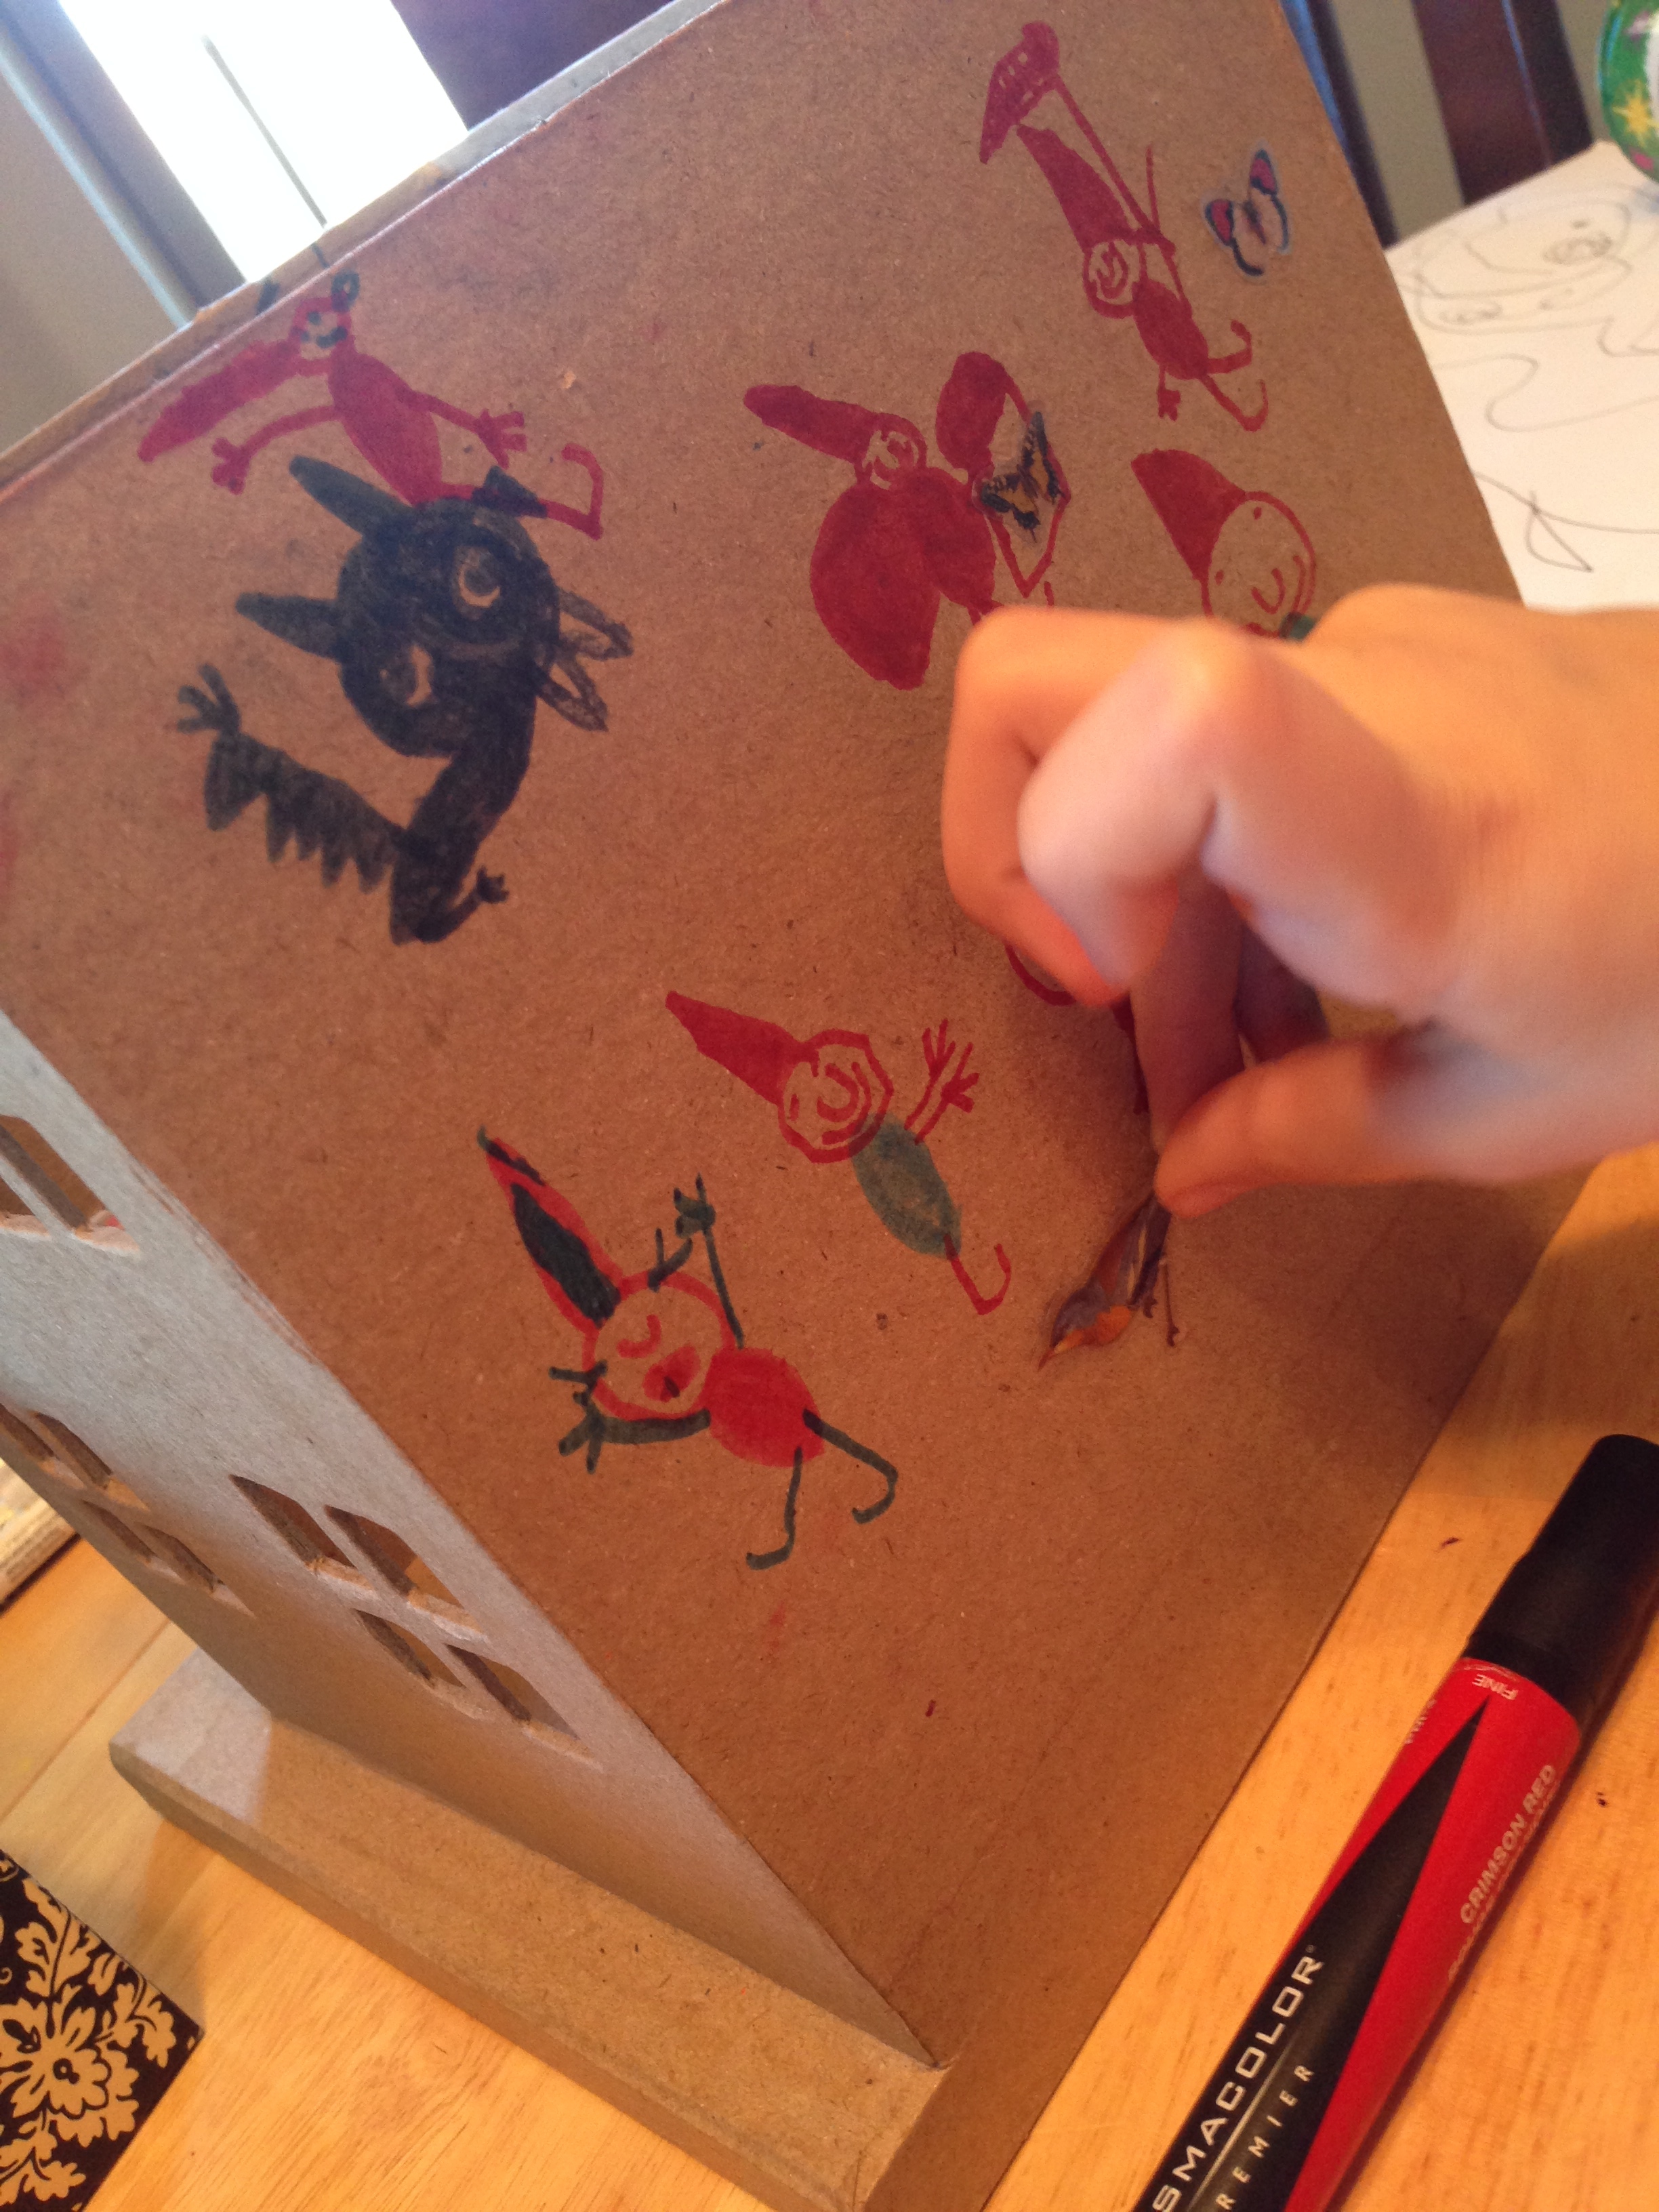

We put some of her dollhouse furniture in it. She put tomatoes in it “for dinner,” she said. And we tucked the little gnome house into the corner of our back porch, to protect it from the rain, since we don’t have any trees around. 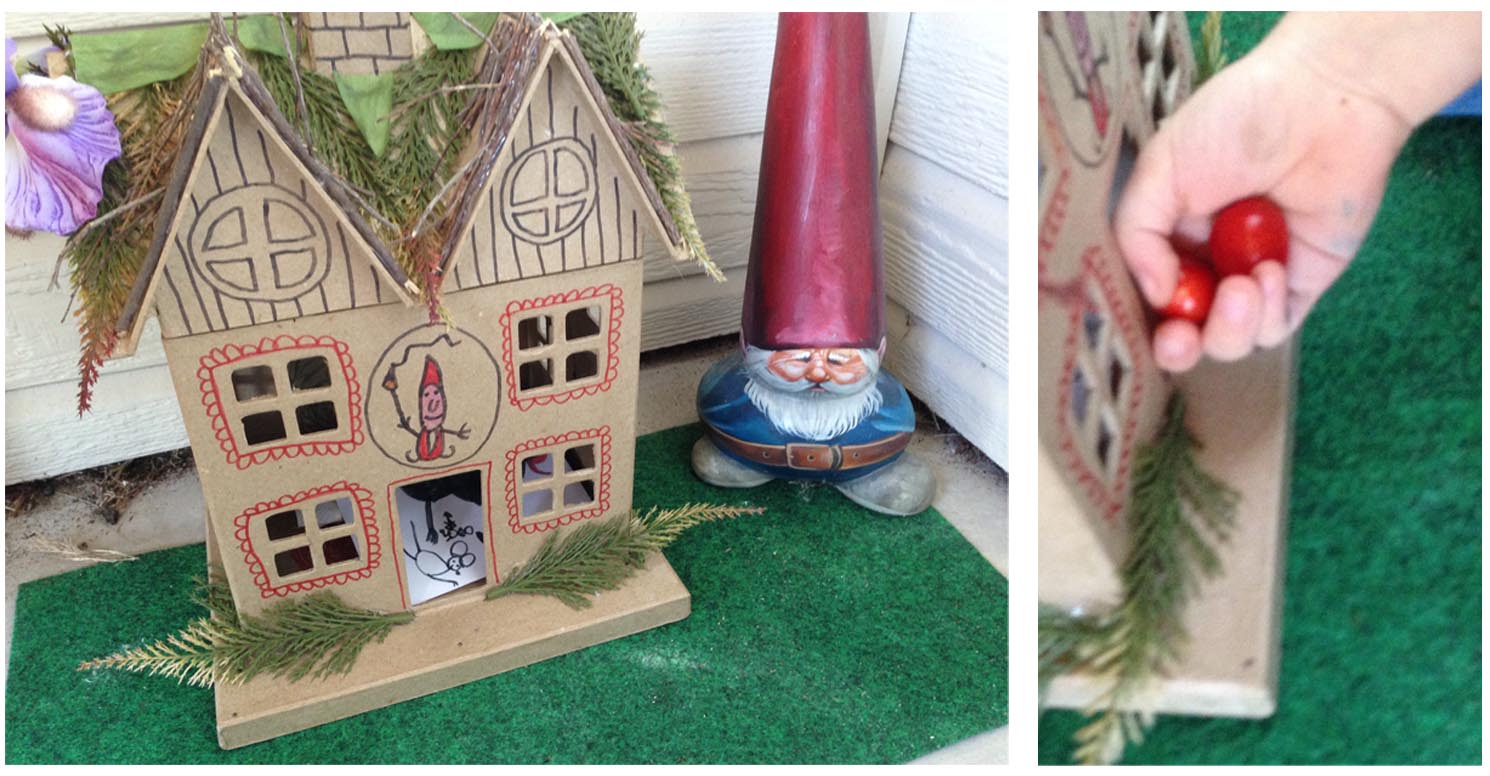
(Side note: That little garden gnome in the picture above is actually a weird little terracotta gnome I got at Ikea ages ago. It came plain, but I painted to look like the gnomes from the Gnome Book. The book Gnomes was a favorite of mine as a kid. It explained gnomes in a realistic way, and fit them into our world as if they WERE real.)
Later, that evening, I threw out the little tomatoes, partly to see if she’d notice, and partly so our little food-hungry dog wouldn’t tear the gnome house up trying to get to them. It all reminded me a little of the Dinovember post that was going around a while back.
Today, it rained. So I decided to have fun with it, and added a few muddy footprints leading up to the house, and a few pea seeds and a tiny carrot from our garden on the table. 

When she saw them this afternoon, she was excited. And I was excited for her. “GNOMES! I didn’t know we could really have GNOMES!” But honestly, I’m pretty sure she didn’t believe it. I suspect she’s enjoying just playing along…
And I’m not sure if I want to run with it, or just sort of let her in on the fun of pretending….
I don’t want to totally LIE to our kid—she’s always known us to be able to give her straight answers on nearly any topic imaginable. But I don’t want to rob her of that magical fun stuff that makes up being a kid. Her world hasn’t been completely defined by reality yet—for all she knows, there ARE such things as horses with wings or giants. Why not gnomes? After all, we’re all free to believe what we want, right?
Your’e So Lovely!
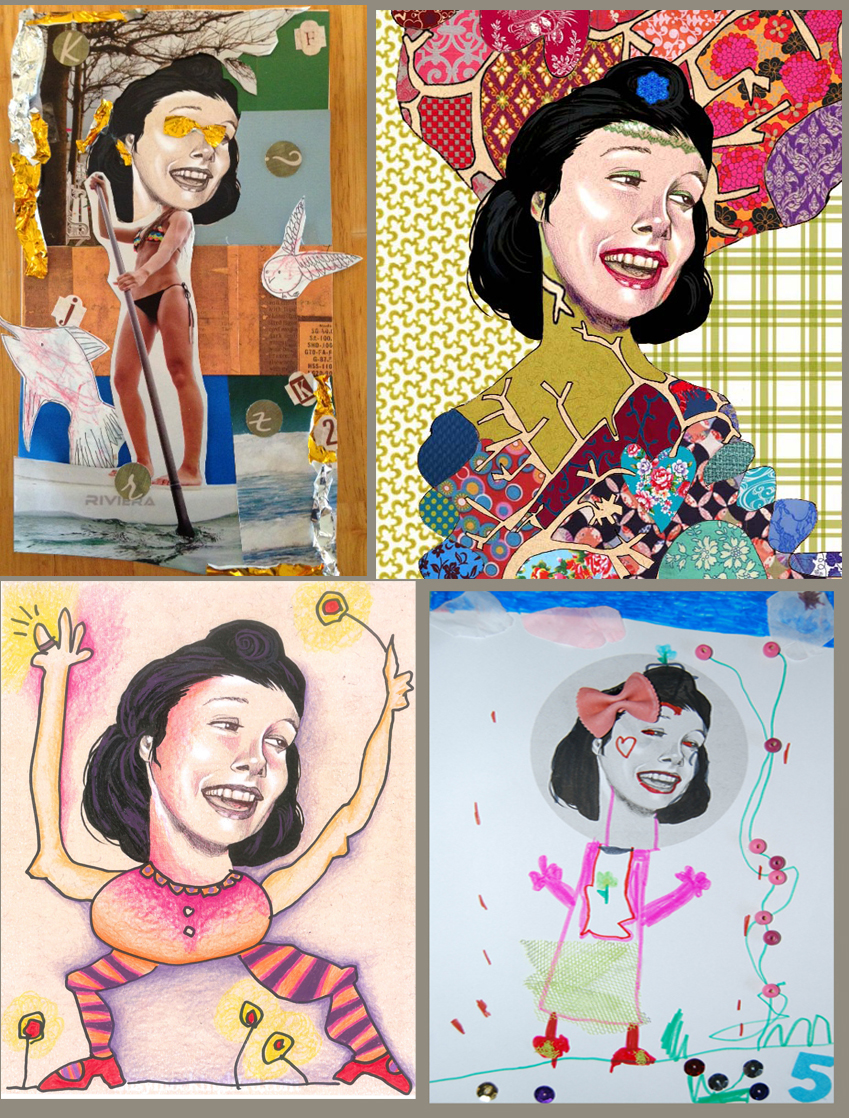
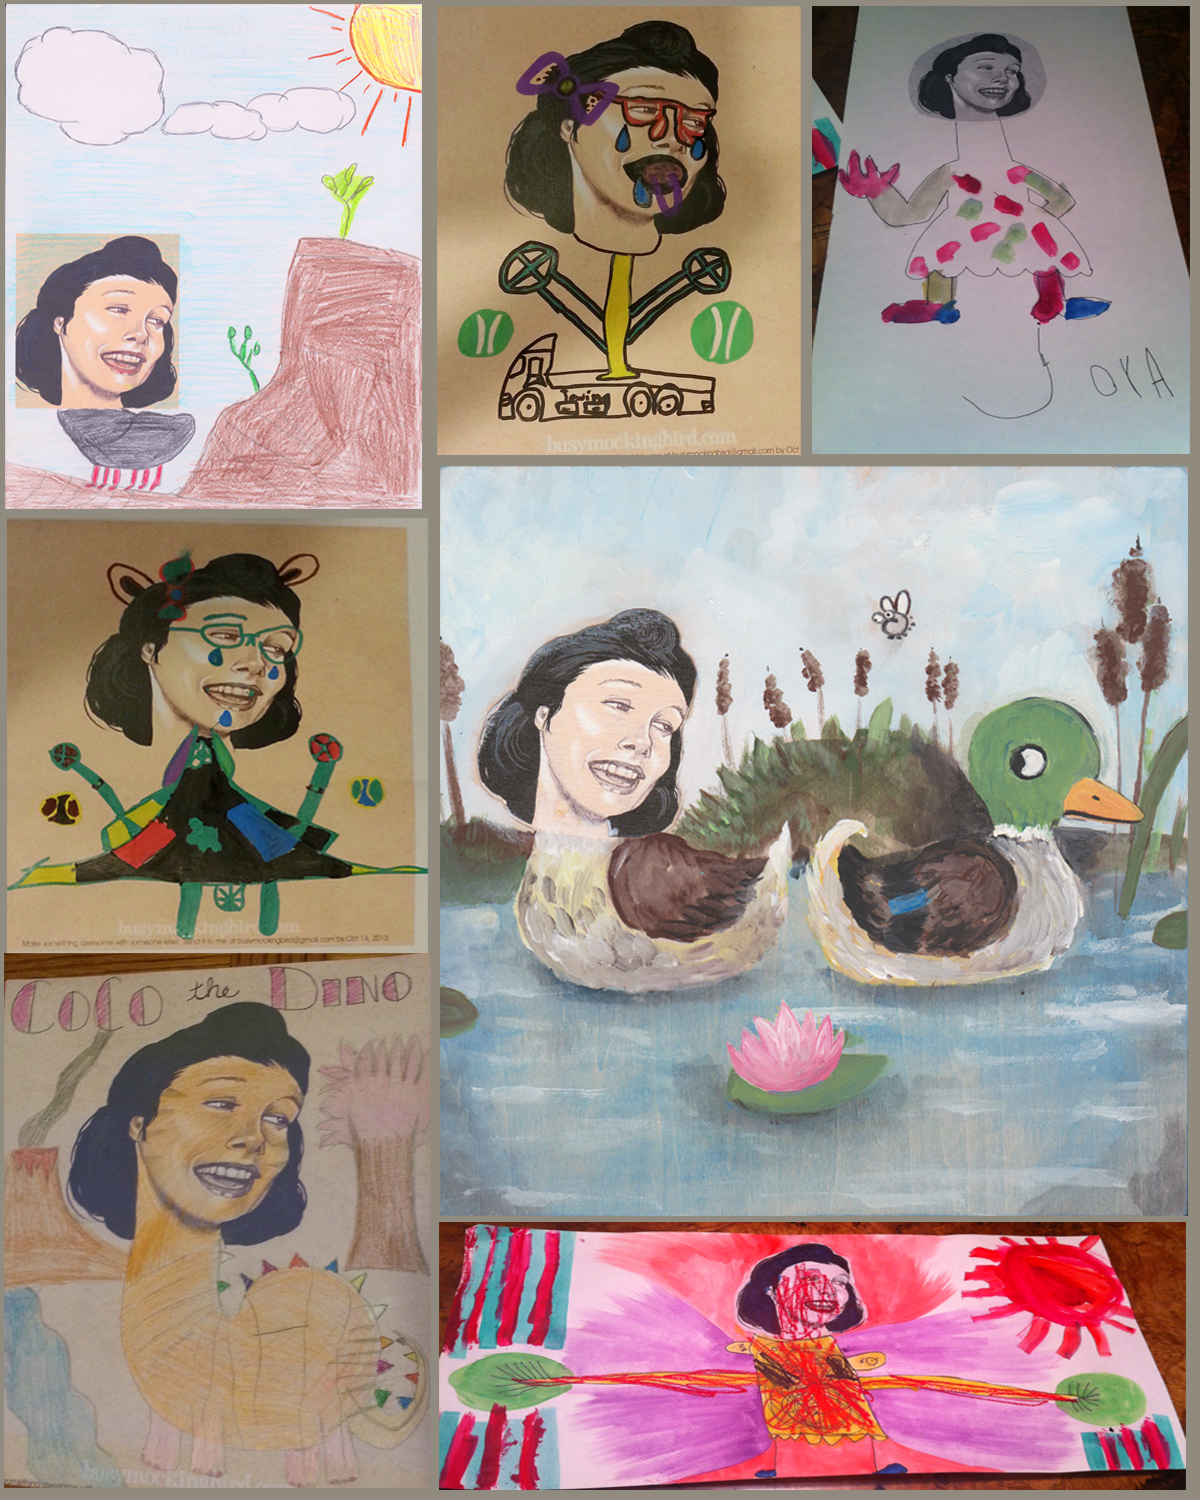
It’s SO amazing to see all the beautiful entries coming in from all over the WORLD for the contest…and even more amazing hearing all the wonderful stories of the fun you all had creating them! Don’t forget, Monday is the last day to enter, so let’s see what you’ve got!


Keep ’em Coming…
Contest entries are coming in from all over, and they’re so awesome! Have you entered yet? …Looks like you all are having a lot of fun with it, and I want to see MORE! One more week to enter! If you want to give it a shot, head on over to the last blog post and try it yourself. Good luck and most importantly: have a great time with it!

Beautiful Messes
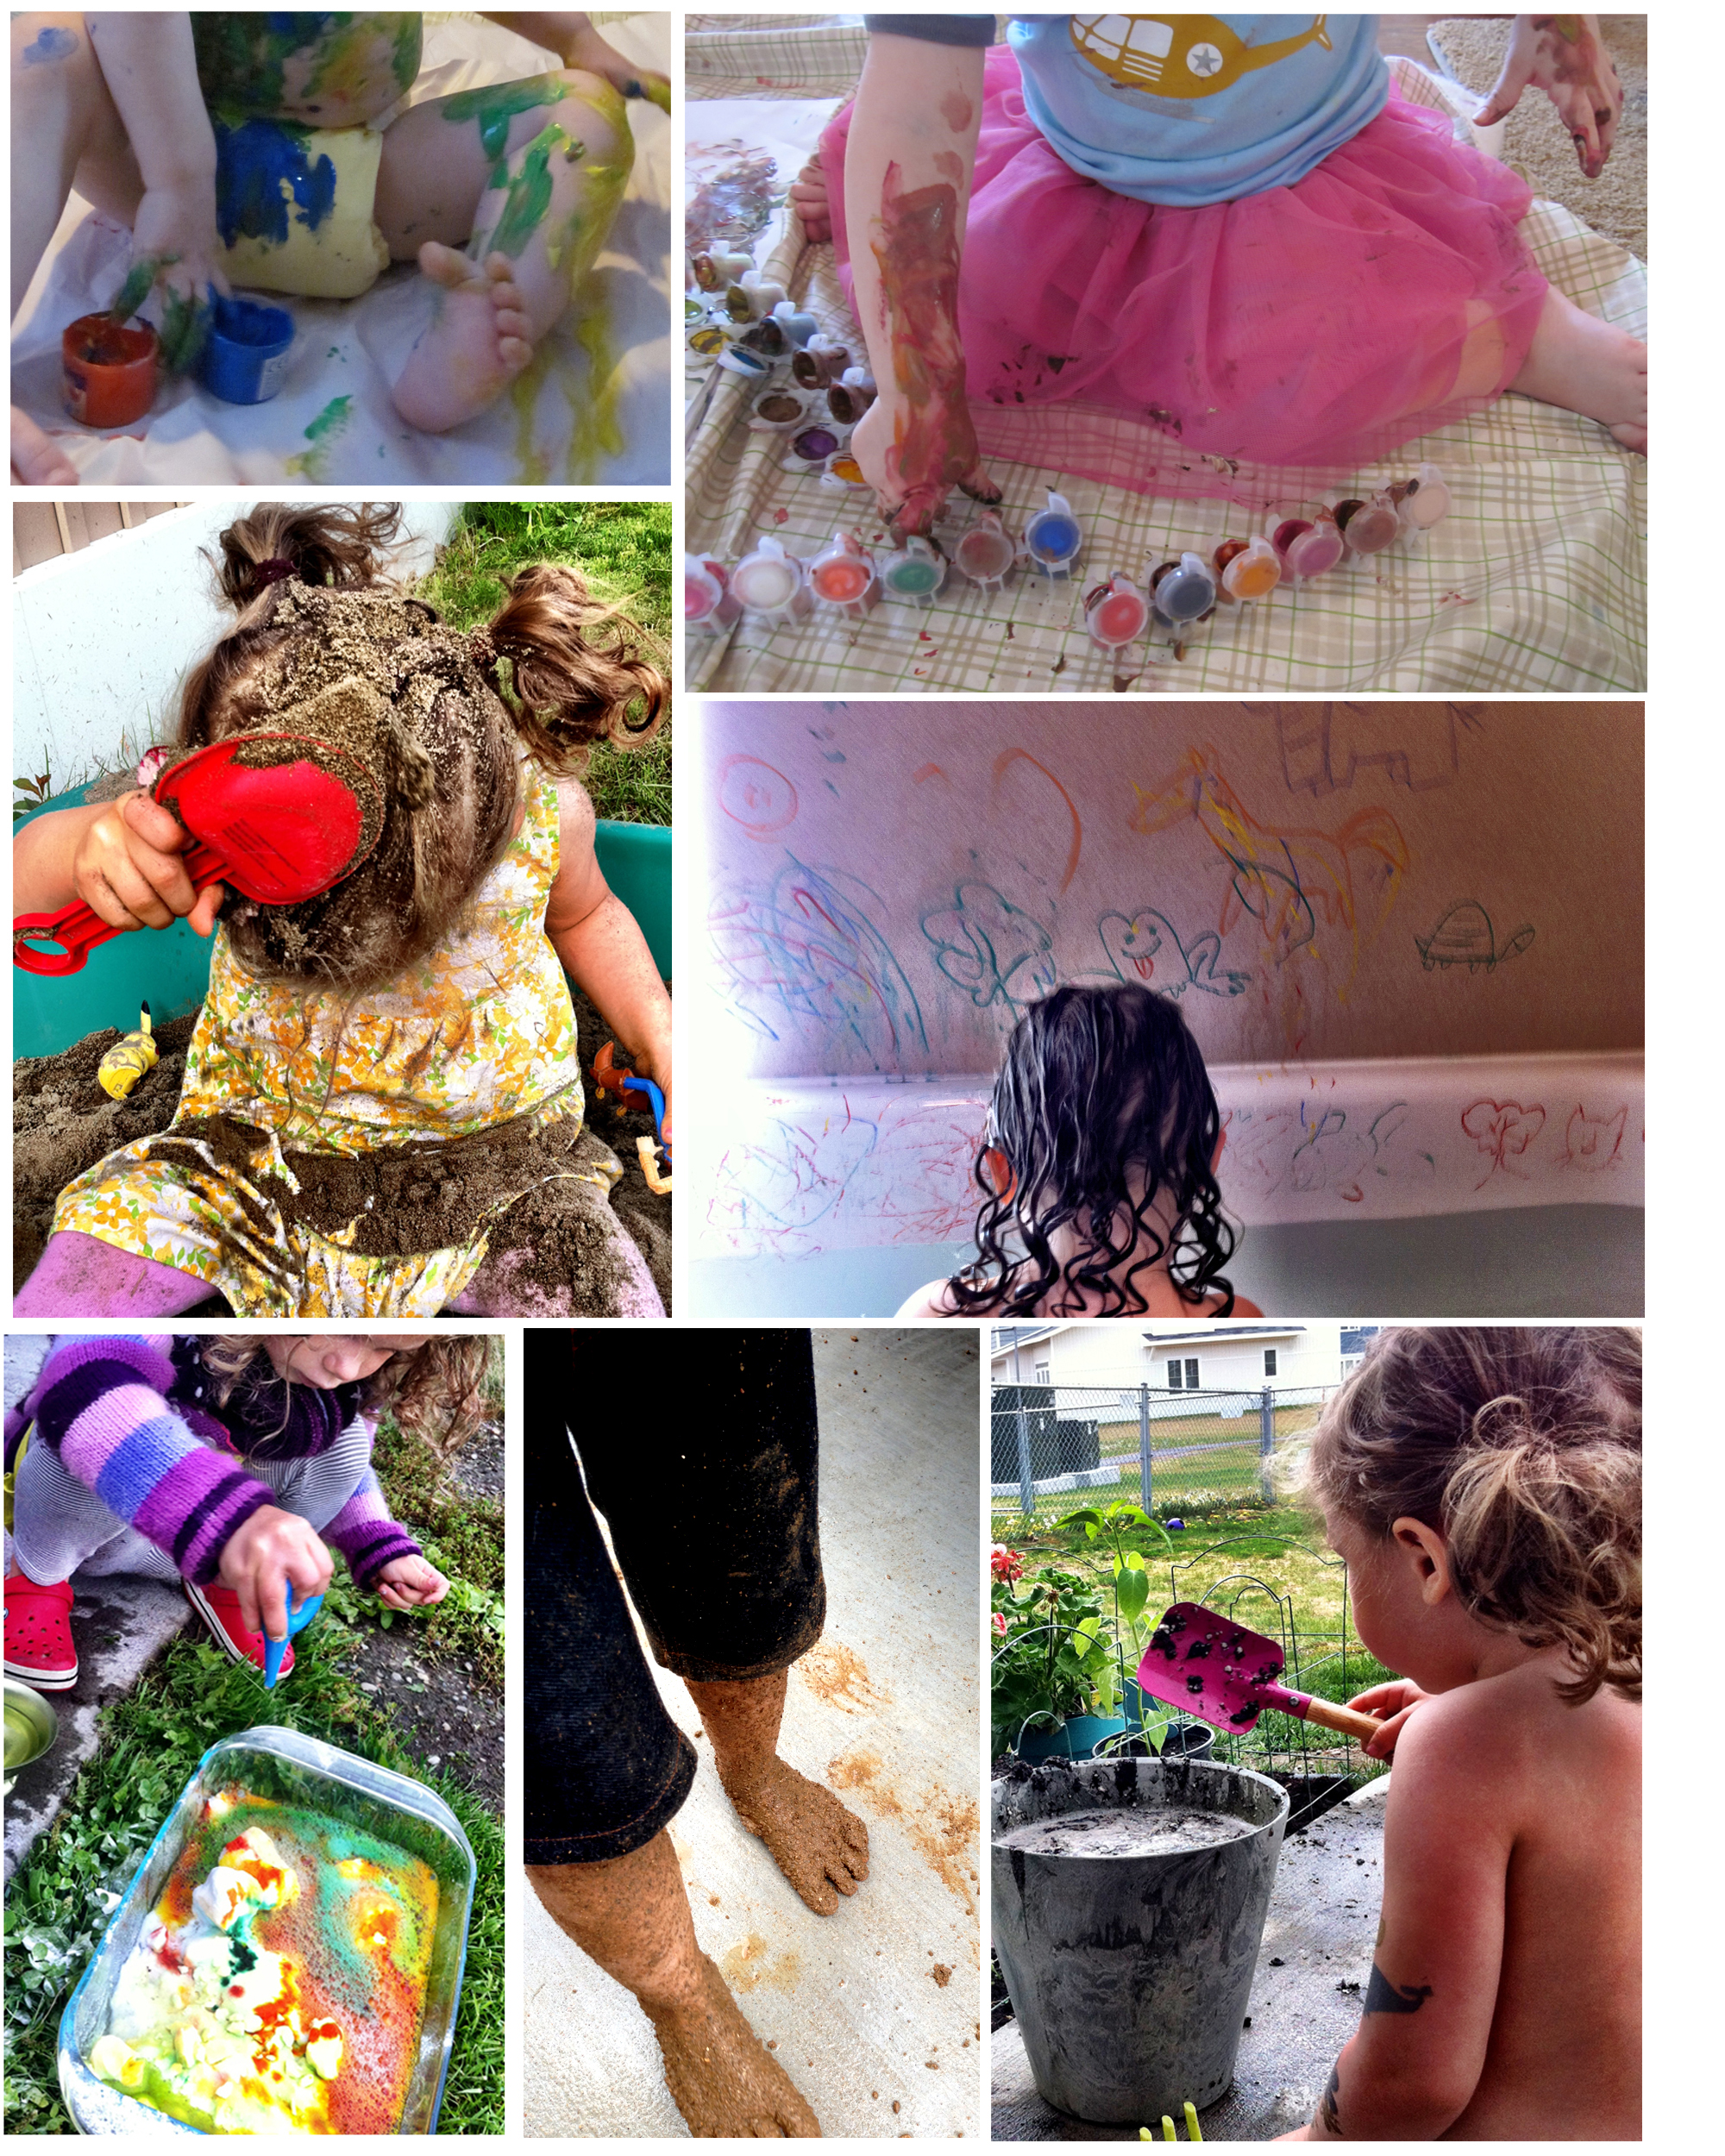
From the time she was little, my daughter (like most kids, I think) loved nothing more than a big mess. Now, I’ve mentioned I am a bit of a perfectionist–which I once defined as someone who thinks they’re ALREADY perfect…I’ve learned that instead, I’m someone who always WANTS things to be perfect, or in their right spot, or “just so,” which is a constant feeling of internal frustration since things NEVER EVER ARE.
I have a problem with that. I’m working on it.
But since I wanted my daughter to be a fearless mud puddle-splashing, bug-loving kid, I make a point to allow her to be messy and try my best not to worry about it. That mud on the patio? Calm down, mama…I can hose it off. Sand in her hair? That’s what bathtime’s for. Doodles all over her skin? Well, that’s why you get washable markers.

I let her cover her arms in stick-on tattoos, paint her hair with temporary pink mousse, and make magical messes experimenting with food coloring, baking soda & vinegar. The way I see it, childhood is the BEST time for messes! The BEST time to color your hair and marker your skin, when the responsibilities of the world and work and jobs and life don’t interfere.
Well. That’s all well & good in theory…until she started asking ME to join in.
As a kid, I was a mess-lover, dirt-digger, and bug-catcher. But something changed as I grew up (as I’m sure it does in us all) that made me not WANT to lie down in the grass anymore (it’s itchy! There are bugs!) or splash in the puddles (my pants will get soaked! I’ll ruin my shoes!) or catch a bug (I don’t WANT to touch a mealworm!). I started realizing, though, that unless I joined in, all my talk to her about having fun and making messes would be just talk. My kid learns more from what I DO than from what I say, and unless I joined in, she might feel that the beautiful messes were somehow wrong. So I did.

I let her paint on me. I let her polish my nails. I get down in the grass and get dirty. Not every day. Not always. But when the opportunity presents itself and the only thing stopping me is my own discomfort.
The main key to it all is preparation. Painting outside, or with a mat down, or in a cruddy shirt, and ALWAYS with washable, skin-friendly, or water-based supplies. Have a towel ready.
It was difficult at first, ignoring the inner “irk,” but I told my inner voice the same things I’d say about her: “it’s washable. I can take a bath later. It’ll come off.” And the fun we have doing it is always worth the cleaning up. I can’t say that afterward I don’t run immediately to the shower & laundry to clean everything off, but I try my best to wait til we’re all done to internally freak. I can’t say it’s not a challenge sometimes, but I try my best to enjoy it IN THE MOMENT.
Because I allow the messes, you’d think that nothing would be off limits. But she is VERY sincere about knowing what’s okay and what isn’t. She knows not to paint on the walls in house, and respects that story books are for reading. Thankfully, she asks before she doodles on things. Because I allow the messes, she doesn’t seem to feel the need to go crazy elsewhere. It seems with her that giving her the opportunity to go wild sometimes keeps her calm in other places.
We have a world full of no. Every day of her little life is full of boundaries and structure, struggle, conflict and organization. There are rules and manners and courtesies, permissions and consequences. These are good things. These are necessary. But there are moments you can let go of your hangups and just enjoy the feeling of paint slopping around and mud between your toes, for no other reason than that it’s fun.
You forget those things when you’re older, and you’d be surprised how quickly and fiercely that happens. So why not cram your childhood full of them?

So, kids or no, artistic or not….when’s the last time you made a beautiful mess?
Felt Top Hats and a Wonderland Party
When my daughter was nearly two, she was VERY MUCH into the Disney version of Alice in Wonderland. She also loved tea parties and hats. (See where I’m going with this?)
Since my husband was deployed, I decided to make a “Mad Hatter’s Tea Party” for my daughter’s second birthday, and have a fun time of it with some friends. Keep in mind, deployment can make you a little cuckoo. I threw myself into it, but I didn’t need any additional stress, so I planned it WELL in advance, and although it seems like a ton of work, by the time party day came around, I just sort of got everything out & laid it nicely around the room. Easy peasy.
So I had this funny sketch I had done of my daughter intensely focused on her “tea” that was perfect for the invitations.

The idea was that kids could show up in hats & have some fun. My friends surprised me, and most had not only their kids in hats but themselves as well! One thing I’ve learned from homemade kid’s parties is to have something for kids to DO right off the bat, so there’s no awkward waiting-around-for-everyone phase (kids have been known to have short attention spans). So I got some inexpensive foam visors from the craft store, a few plain stickers, lots of foam stickers, and let the kids have at it. We didn’t even have chairs–I just laid tablecloths on the floor (which fit the “tea party” theme anyway) and let the kids play with the stickers & hats while the mamas talked.

I got plain ol’ cookies (I think they were pre-made grocery store ones), and decorated them with hearts and card symbols with a simple tube of icing.
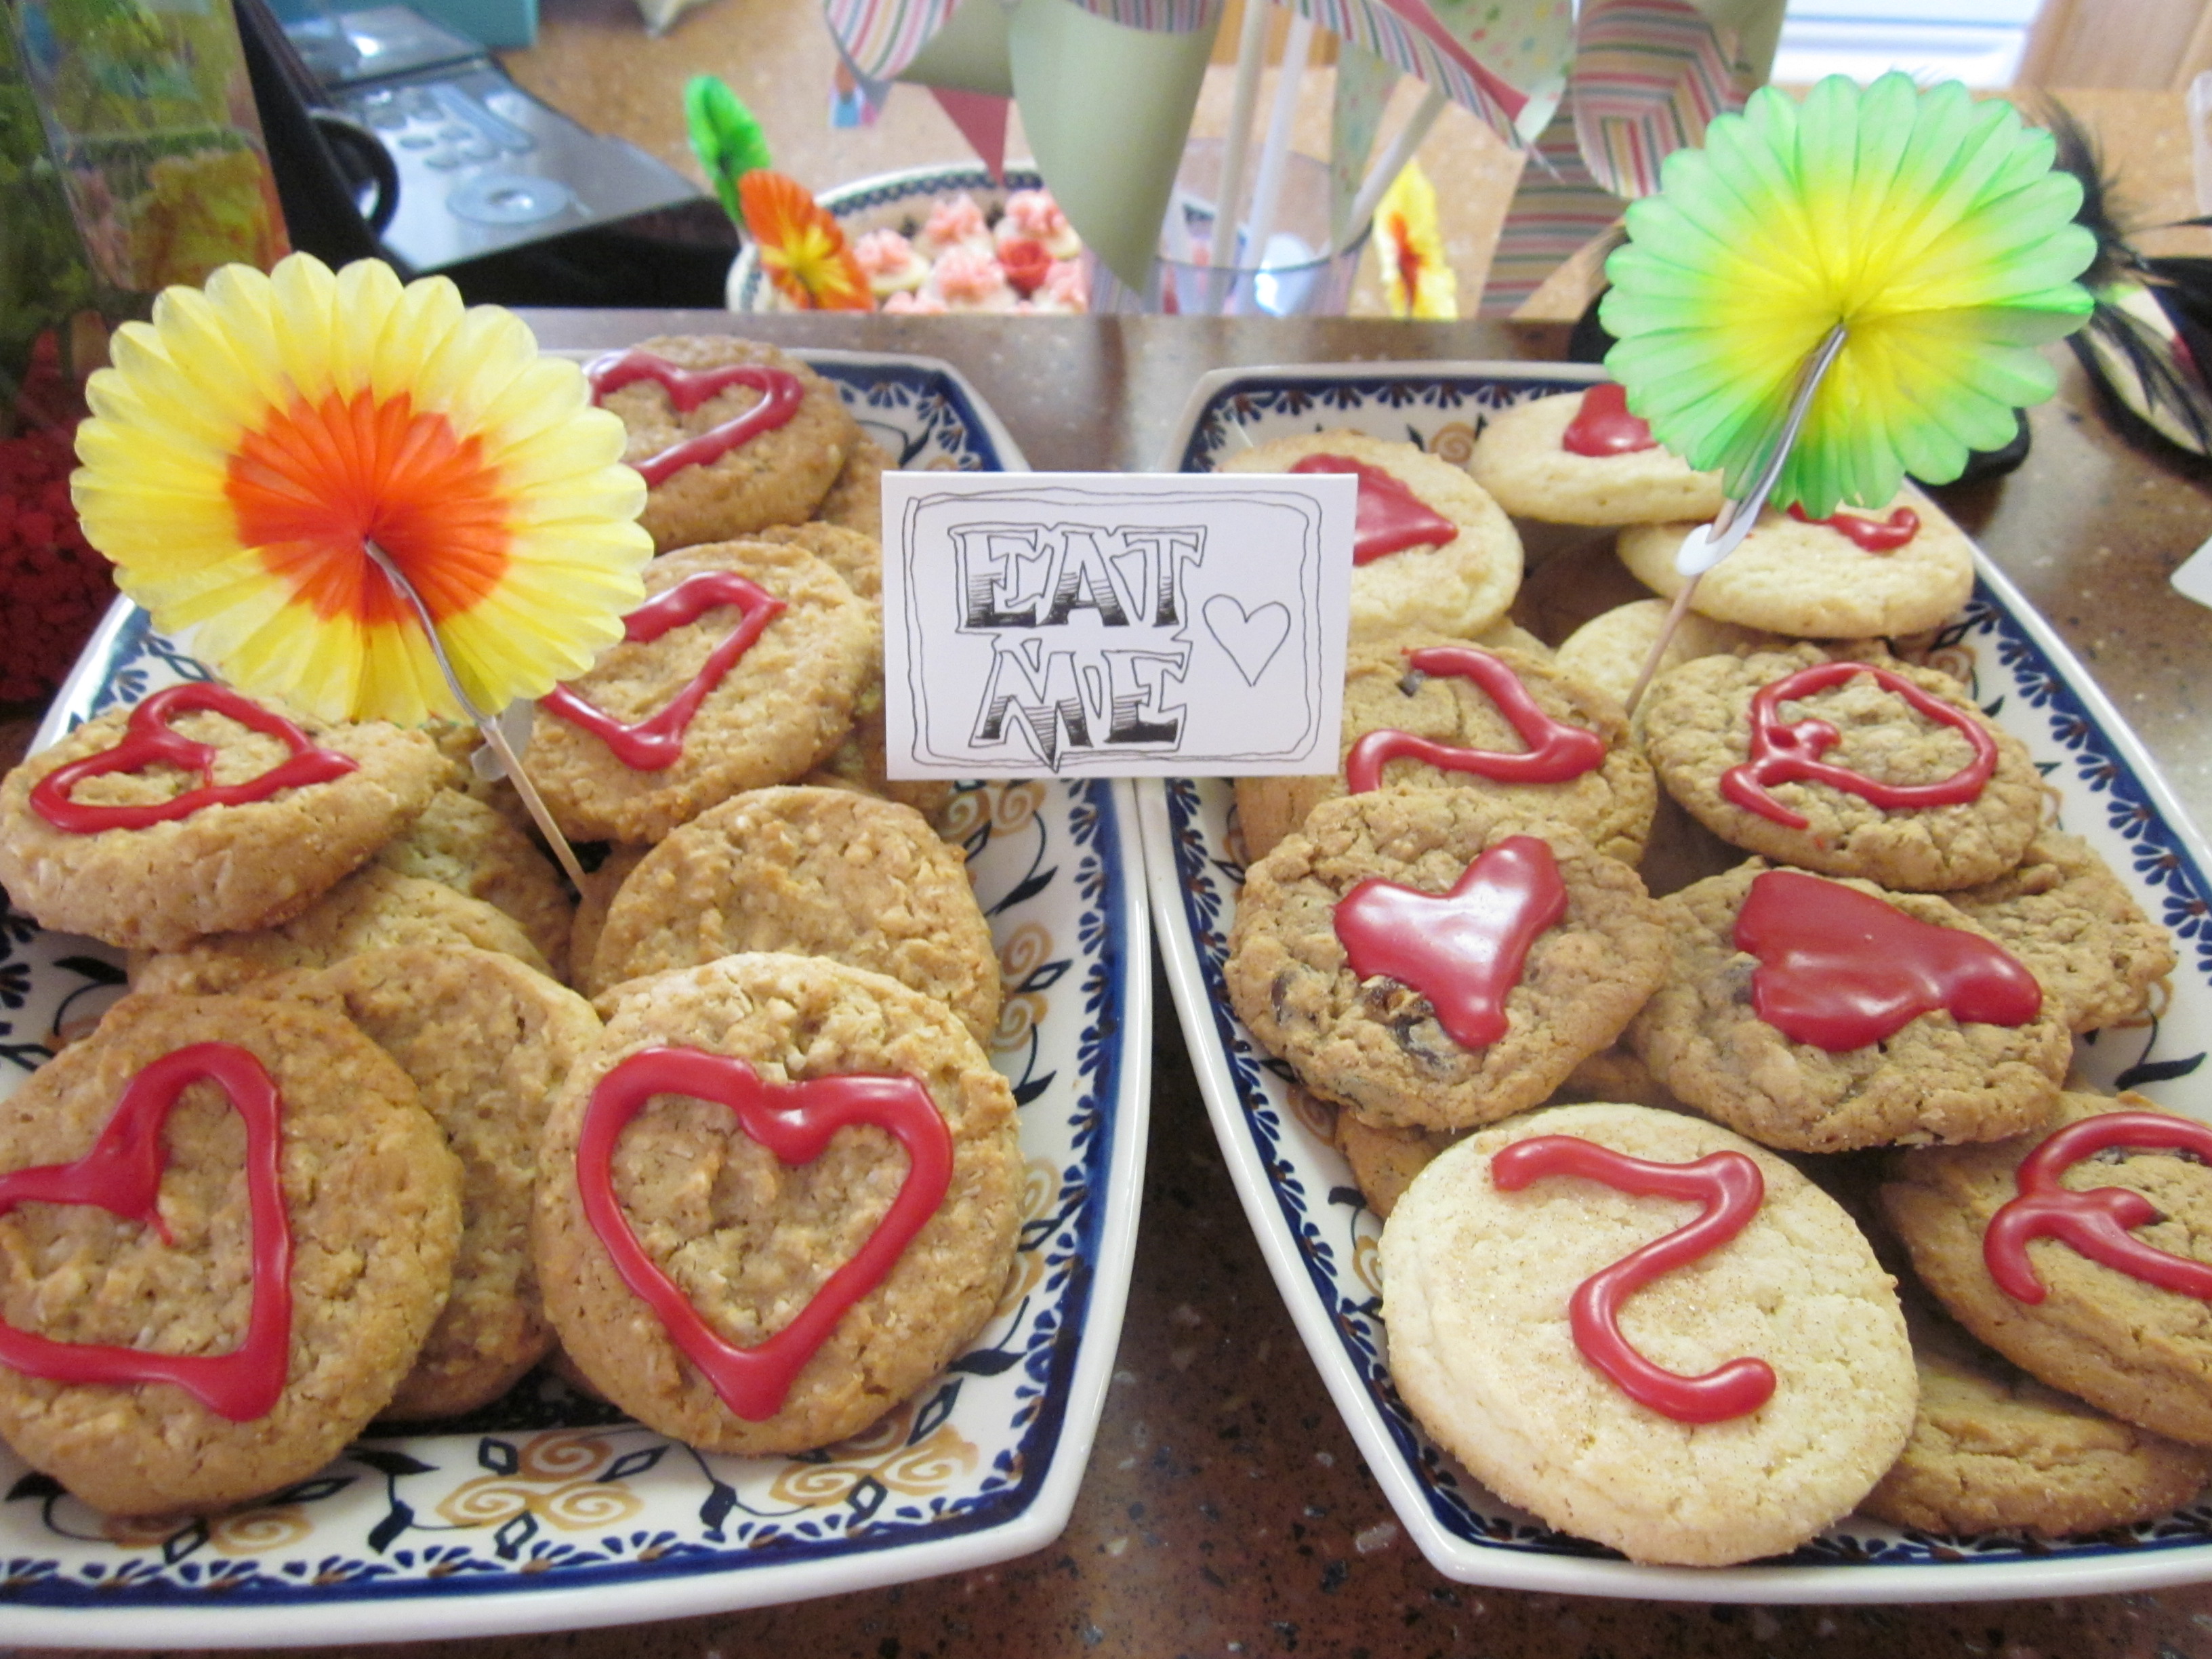
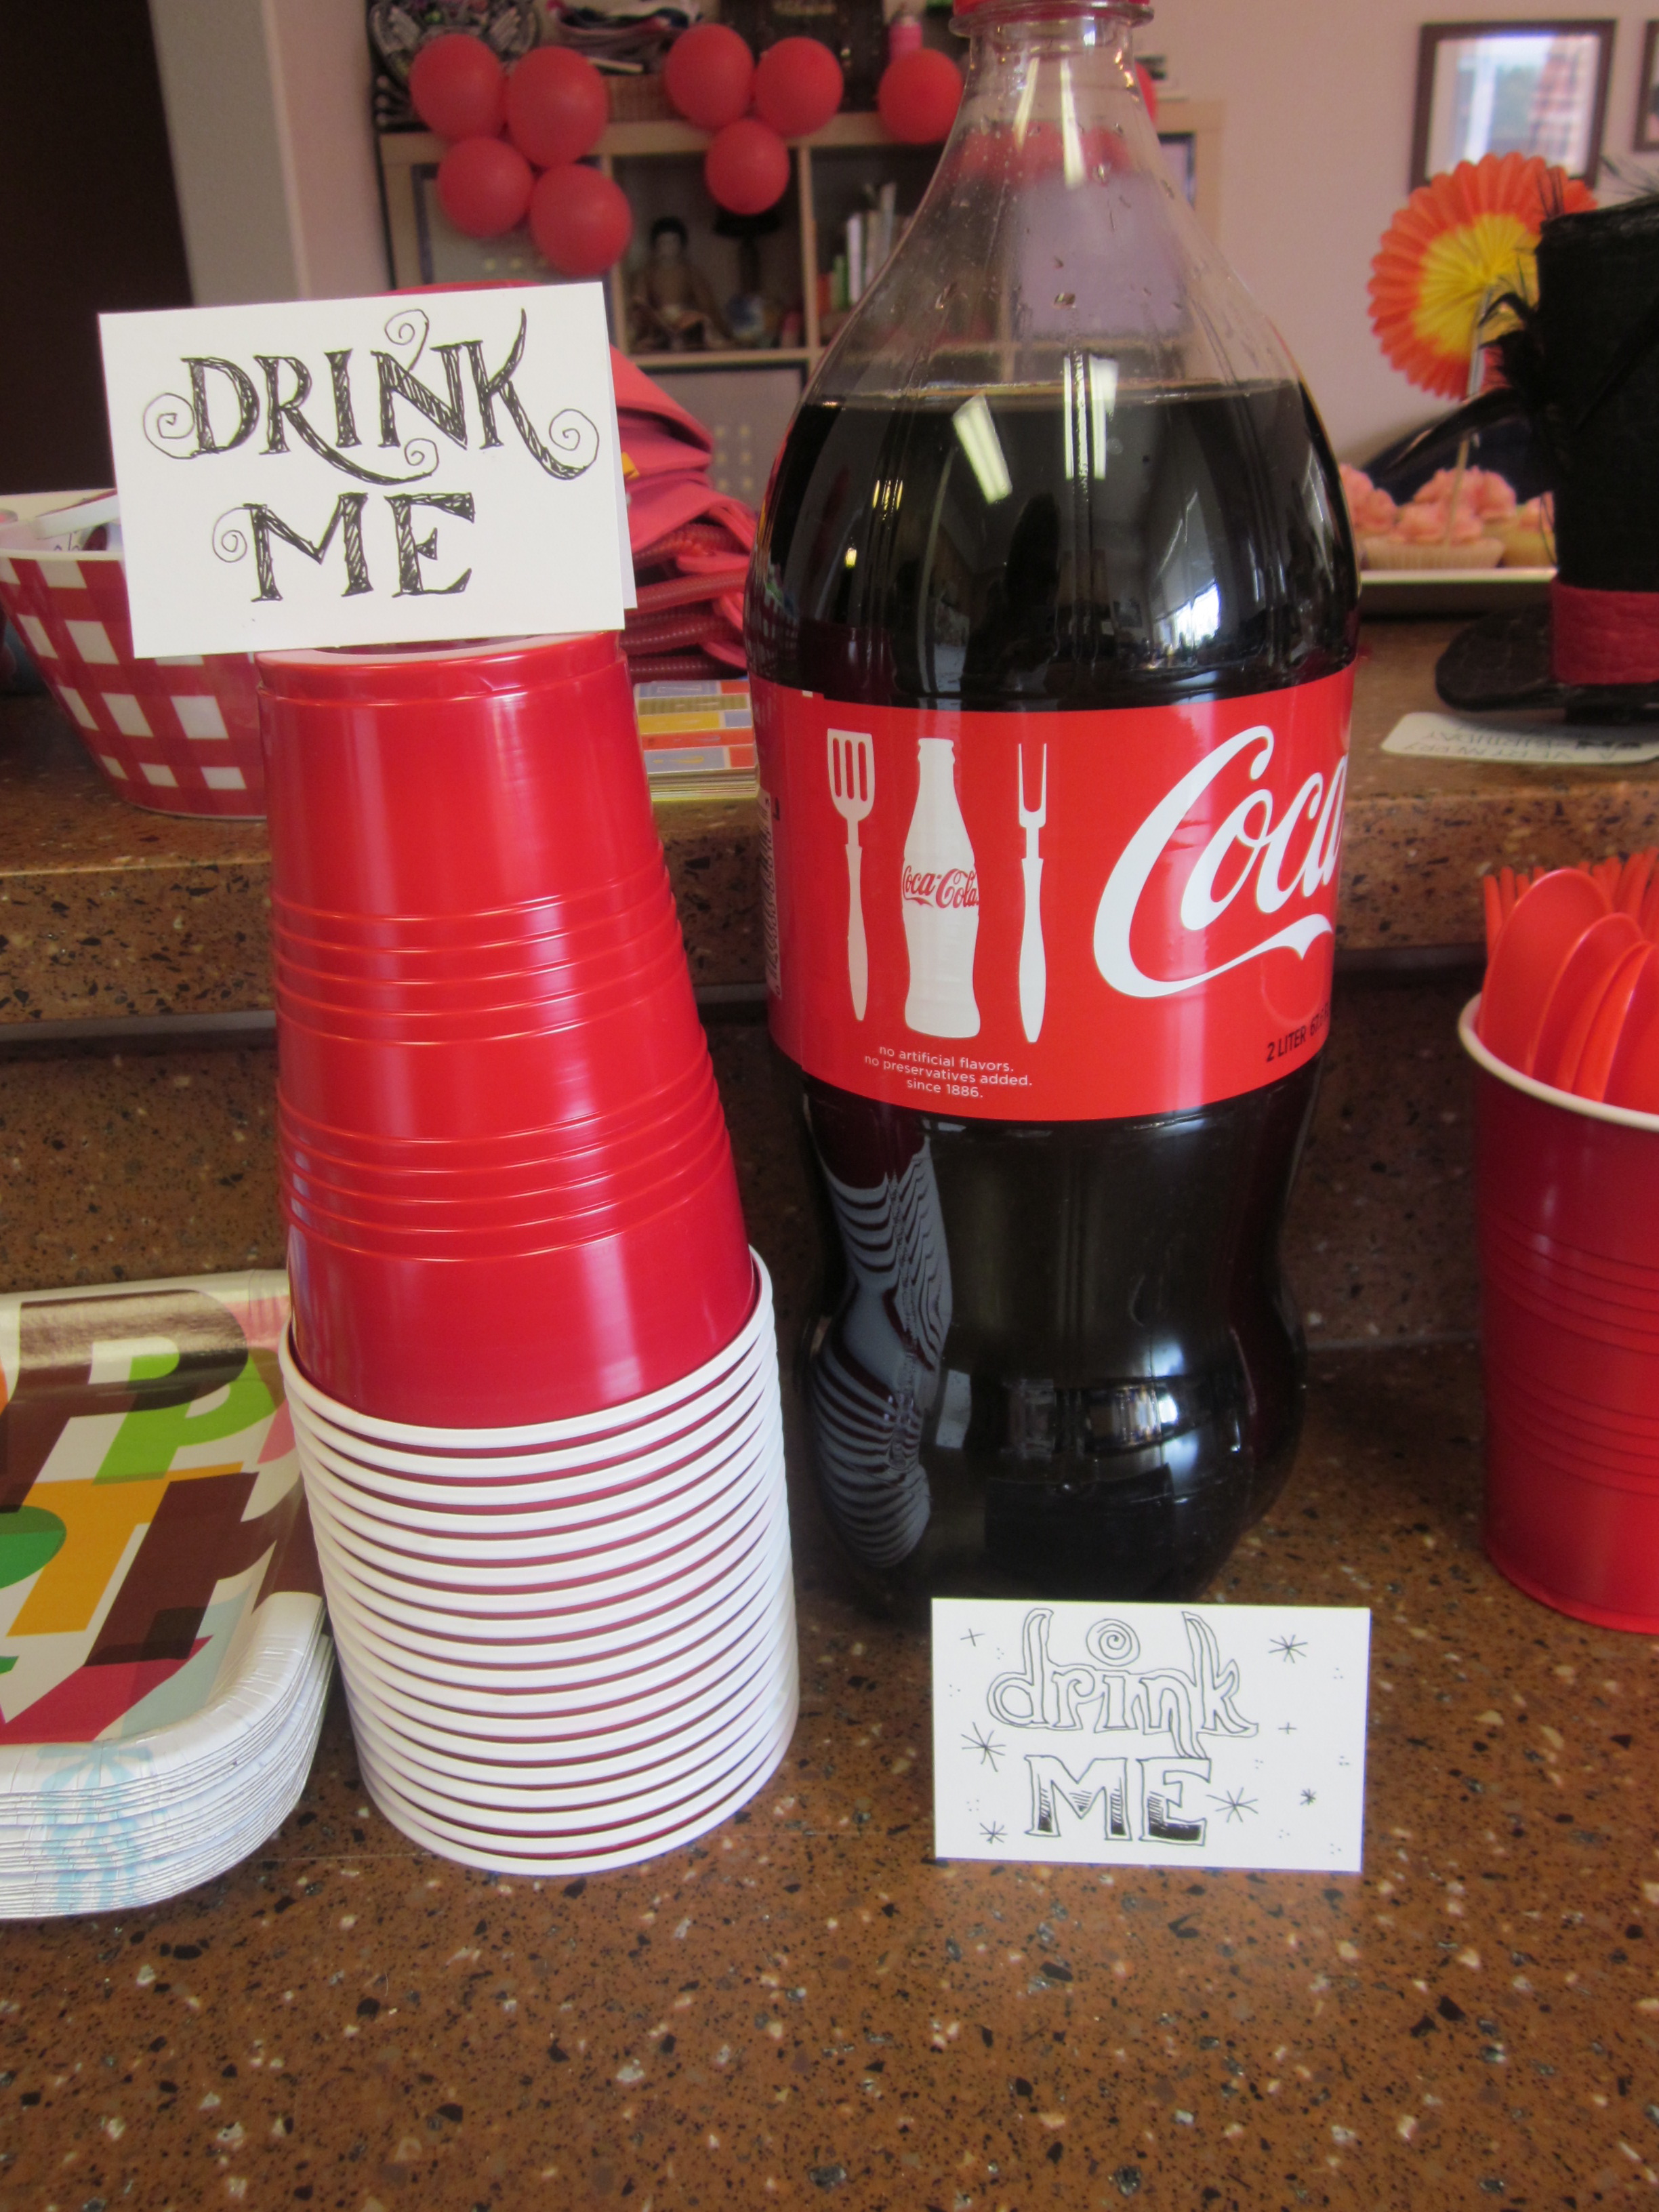
I had little paper signs that said “eat me, ” “drink me,” “we’re all a little mad around here,” and “don’t step on the mome raths.”
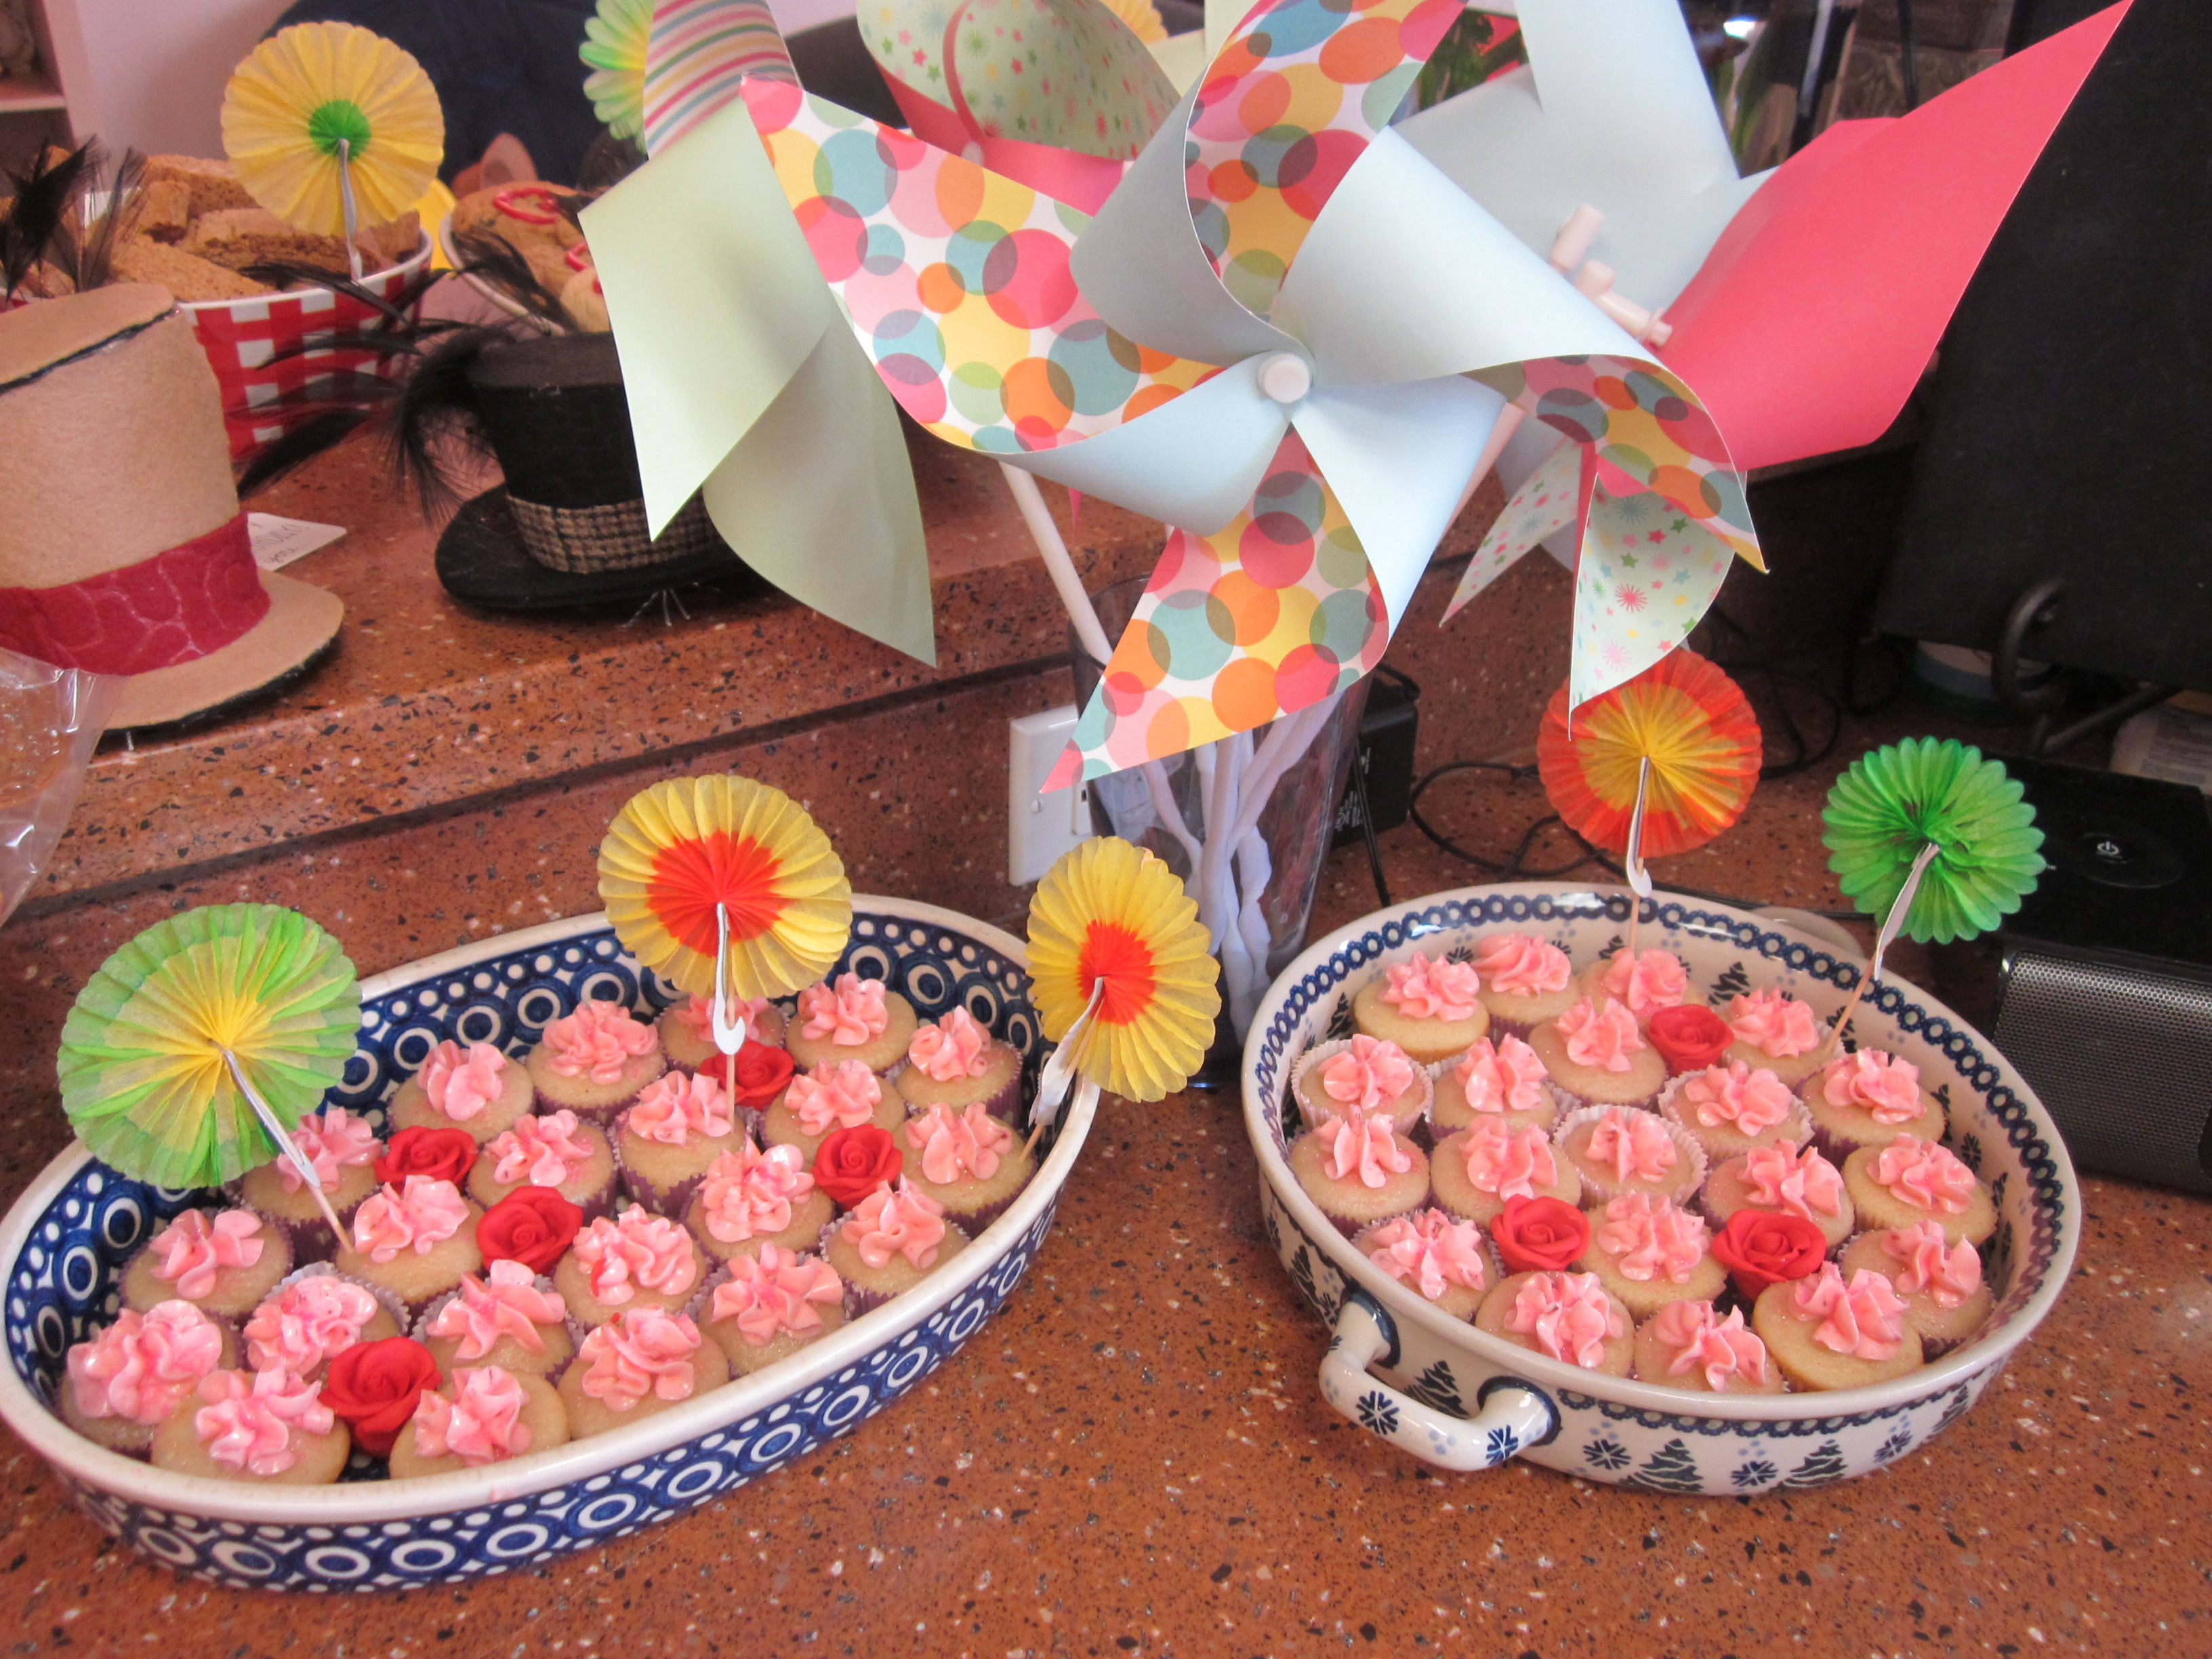
I had splurged a little on a local bakery’s mini-cupcakes, and put store-bought little sugar roses (from the cake decorating section of stores) in them.
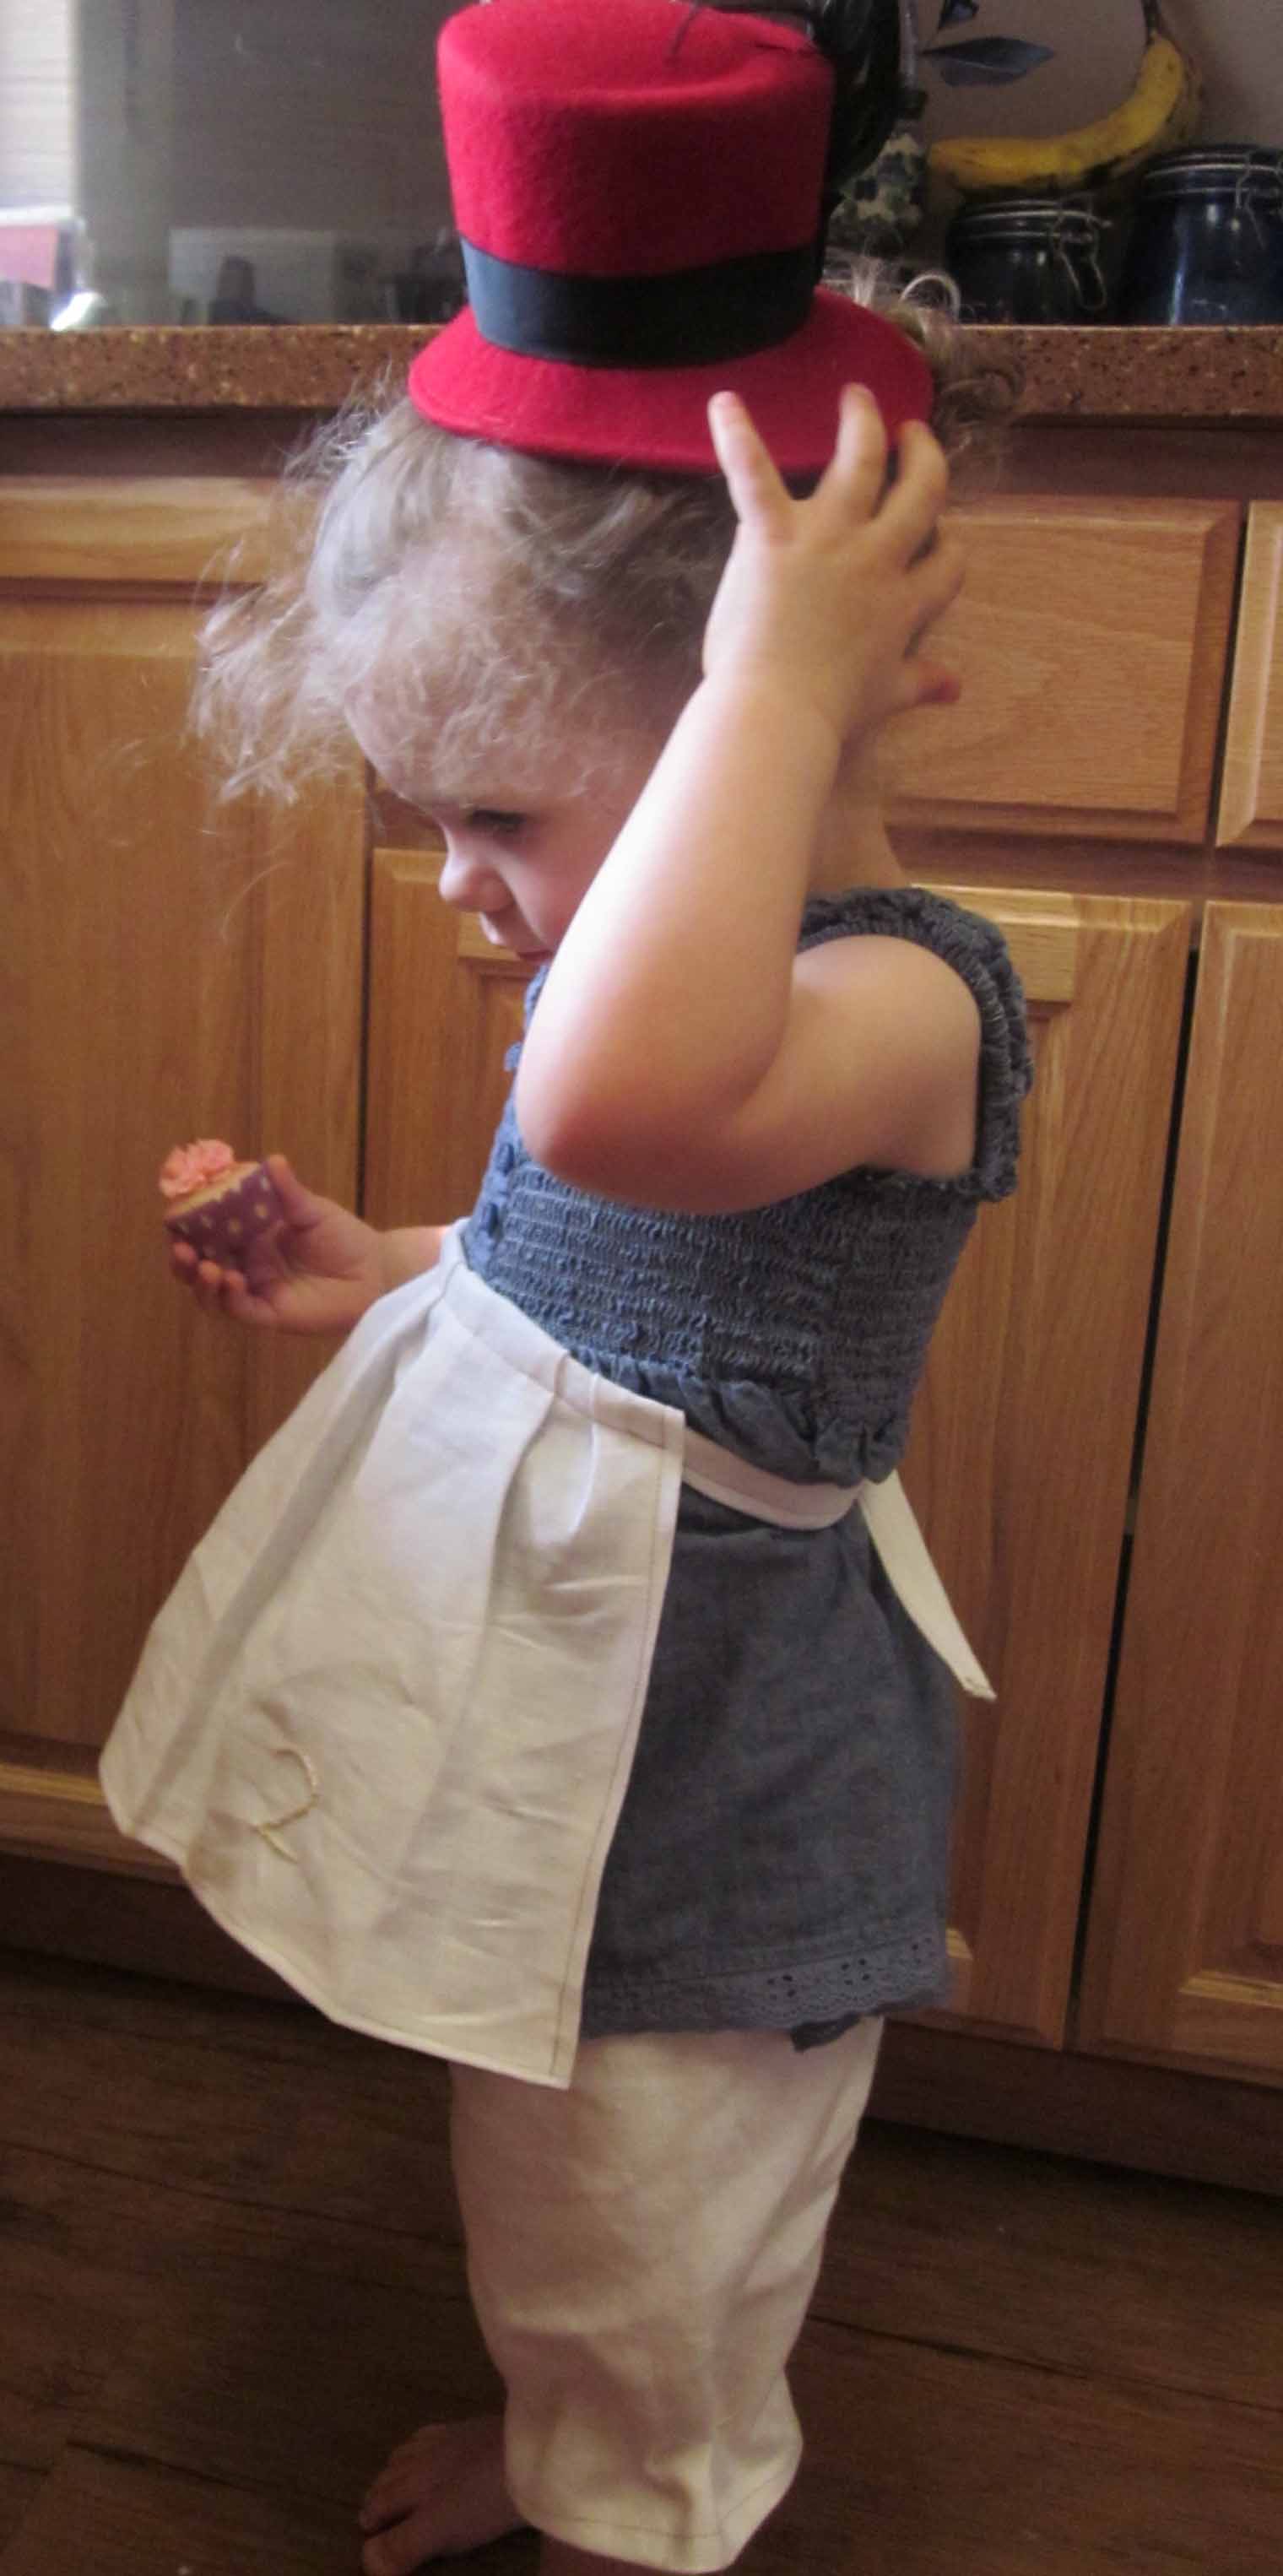
My neighbor, a crafty friend, had helped me sew some little bloomers and an apron for my daughter, to pull of a sort of “Alice” look.
The fancy footwork came with the cake. I had done a full-fondant cake for our daughter’s first birthday (more for me, just to see if I COULD), and didn’t really feel like taking that route again. But I did have my mom’s awesome buttercream recipe, and a ton of food coloring. I even made the cake batter rainbow swirl, as I had seen all over online. Fondant eyes, teeth & nose, 2-layer cake, and boom–the Cheshire Cat. (I even accidentally jacked up the top layer, and calmly just cut it out and drew his ears on the bottom.)

As one of the fun parts of the party, I had a few mini felt top hats for anyone who didn’t come with a hat and didn’t want to feel left out. (Also, they decorated the place nicely.) When I was researching some party ideas early on, I had seen an awesome tutorial online that was super easy and fun to do, and basically used felt and random embellishments.

I hot-glued everything together, and mostly used plain felt sturdied with cardboard (although the pre-made sturdy felt works best). I had seen some hot-glued to headbands before, but I wanted something a little sturdier, so I decided to hot glue the top side of hair clips to the underside of the hats, and it worked REALLY well. It allowed the hat to stay on through the whole party.


They were so fun to decorate and embellish with pennies, feathers, buttons, and whatever else I had lying around, and I even invited some guests to take them home as party favors.

All in all, a “fancy” birthday party that seems like a lot of work, but when done in little steps well in advance, wasn’t so bad at all. I had a great time with friends, the kids had fun, and the best part is I wasn’t stressed at all! Seems silly for a party she’ll never remember, but as I said, during a deployment, sometimes your friends are all you have to help you make things better. I was grateful for everyone that showed up, and I’m pretty sure everyone had fun!
The felt hats were especially fun. Might be a cool kid’s project to make a couple of hats up in advance, and let the kid decorate them…
Distractions: On Kids and Creating

I’ve found being an artist a very solitary lifestyle…it’s something I often do by myself. I could spend hours and hours at a time on my own, just painting and drawing, sewing, sculpting…creating. Often, I wouldn’t start a project unless I could devote three to five hours on it.
After I had my daughter, I found it difficult to find the time to carve out to create. I couldn’t have the hours and hours on end to myself–there was another little person there, asking, needing, wanting, and I enjoyed her very much. I still felt the tug to create, I just had to learn to enjoy it in smaller increments. To be able to put it down at a moment’s notice, and pick it up again quickly, when I got a chance.
People ask me all the time, “how do you find the TIME to do all these projects??” And the answer is that I didn’t much, for the first couple of years. I waited until bedtime.
But now that our daughter is four, the answer to that question is: DISTRACTIONS. She’s developed a love of art and crafty things. When we’re out of something (anything), she’s been known to say “well, let’s just make our own.” I’ve taught her that there are no mistakes you can’t fix. I’ve taught her about “happy accidents” (an artistic lesson my mother instilled in me when I was young, and Bob Ross reasserted). Now that’s she’s a little older and enjoys crafts and drawing and creating, I’ve learned that I CAN create with her around. I’ve learned a little bit about how to SHARE my time, which has always been difficult for me, especially concerning artistic endeavors… And I’ve learned that if I let her go wild doing something similar to what I’m doing, she not only enjoys herself, but she learns from me. If I’m painting on fabric, I let her paint on fabric. I don’t mind a mess (but I also don’t put her in her best clothes when we paint). Sometimes I let her use the “good stuff” (like acrylics and permanent markers), and teach her how to use them correctly. I remember being a kid and the feeling of using new paints, or having a marker that was dried out, or the difference between drawing on newsprint versus fine sketchbook paper. If she’s into it, I want her to experience all that, too.
Many of our trips to the craft store are spent with me getting my supplies and her picking a “project.” Sometimes they are the pre-made ones, and sometimes she comes up with projects all her own. This bird mask is a project she came up with all on her own. I mean , she knew exactly what she wanted to do:

We also subscribe to something called Kiwi Crate, which sends out a box every month full of 2 or 3 super easy, super fun kid projects. She’s always so excited to get them in the mail and get started on the projects. And best part? They require very little parental assistance!
…So this is how I do all the creative projects I do, now that we have a kid. I’m very grateful that she is so artistic, and I’m enjoying that for as long as it lasts. I know as a parent, things constantly change, at just the moment you think you’ve got things under control, but for now I am enjoying sharing my creative time.
Another Back-To-School Idea: Custom Clothes!

I’m not a big one for character clothes, and sometimes it’s hard finding kids’ clothes that don’t have cutesy sayings all over them. So in getting ready for the first day of school, consider customizing a plain ol’ dress or shirt! You can usually find pretty inexpensive plain clothes any ol’ where, hiding in the kids’ section of WalMart or your local craft store–shirts for around $4 or a little dress shirt (like the purple one above) for around $9.
A tricky, fun tool to have is this fusible, iron-on web. The directions are very easy, written on the back side of the package. Super easy.

Simply stick the web like a sticker to the back side of the fabric you’d like to fuse to your clothing (in the case above, a brachiosaurus and pteranadon my daughter wanted on her dress shirt). Then draw the design on your fabric and cut it out (it’ll have the fusible web stuck to it). Then iron it on your clothing, and BOOM you have a customized piece of clothing of whatever you like!

You could do this for all sorts of things. When I was in roller derby, we’d customize all sorts of things for ourselves. It’s not just for kids! Backpacks, bags, pants. So far, it seems to have held up after several washings, and with living through the wear and tear of a 4-year old. No sewing required, but I’m sure if you wanted to get crafty, you could embellish with beads or embroidery. So have at it! Get creative!
(On a side note, if you want to get your kid involved, I’ve also let ours go crazy on a $4 shirt with some Sharpie markers. Now it’s one of her favorite shirts!)

Doodle Chimes
Our kid likes to draw a lot. I mean a LOT.
I take photos of all of them, because I’m so fascinated by them. I love watching her skills develop, and love seeing how her mind thinks, how she can see something and observe how it’s done, and sort of meld that with her own work.
Through all my scouring the internet, I’ve seen lots and lots of ideas of what to DO with all these doodles, and I’ve done quite a few of them. We have bulletin boards where we’ve pinned some of our favorites. We have some in changeable frames. I’ve had strings with doodles clipped to them with clothespins. My mother uses the photos of doodles in the backgrounds when she makes a digital photo album. I’ve heard of people making books full of kid doodles.
I wanted a way to show them as a decorative piece in the house; a way we could enjoy them in an awesome way while putting all those doodles to good use.

So I got some laminate paper, stuck them on there to keep ’em safe, punched some holes in them, and strung them from eachother. We hung them in her bedroom window, and I think they turned out lovely!
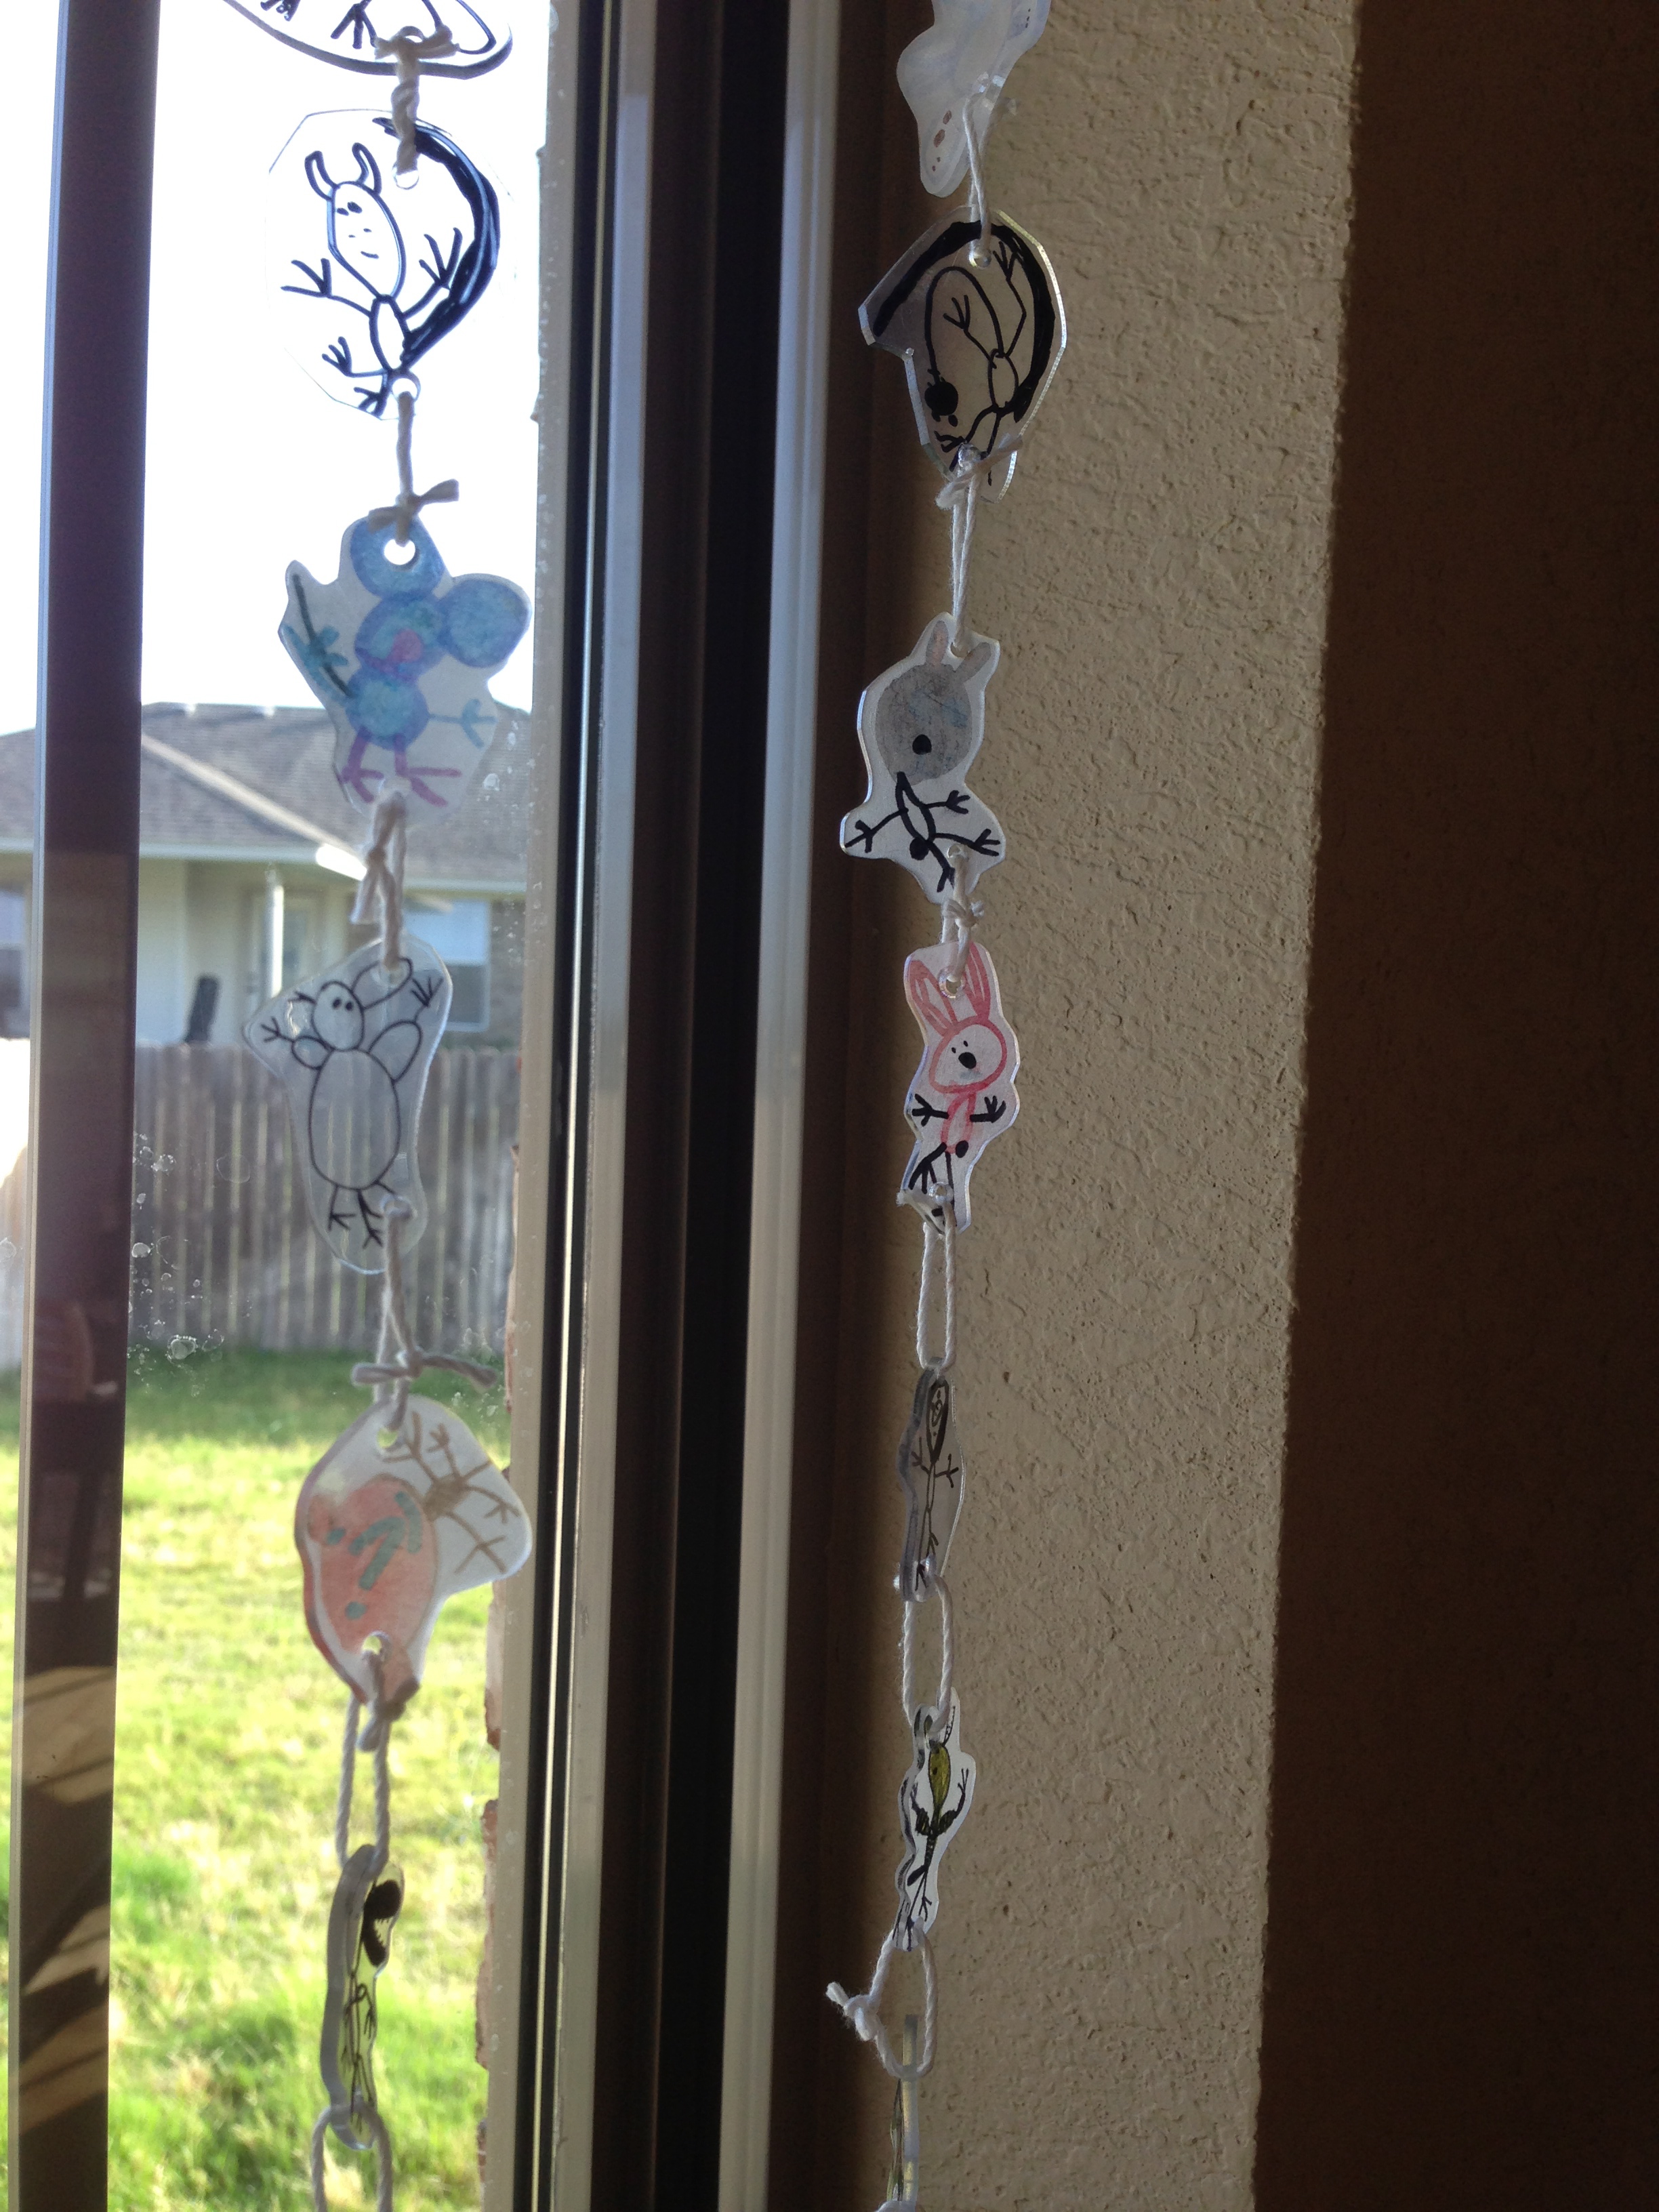
Our daughter went through a Shrinky-Dink period for a few weeks, where she created TONS of Shrinky Dink doodles. What to do? Why, same thing, of course! Strung up little doodles look like lovely little wind chimes hanging in our kitchen windows! With Shrinkies, you have to either punch the holes before you shrink them in the oven, or spend some quality time with your Dremel and a tiny drill bit….
So what do you do with all your kid doodles?
finger monsters
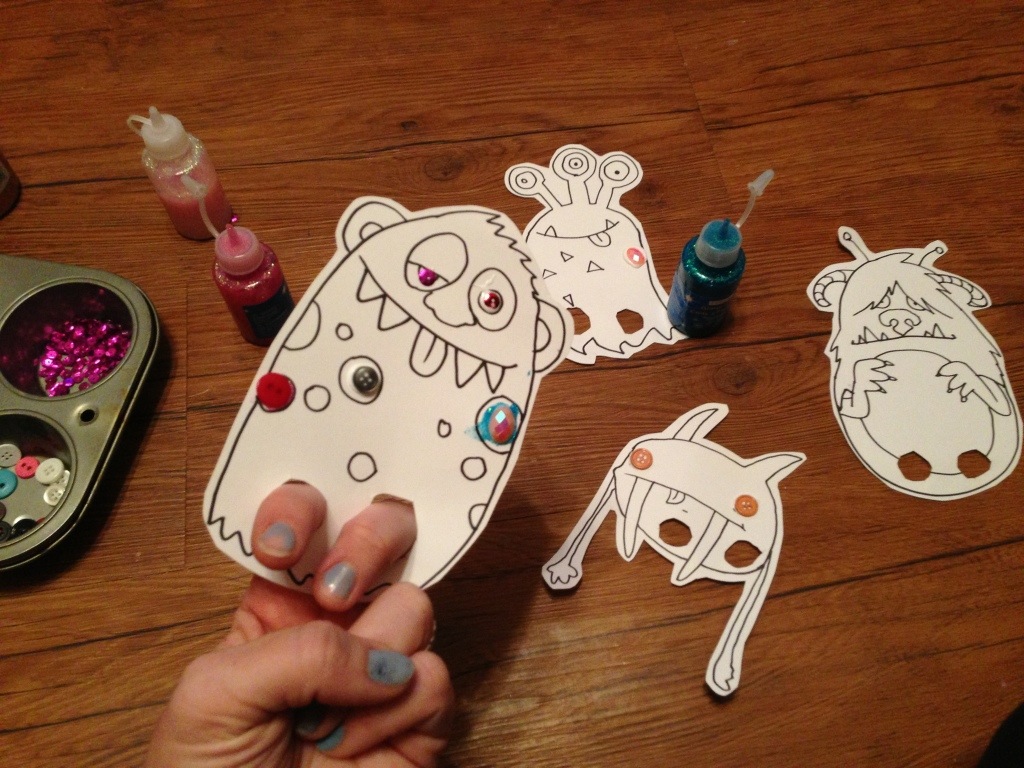

Remember finger puppets? We were looking for a kid-friendly project one day, and I remembered these. I got some white card stock, doodled a few monsters (with no legs, of course), and cut holes out for little fingers. The fun part was letting her decorate them. I put a variety of sparkles, sequins, plastic jewels and puffs in a muffin tin and let her go wild!
(PS: The little walrus-toothed guy came from a drawing from a college buddy, James Stowe, who runs a website called Sidekick Quests. He has a thing called “Fiendish Fan-Made Fridays,” where he takes kids’ doodle monsters and makes fancy grown-up versions of them. This one was a “Toelizer,” a monster my girl made up…)

