Another Back-To-School Idea: Custom Clothes!

I’m not a big one for character clothes, and sometimes it’s hard finding kids’ clothes that don’t have cutesy sayings all over them. So in getting ready for the first day of school, consider customizing a plain ol’ dress or shirt! You can usually find pretty inexpensive plain clothes any ol’ where, hiding in the kids’ section of WalMart or your local craft store–shirts for around $4 or a little dress shirt (like the purple one above) for around $9.
A tricky, fun tool to have is this fusible, iron-on web. The directions are very easy, written on the back side of the package. Super easy.

Simply stick the web like a sticker to the back side of the fabric you’d like to fuse to your clothing (in the case above, a brachiosaurus and pteranadon my daughter wanted on her dress shirt). Then draw the design on your fabric and cut it out (it’ll have the fusible web stuck to it). Then iron it on your clothing, and BOOM you have a customized piece of clothing of whatever you like!

You could do this for all sorts of things. When I was in roller derby, we’d customize all sorts of things for ourselves. It’s not just for kids! Backpacks, bags, pants. So far, it seems to have held up after several washings, and with living through the wear and tear of a 4-year old. No sewing required, but I’m sure if you wanted to get crafty, you could embellish with beads or embroidery. So have at it! Get creative!
(On a side note, if you want to get your kid involved, I’ve also let ours go crazy on a $4 shirt with some Sharpie markers. Now it’s one of her favorite shirts!)

Back to School Baggies

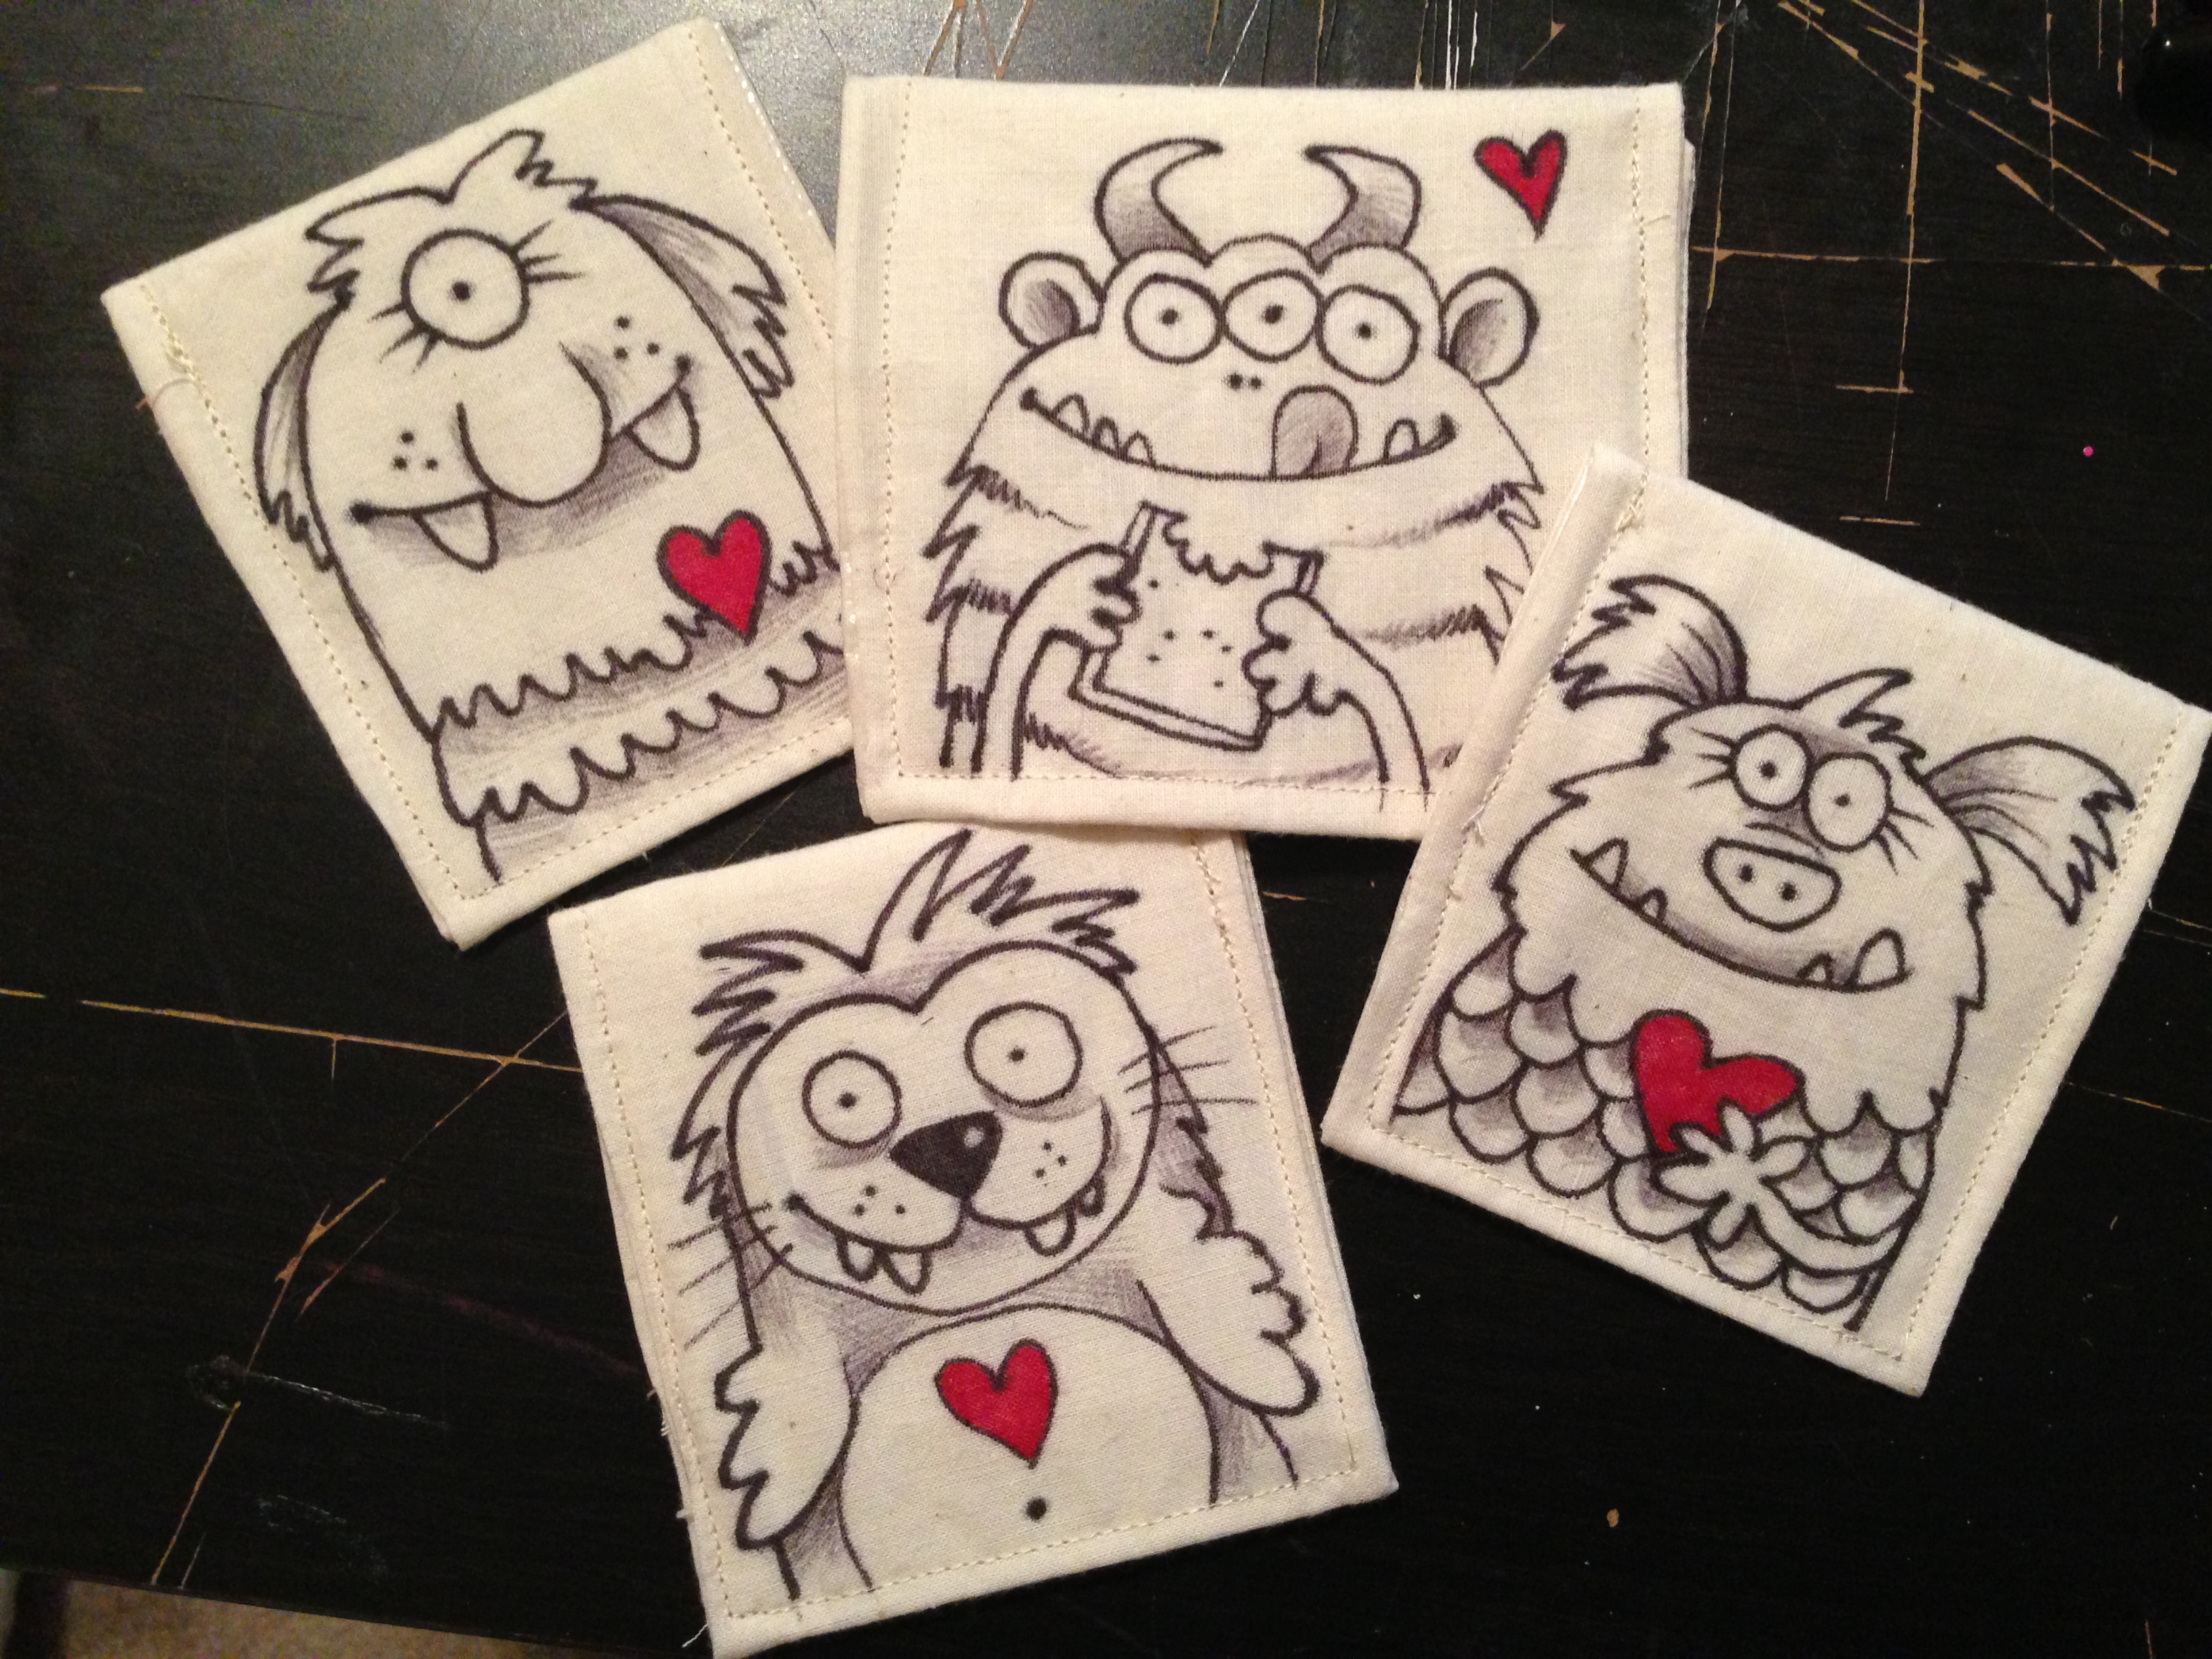
My daughter just started preschool at the end of last school cycle and she loves it. She loves having a backpack and a packed lunch. I have very fond memories of the little notes my mom would leave for me in my lunch box. Since my daughter’s only 4 and can’t read, for awhile I was having a ton of fun decorating her lunch bags with Sharpie doodles…

But being a bit of a pseudo-hippie, it bothered me a little, throwing so many bags away every day. I mean, I’m not super hardcore, but when I notice ways I’m being wasteful, I try my best to find ways that might be a little better and aren’t TERRIBLY inconvenient. We used cloth diapers when she was little, we use cloth grocery bags (when we don’t forget to take them into the store), so why not whip up a few quick reuseable bags?
When I looked around online, there were a great many DIY options, several of which seemed quite complicated for an amateur like myself, with zippers and pulltabs and fancy fabric and such….except for one: this tutorial from Rhinestone Beagle. Our local fabric department didn’t have any of the fancy nylons I had seen in some DIYs, but they did have very inexpensive fusible vinyl, which is SUPER easy to use. You iron it on, and boom–whatever you’re making is water resistant. So that was good. Secondly, I’m not good with zippers, but I can sloppily fake some velcro like no one’s business, so score another point for this tutorial. Thirdly, I worried that certain opening fasteners would be difficult for my kid to open at lunchtime, so if I wasn’t fancy enough to put in my own zippers, I wanted one that folded over a bit. And lastly: I felt a little like I was taking the easy way out, not being able to doodle something new with every lunch. (I felt I had to live up to things like this)…I compromised by going with a plain fabric, so I could doodle some monster faces on the bags (with Sharpies, of course. …They should sponsor me).
And there you go! Personalized lunch bags!
Now, in hindsight, they’re a BIT small.
…Okay, they’re tiny. The sizes I had seen online just seemed so HUGE, so I sort of winged it and made them smaller. But I can fit a cookie or two in there, or a couple of small strawberries. But just for giggles, I decided to try a few of the fancy ones. I found a shop on Etsy called Cute Little Bugs, who seemed to have the best quality & the best deal. Zippers, nylon liner, cute fabric, and even a little tag for you to write your kid’s name on it. Super cute. And they’re not tiny at all.

So, as my daughter gets ready for her second year of Pre-K, I think I’m going to have to look into trying again to make some more baggies of my own–this time human-sized. That can fit actual food inside. The point is, I want to make lunch a little special for my kid. And there’s always room for some creativity!
An Artistic Experiment…
Every now & then, I will see artwork that is so amazing and wonderful that I just have to try it for myself. Not because I think I can do better or even comparable, but maybe just to feel the same joy of creating something that makes my artsy side sing.
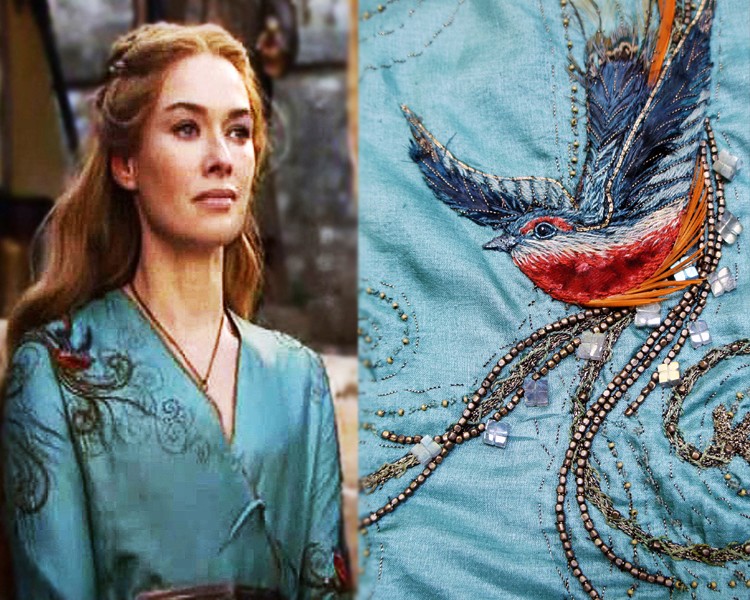
So I was enthralled when I discovered the work of costume embroiderer Michele Carragher, most notably on her work for the costumes in Game of Thrones. I am a big fan of GoT, and actually did notice quite a bit of her work in the show without knowing it…Sansa’s dragonfly, Cersei’s lions, and the Thirteens’ insects.
As an example of her beautiful work, here is a photograph from her website of a details of Cersei’s kimono-dress, with an embroidered bird. This is the one that inspired me the most..
Now I am a pretty crafty person, but I don’t know much about embroidery….but it nibbled and ate at me, until I had to try it for myself. Having never done embroidery before, really, it would make for an interesting venture.
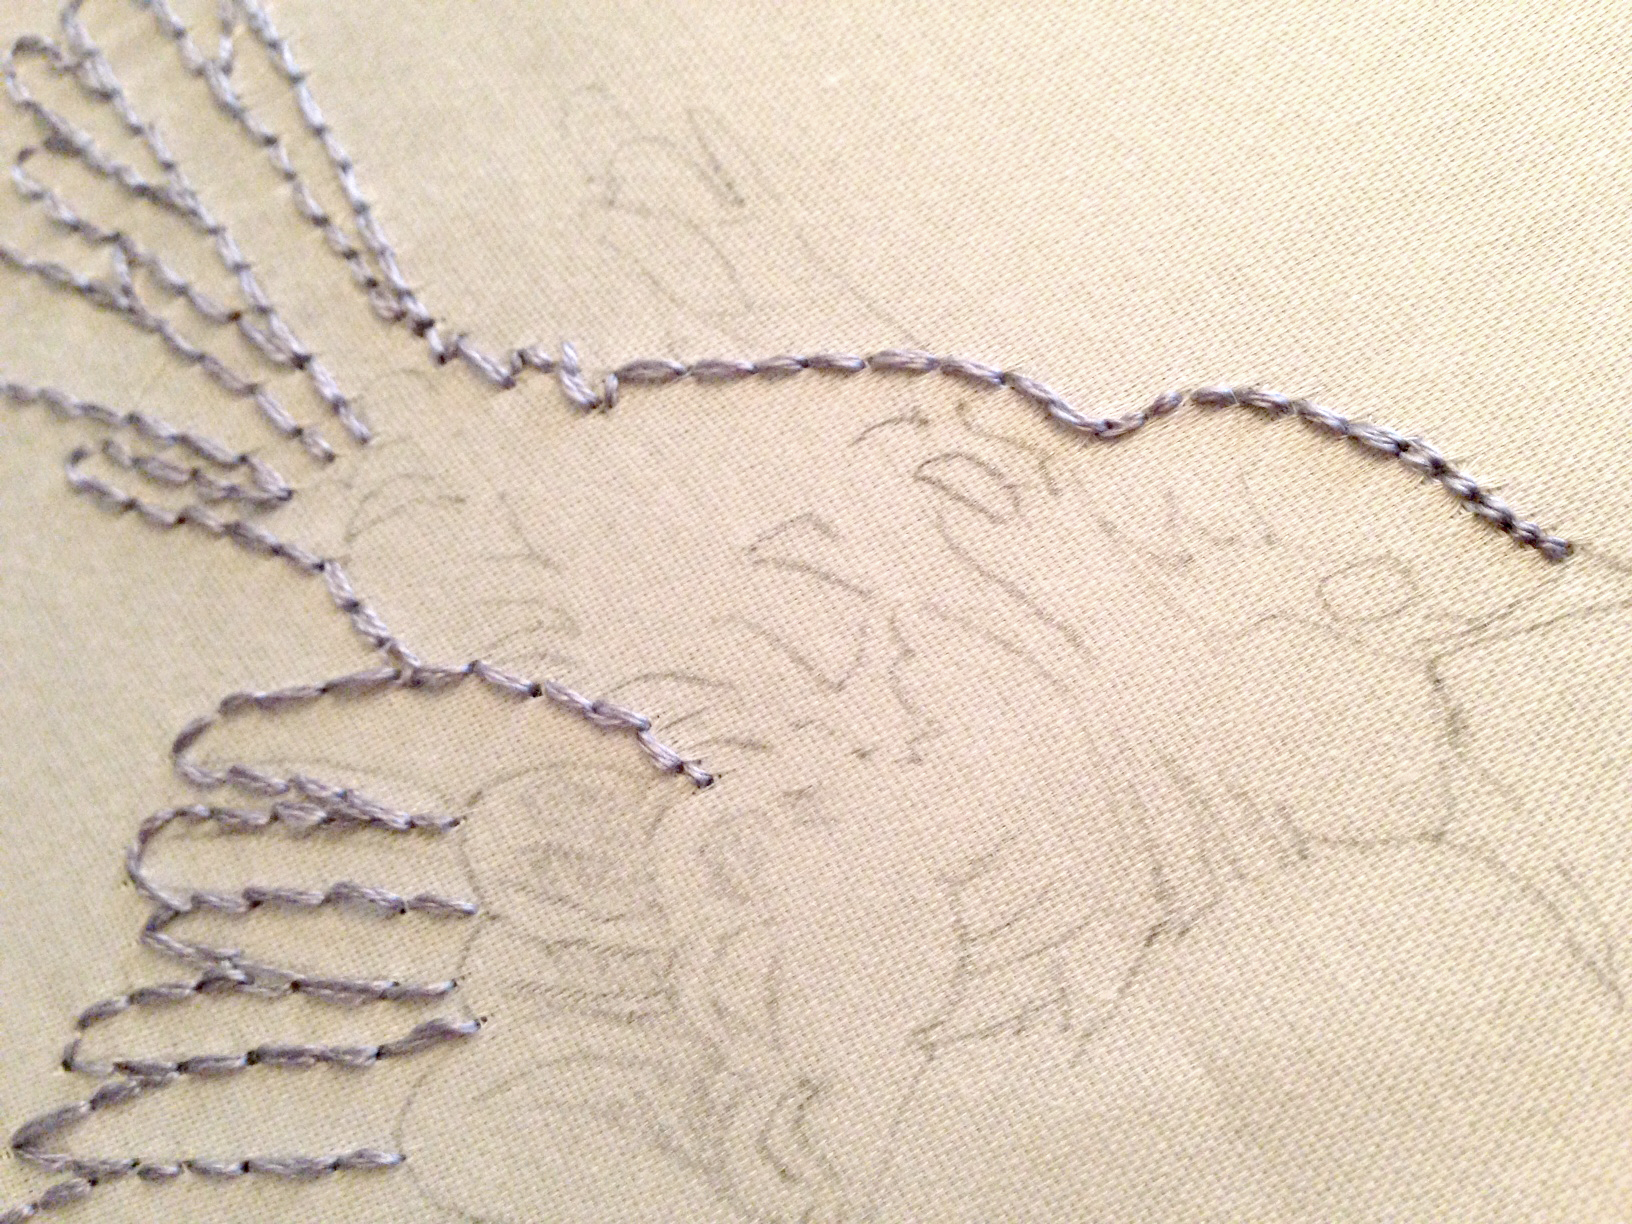
I got my supplies right away, based on what I THOUGHT I’d need. (When the mood strikes, I gotta get that junk NOW.) I sketched my pattern onto a smooth cotton piece and got to work. Of course, I thought I’d try a mockingbird first. My favorite mockingbird sketch, one that I had once shared with my granddad, a woodcarver. I had also purchased a thin book on embroidery stitches, but I rarely looked at it. I mainly sort of made it up myself. Did I also mention that I’m quite impatient? …I am.
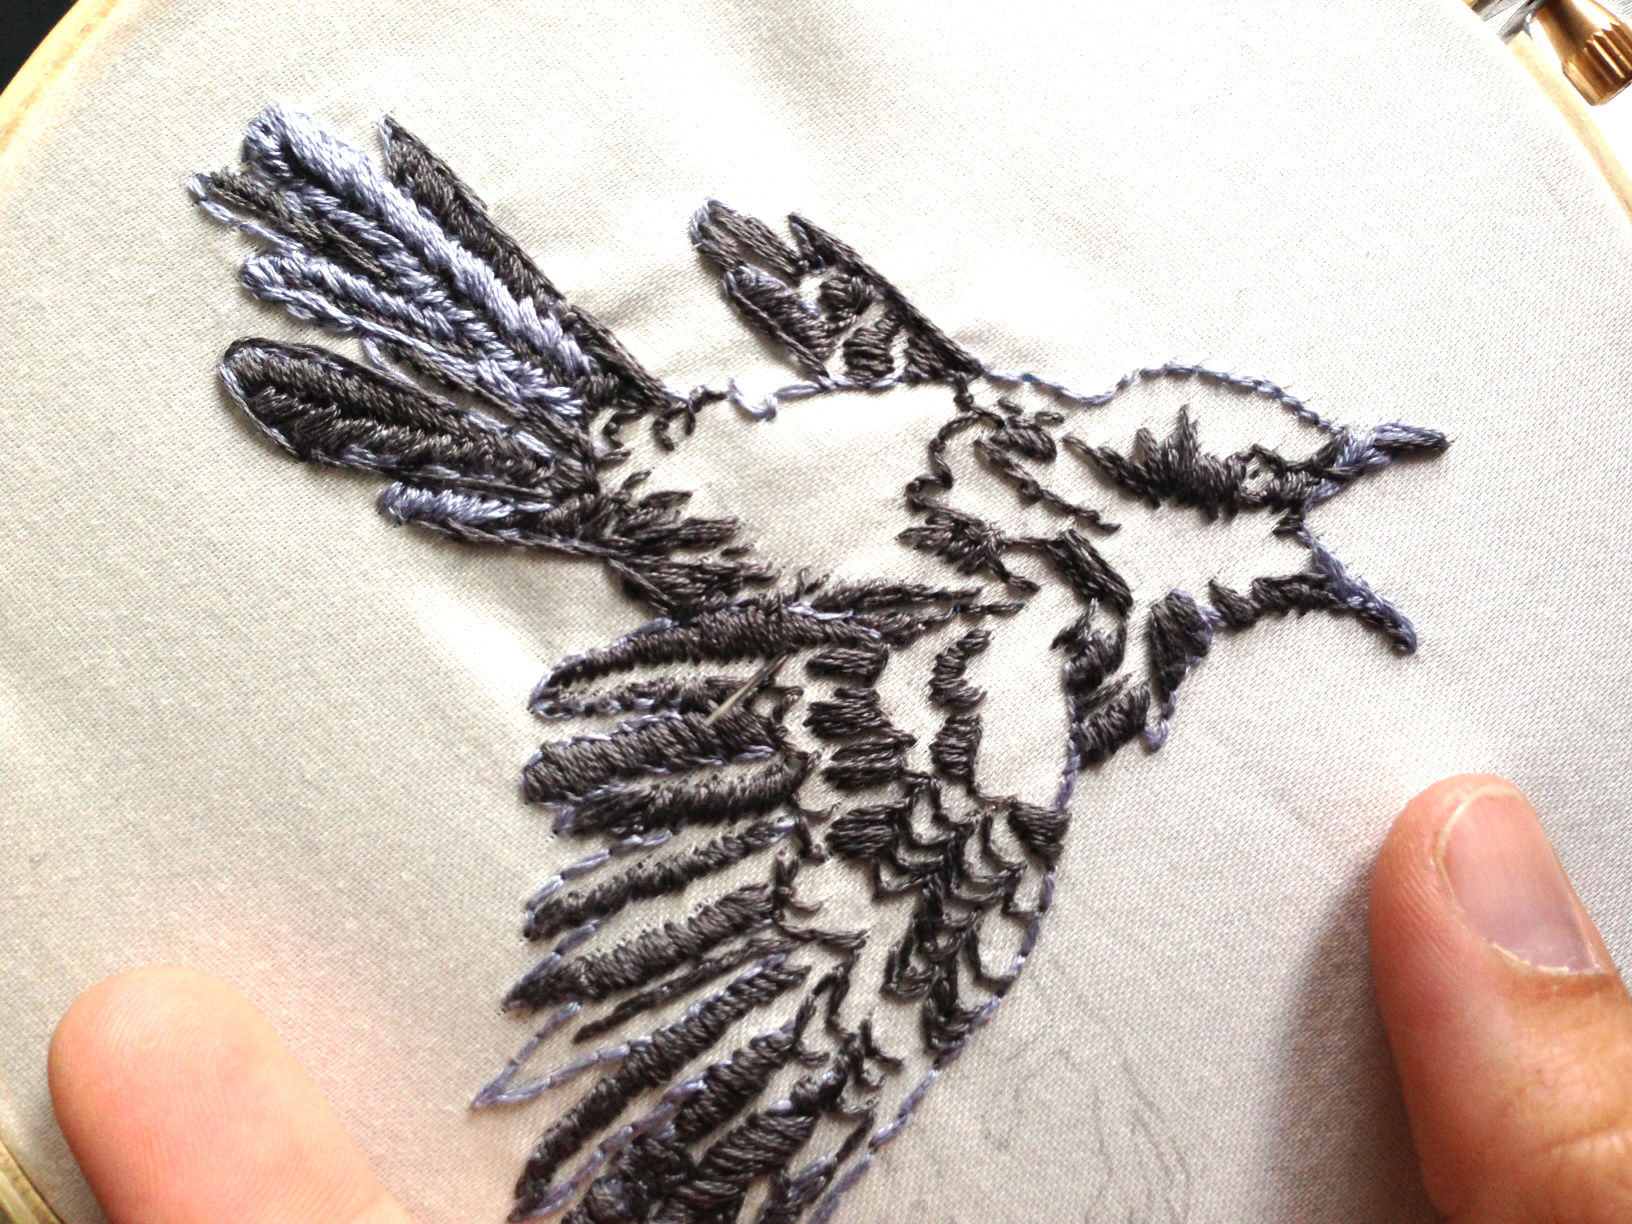
I think the outline is done in what is called called a “running stitch.” Or in my case, a “stumbling stitch.”
After the outline, I started with the darker portions, sort of filling in the shadows. Now, if you’re looking for fancy needlework, you’ll find none of that here, sir. Like I said, I am quite impatient. I tried a few techniques from “leaf” stitches, but primarily just did a basic filler stitch. So it’s all sort of wonky and crooked. I looked at a printout of the sketch for reference, and used it to sort of plan out the next steps.
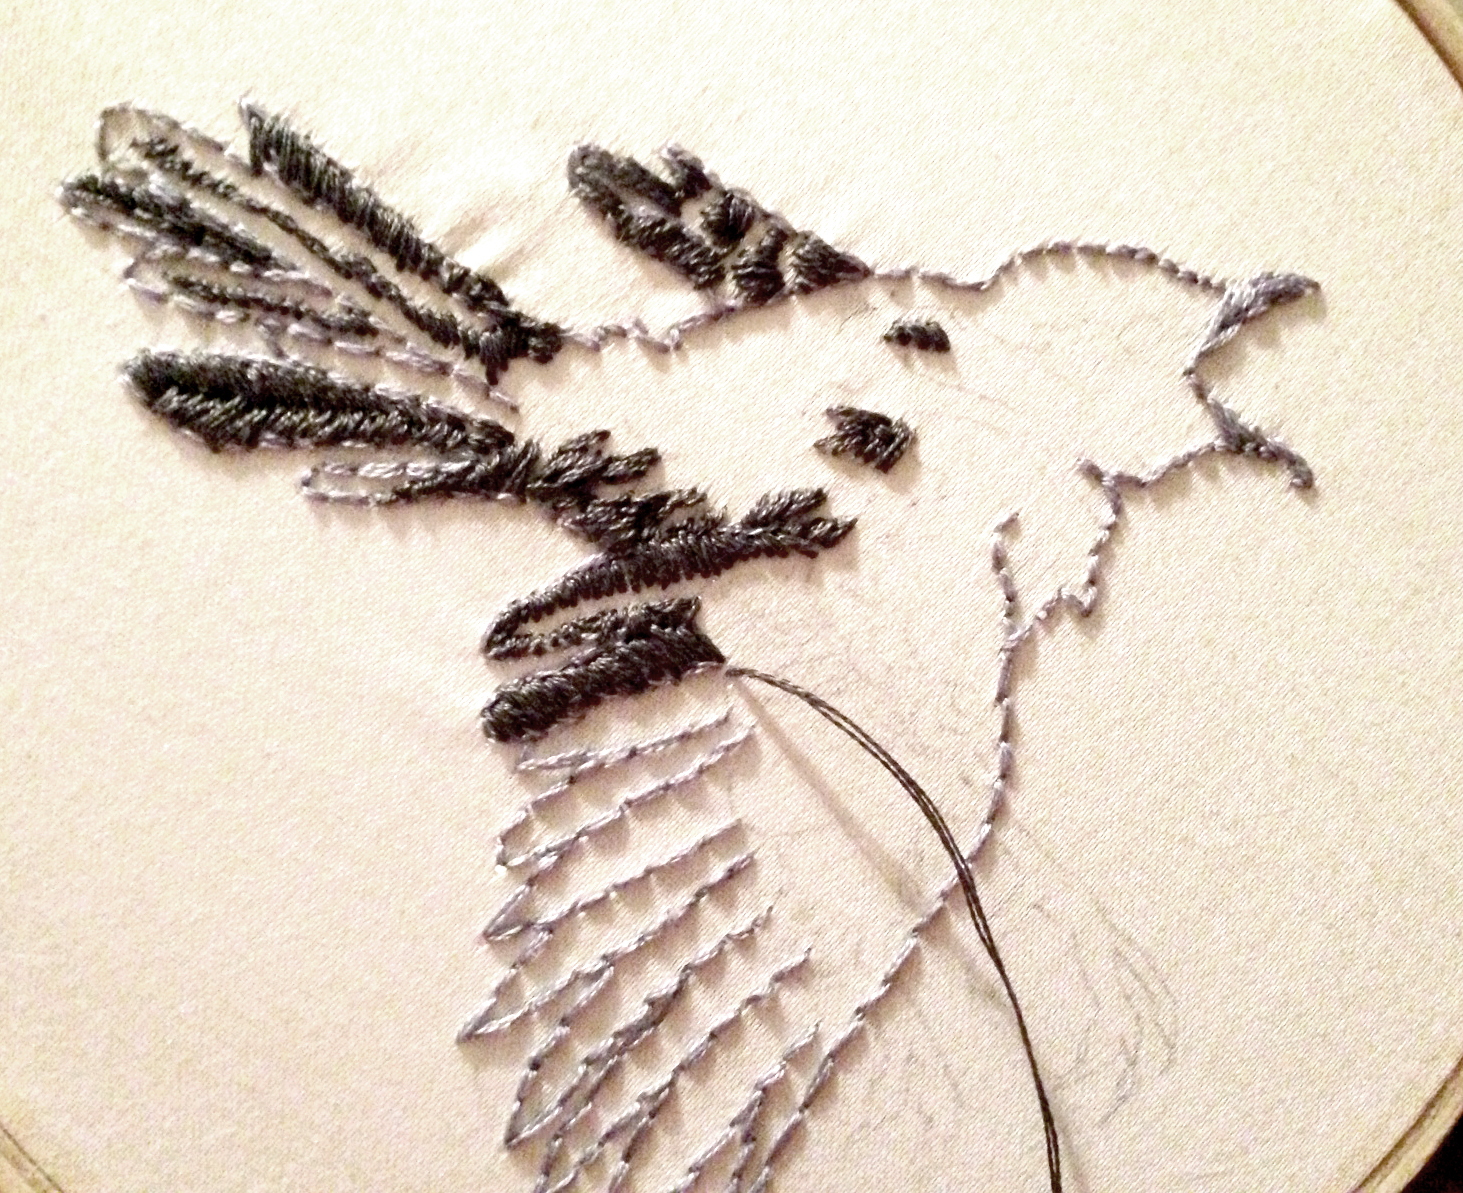
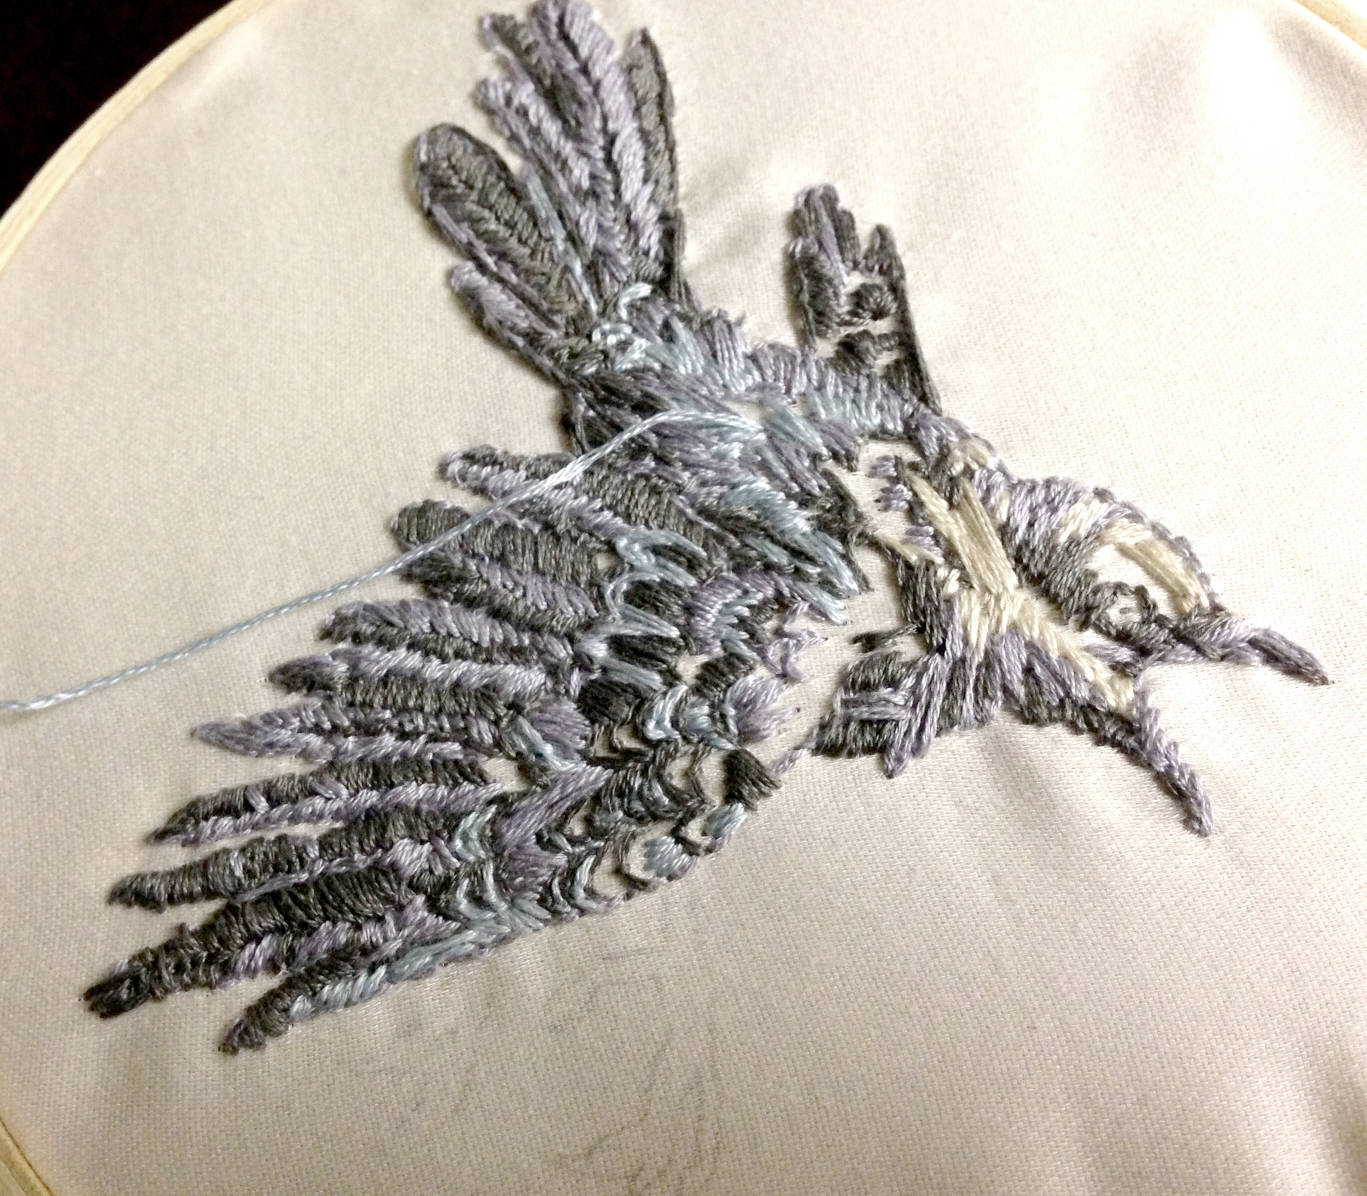
Next step: adding a slightly lighter shade of gray. Here’s where the only bit of fanciness comes in: I learned about a sort of feather stitch from this amazing resource for stitches, and did a few fancy curved feathers at the edge of the upper wing joint. It kind of looked like feathers! This made it feel a little bit like a “real” embroidery project. Like I sort of knew what I was doing. (…I didn’t.)
And then lighter and lighter shading. It was almost like painting, so in that respect I quite enjoyed it.
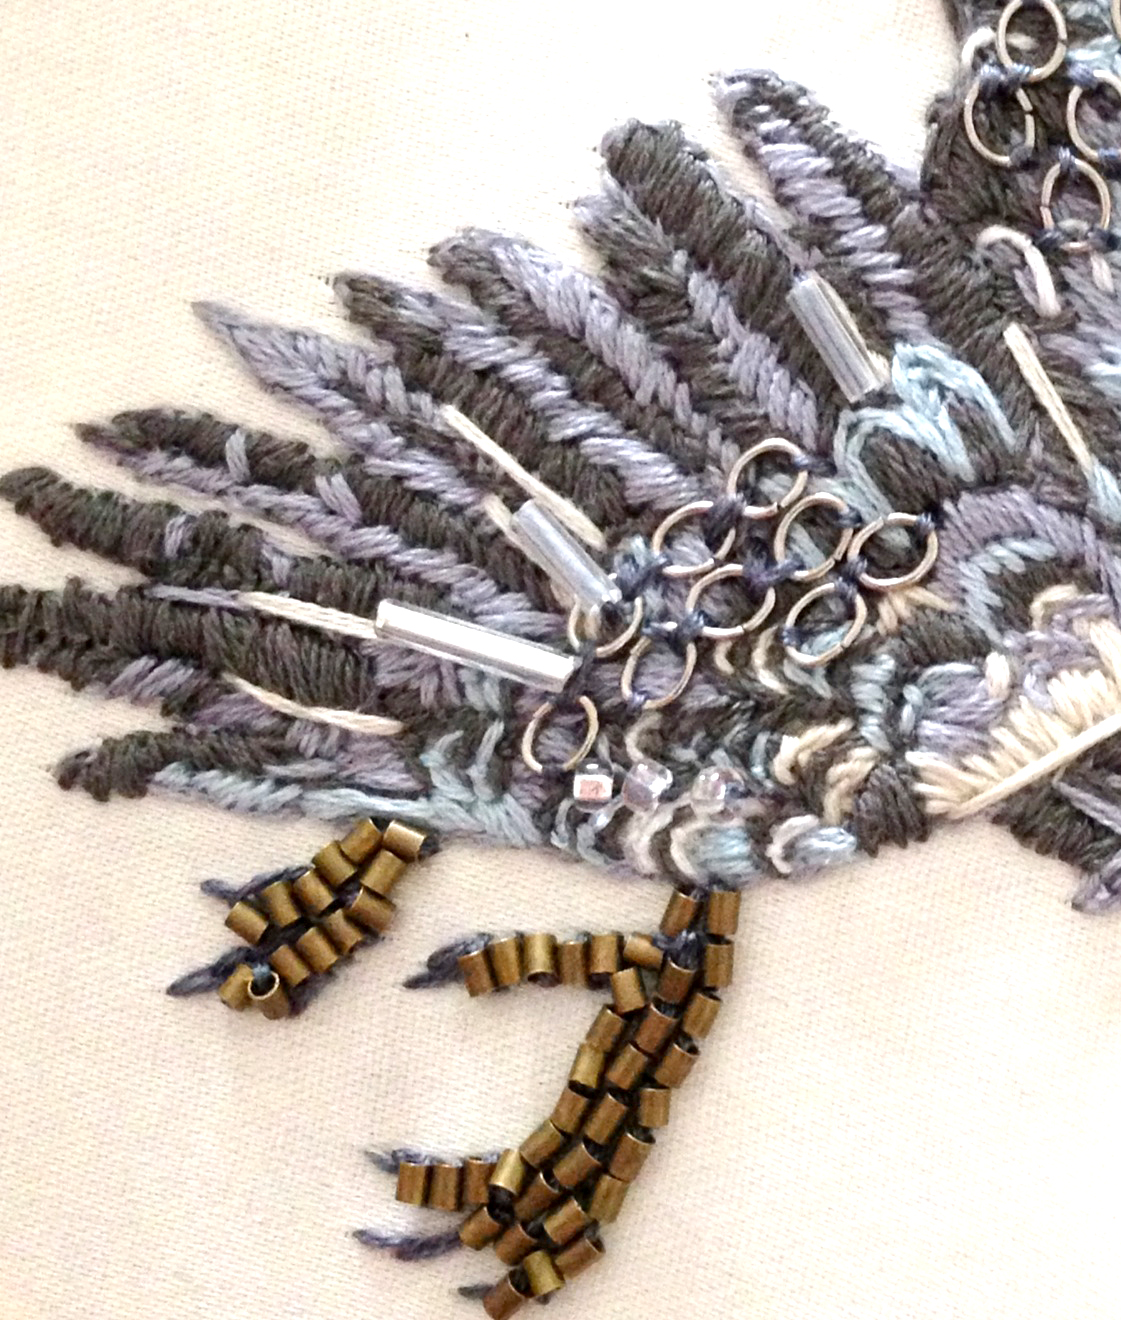
This next part was my favorite. I had gotten several little beads, jumpers and metal pieces from the jewelry section of the craft store. I sort of placed them for texture with tiny stitches onto what I had already sewn. I loved how the little brass tubes made interesting texture on the bird’s feet, and the effect of the circle jumpers in the feathers made me happy.

A detail of my shoddy stitchwork. If you have a background in needlework or embroidery, you should look away…
And finally, for better or worse, here is the final piece, with red cherry blossoms added.
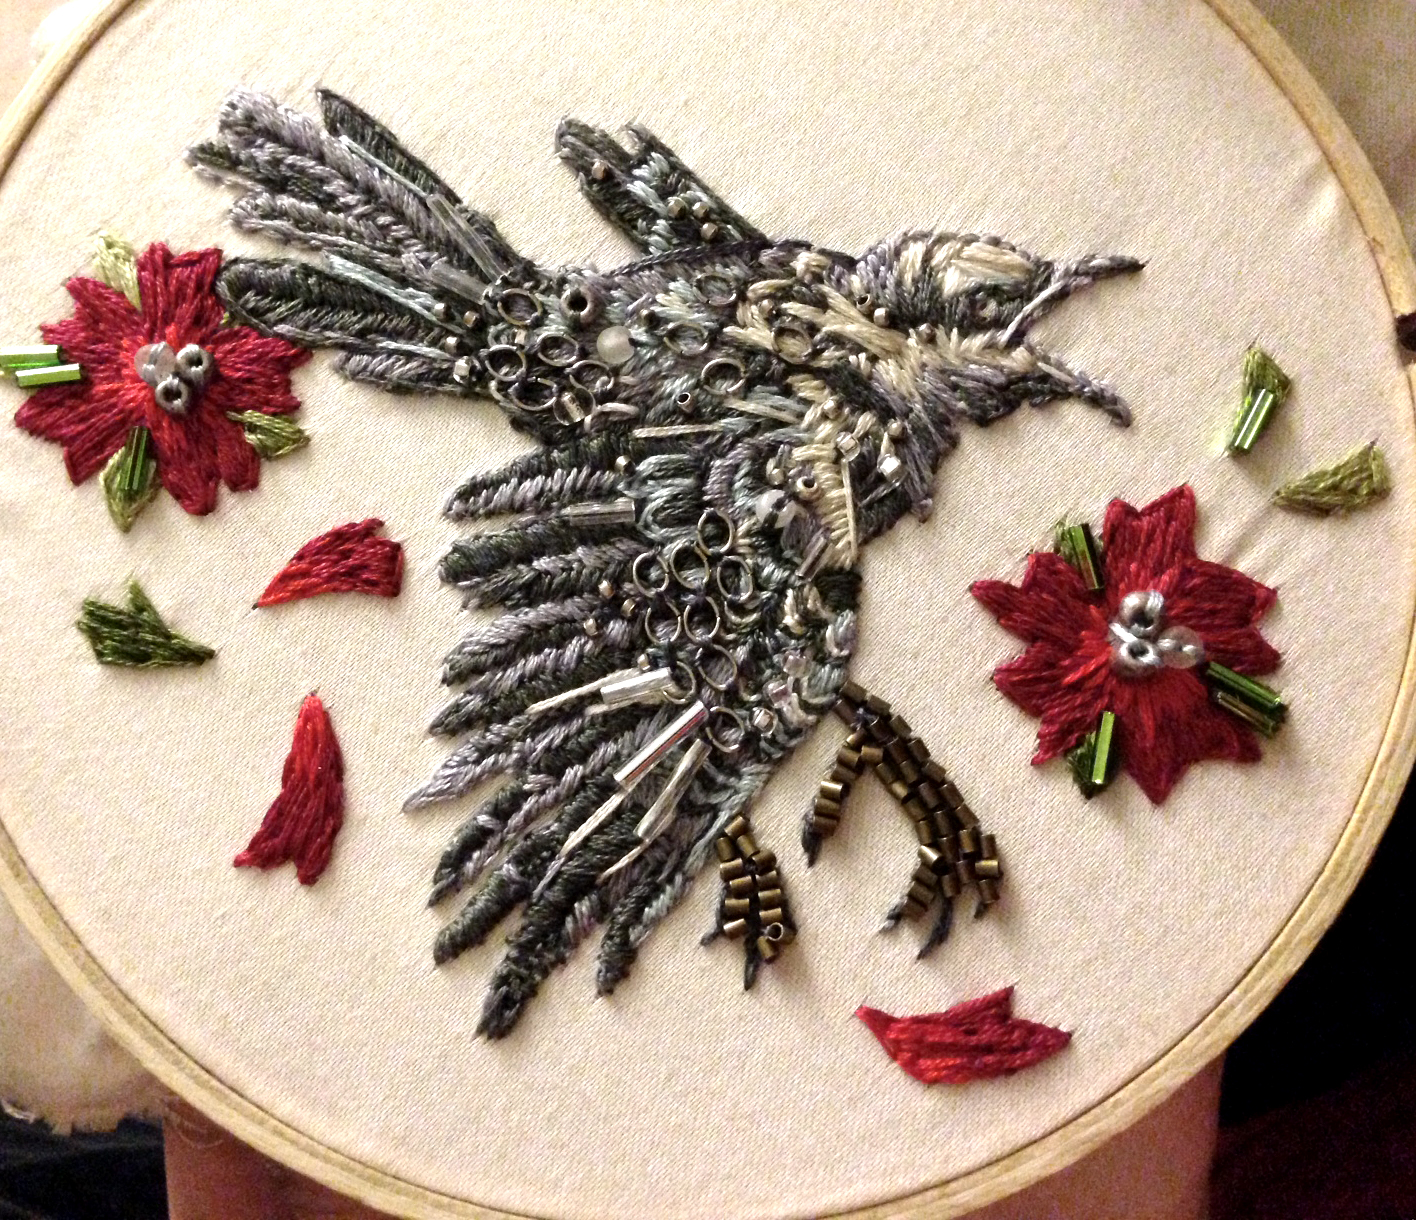
So there it is! It took about four days to complete. I worked on it during a visit to see family. I know the stitches are wonky and misshapen, and the final result looks like NOTHING nearly as beautiful as Michele Carragher’s work, but this is what came of it. And it was FUN! Aside from a few cursed knots and foul tangles, it wasn’t too stressful. And, always one to multitask, I could either have a conversation, watch a program, or listen to an audiobook while I stitched. I will say that it did seem to age me a bit, sitting around an airport, hunched over my embroidery hoop. But thankfully, I don’t really mind what other people feel about my “look.” I had a little travel bag for it, and it was super easy to carry around, super easy to just pick up & work on.
In retrospect, I could maybe have hidden my outline stitches (or not had them at all), and paid a lot more attention to symmetry in my stitches so they were more even. But ya know, when inspiration strikes, ain’ t nobody got time for things like “detailed stitching.” So there ya go. My mockingbird. Quite wonky & crooked, but I like him nonetheless. In looking back, her stitches were lighter and more airy, while mine are much more heavy-handed. Aaaaah well.
I’m not sure what to DO with him now. From what I understand, I could glue down the stitches on the backside, cut it out, and reattach it to something else. I may do that. Or I could just leave it on the hoop & hang it up on the wall. I’m not sure.
…In any case, I liked it so much, I’m working on a beetle next. 🙂
A Hard-Boiled Man
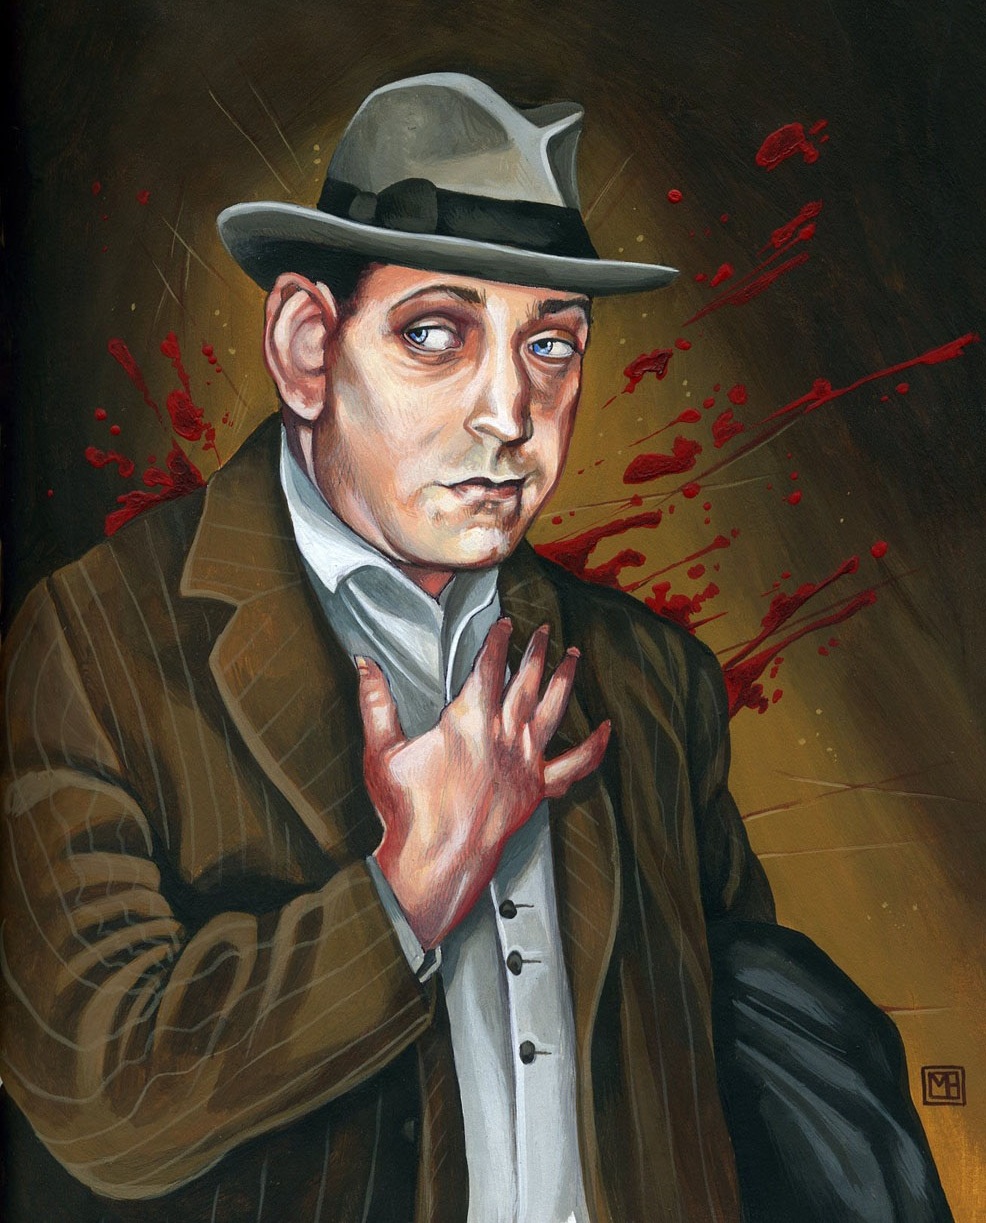
This is notorious 1920s and 30s New York gangster Arthur Flegenheimer, aka “Dutch Schultz.” When his own men decided he was too much of a liability, they order a hit on him and his gang, and shot him in the heart, in the restroom room of a local restaurant. He dragged himself to the nearest table and asked for an ambulance. While he waited for medical help, surrounded by policemen, Schultz remained alive for 22 hours….and spoke the most random, stream-of-consciousness medley of strangeness I have ever read. And luckily for us, they documented the entire thing.
As only a small example, here is a bit of the documented questioning…
- Police: Who shot you?
- Schultz: I don’t know. I didn’t even get a look. I don’t know who can have done it. Anybody. Kindly take my shoes off. (He was told that they were off.) No. There is a handcuff on them. The Baron says these things. I know what I am doing here with my collection of papers. It isn’t worth a nickel to two guys like you or me but to a collector it is worth a fortune. It is priceless. I am going to turn it over to… Turn you back to me, please Henry. I am so sick now. The police are getting many complaints. Look out. I want that G-note. Look out for Jimmy Valentine for he is an old pal of mine. Come on, come on, Jim. Ok, ok, I am all through. Can’t do another thing. Look out mamma, look out for her. You can’t beat him. Police, mamma, Helen, mother, please take me out. I will settle the indictment. Come on, open the soap duckets. The chimney sweeps. Talk to the sword. Shut up, you got a big mouth! Please help me up, Henry. Max, come over here. French-Canadian bean soup. I want to pay. Let them leave me alone.
Annnnnd, that’s only the very LAST words he said.
So, for some reason, I was fascinated by his lunatic rantings. As are many people, apparently. Dustin Hoffman played him in Billy Bathgate, Tim Roth played him in Hoodlum. William S. Burroughs wrote a novel about his last words. And not that I’d like to glorify mobsters, but I think that lifestyle is so…unusual. I won’t wax philosophic about peoples’ fascination (myself included) with movies like Scarface and Goodfellas and shows like The Sopranos. I’m not so much fascinated in glorifying grisly gangsters. But my interest in gangster movies–It’s sort of a guilty pleasure.
And I DO find insanity a bit fascinating! And the fact that it was documented is even more impressive…
So, this is my portrait of Dutch Schultz, for what it’s worth. Because nobody’d be afraid of a gangster named “Arthur Flegenheimer.”
Painting The Pipes

Just before last winter, when we lived in Alaska, I was lucky enough to be chosen as one of the artists in Fairbanks’ Paint the Pipes project that my friend from Chartreuse told me about. Essentially, in the hopes of beautifying Fairbanks, artists were selected to paint designs on the vent pipes downtown. I did two designs, but my design called “Dreaming” was the one that was selected. (Personally, I think the tangled ravens could’ve looked pretty cool, but I get why it might be a little…less upbeat.)

When I first moved to Alaska, I was overwhelmed by a sense of isolation. I didn’t know many people, I had a young child, and my husband was scheduled to deploy. A counselor once told me about an artist, a woman who moved to Alaska during the Gold Rush, and painted to comfort herself, and had written a book about it. The book didn’t necessarily comfort me, as much as remind me that this “adjustment period” in Alaska will pass. And it did! Soon I met some of the very best friends I’ve ever had at a duty station. But I thought of the native babies that grew up in those harsh conditions, and how they not only survived, but thrived. Being relegated to the indoors for a good chunk of the year, I often wondered what they dreamt about, or what they did to pass the time. I thought of however rough the conditions, you always have your mind, your creativity, to take you other places.
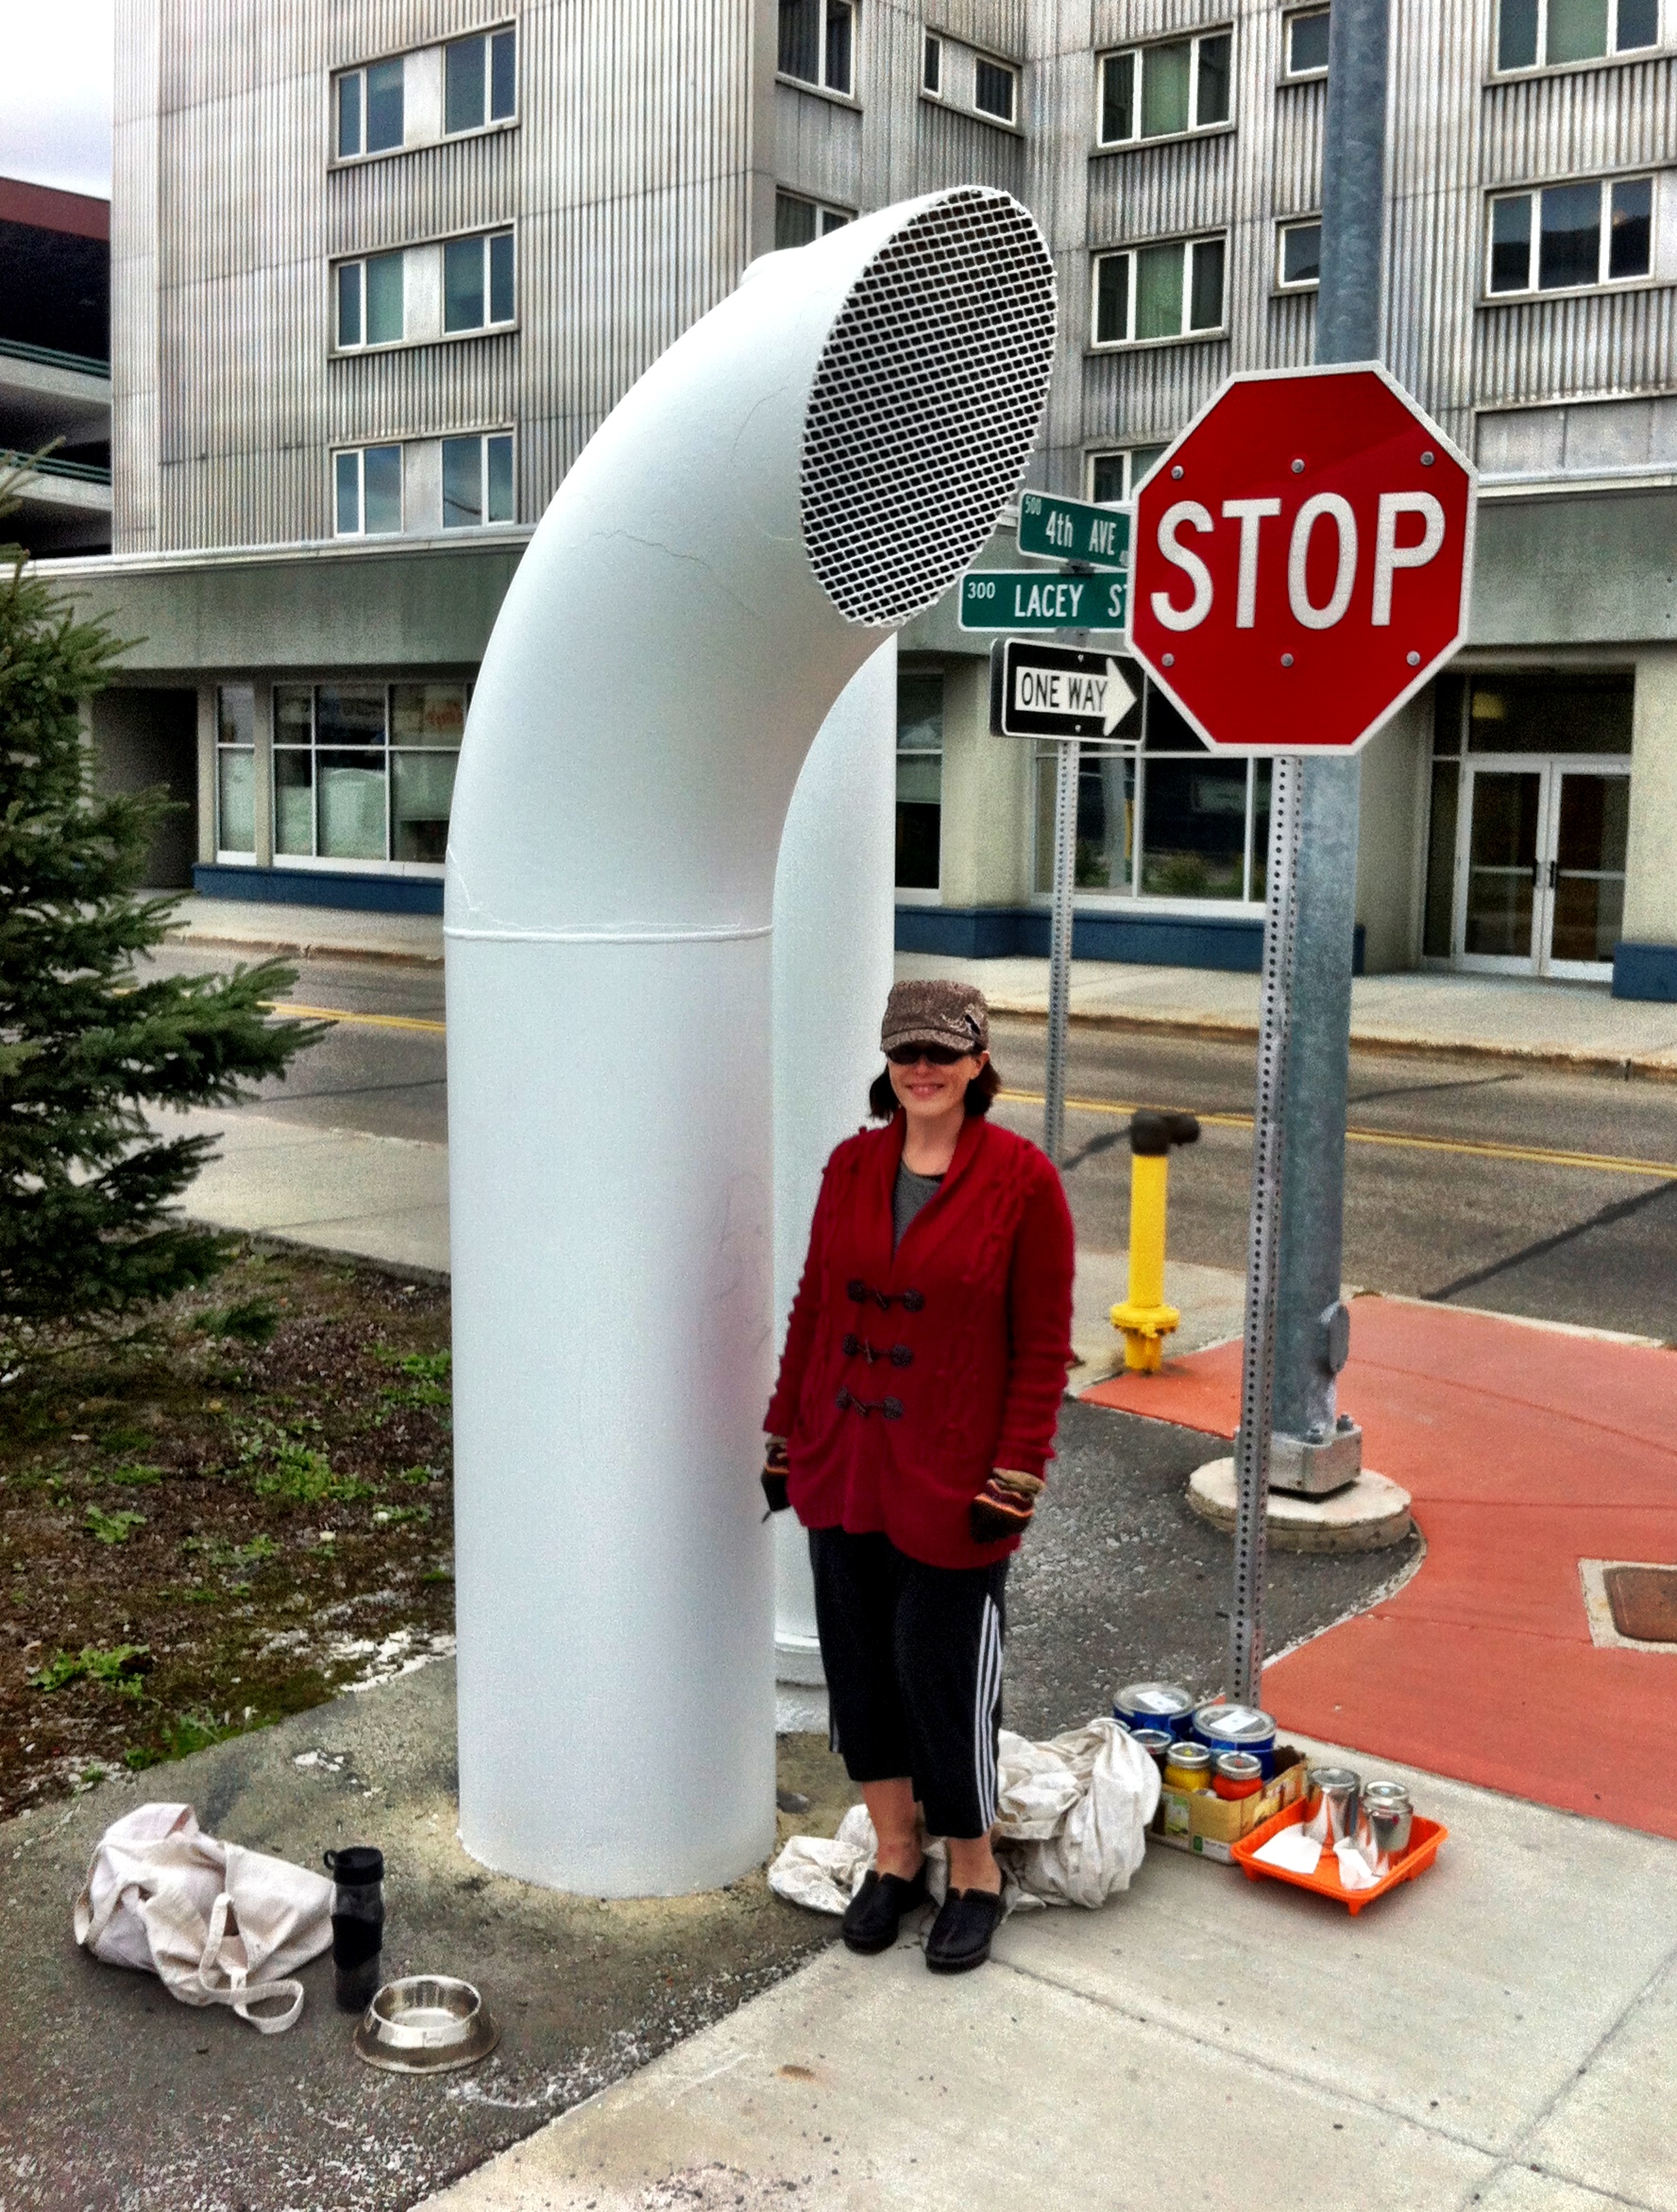
So “Dreaming” it was. I was very very sick when I began painting my steam pipe, and winter was coming….so I had very little time to work on it. On top of that, one of the developers of the program set up a time-lapse camera to document my progress on the pipe, which I didn’t mind, but it sure was intimidating. I often thought, “I’d better move around and finish this up quickly, or it’s going to be one heck of a boring time-lapse.”
I did the majority of the painting the first day, probably in about 3 or 4 hours.

Then I was able to come back another day (still sick, sadly) and paint some more detail. Probably another 4 hours or so.

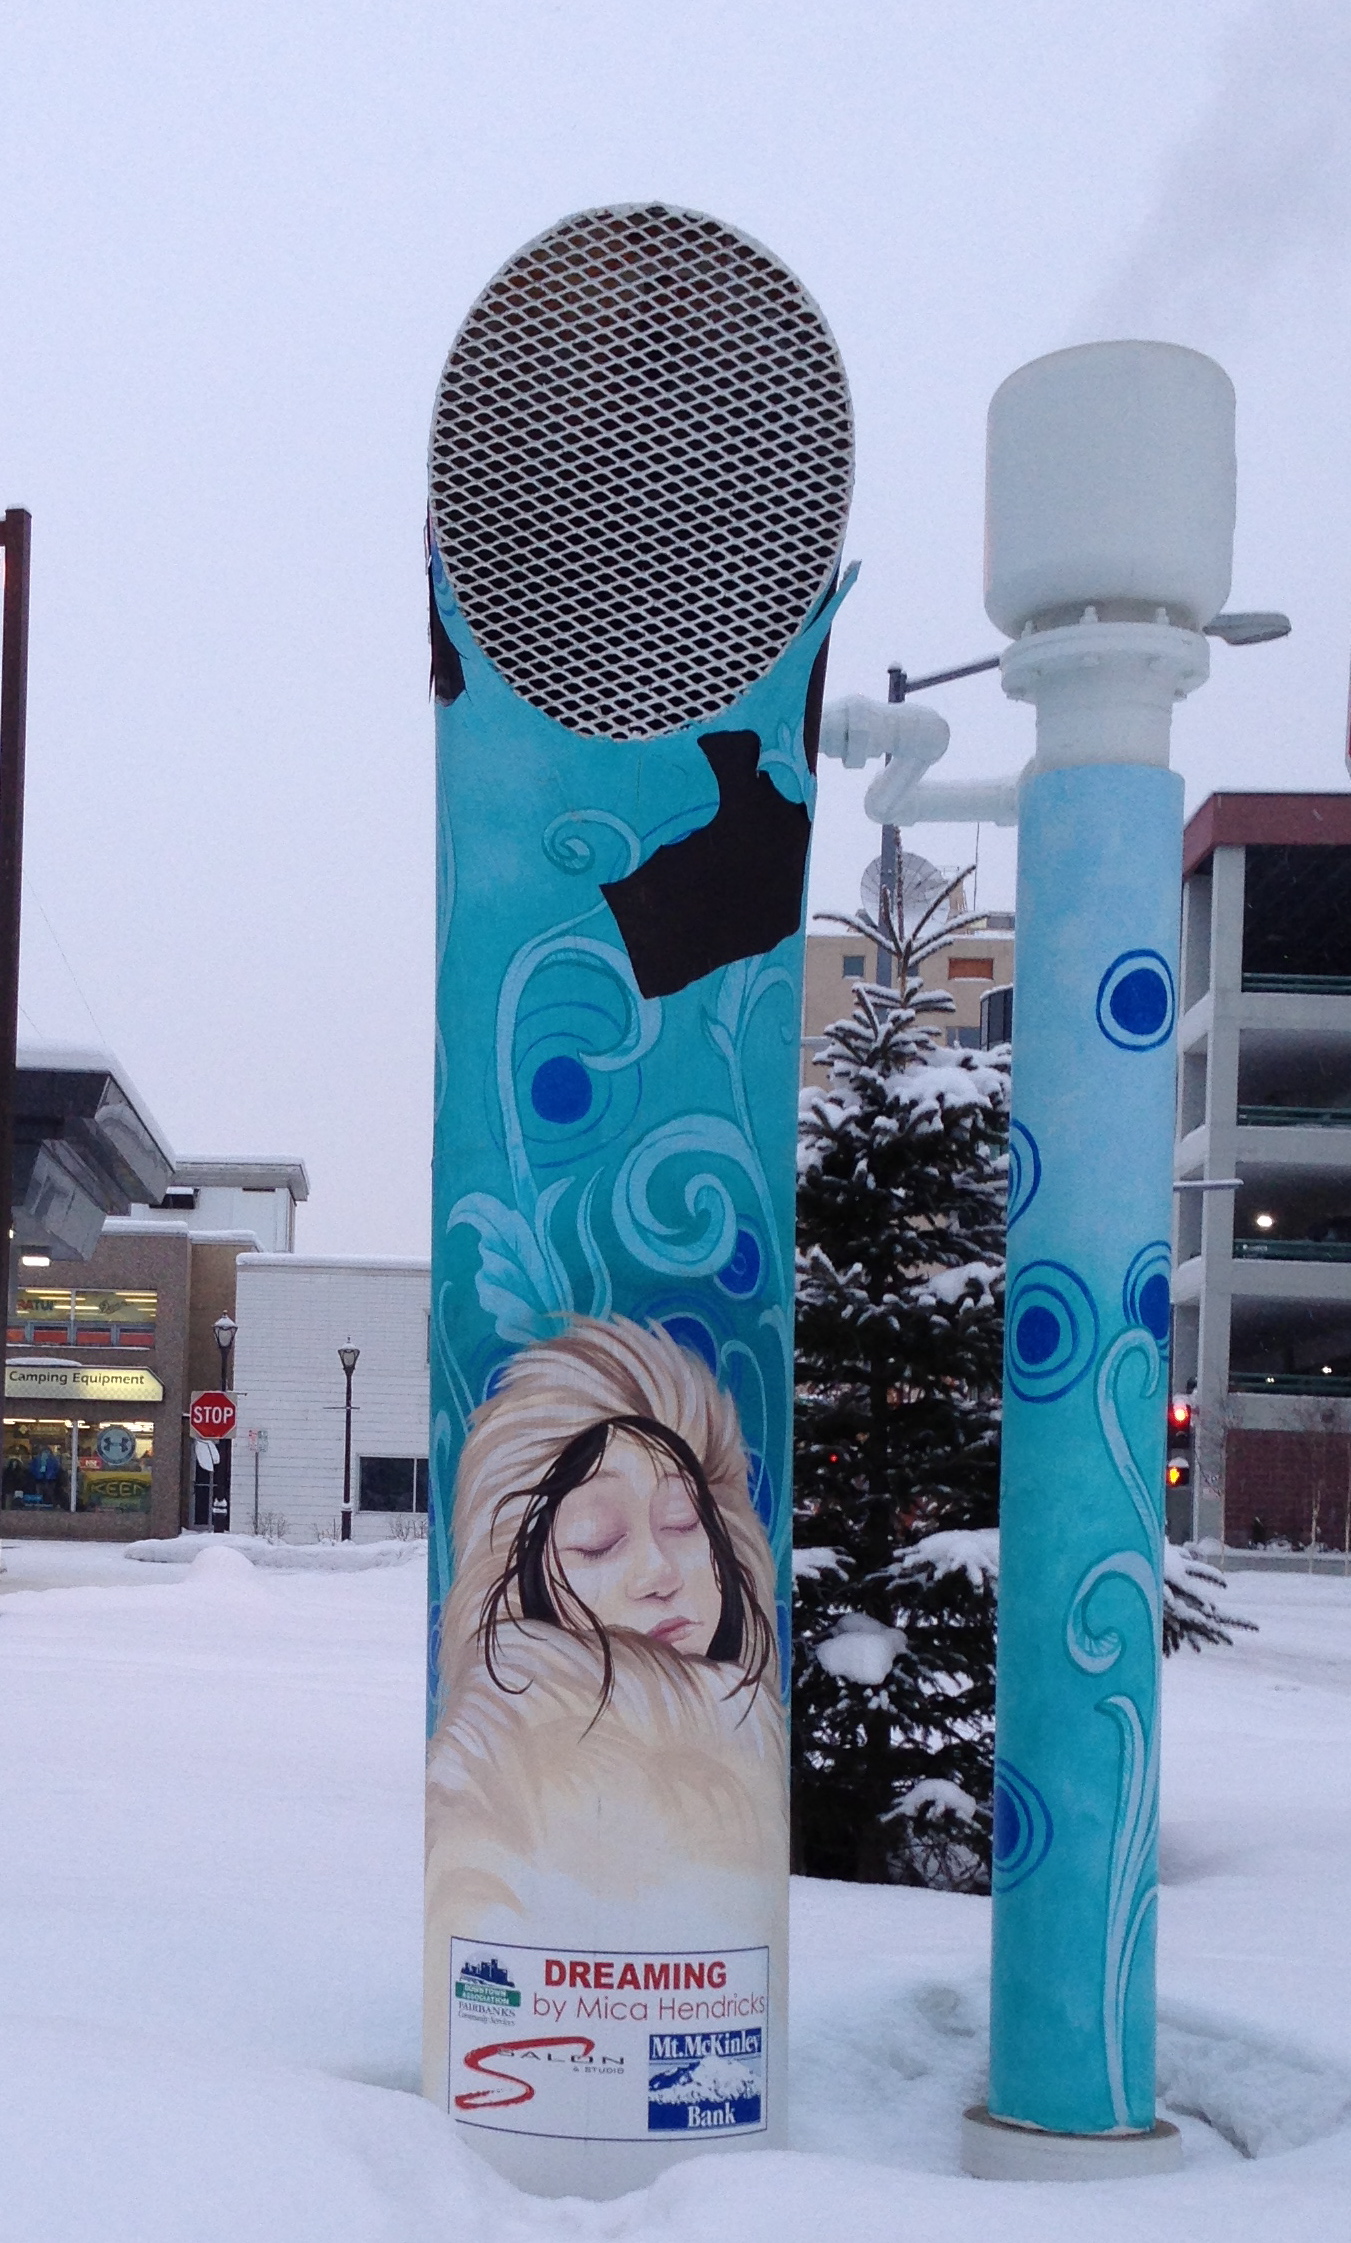
And finally: COMPLETE!

I was so excited to see it in the wintertime, that I drove out to take a picture after the snow had fallen. But to my surprise, CHUNKS HAD FALLEN OFF. The city had primed the pipes, but since mine was a steam outtake pipe, it was warm, so mine was the only one that cracked. They had never tested the primer in winter, I guess.
If you’ve ever read Vonnegut’s “Bluebeard,” (one of my favorites), you can appreciate the irony.
Luckily, the bottom part seems to have kept fairly stable. They asked if I’d be willing to come back & repair it, but sadly, we moved just before summer. I hope it stays together for awhile, or at least until someone can repair it. I won’t even speculate as to the symbolism….and I hope passing tourists do the same!
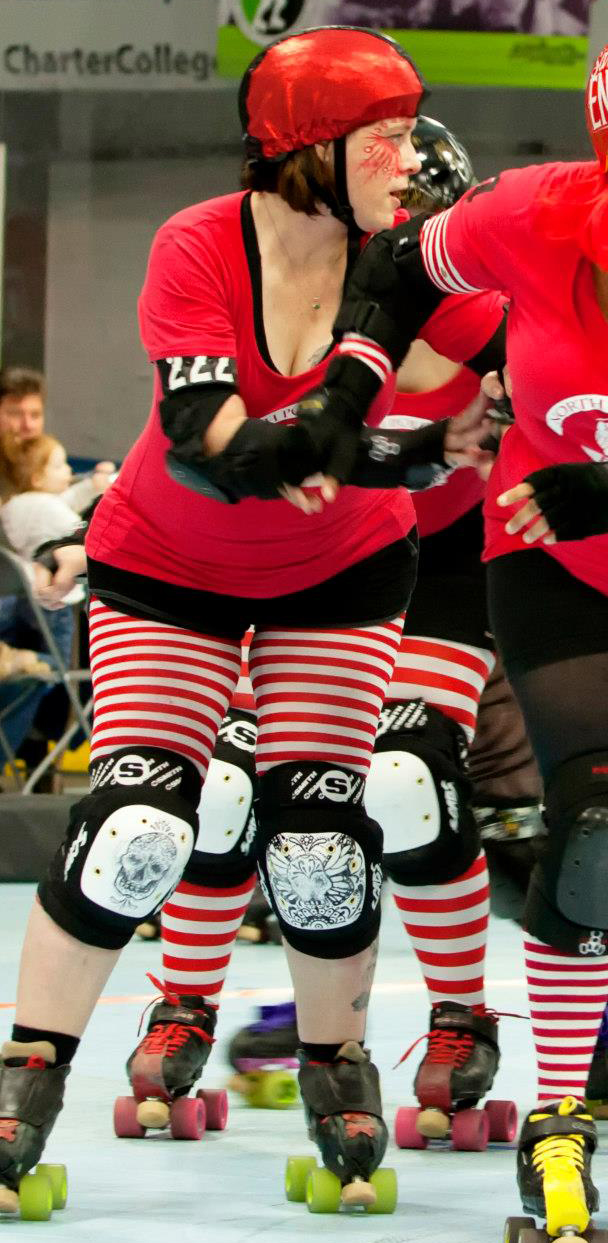
Kneepads!

I have this habit of customizing pretty much everything. I can’t stand a blank canvas, and I get even more excited to customize something FUNCTIONAL. So when I got a new pair of SCABS kneepads, they were not only awesome for my knees during falls (since an injury was jacking them up), with their white kneecaps, they were just begging do be doodled on….so I grabbed my trusty Sharpie markers and got to work.
Now this is one of those projects you do just for fun, because if you know anything about derby, you know those things are gonna get CREAMED. Point in fact: Here’s a picture of them in action:
And this is a pic of my newly customized kneepads after just one bout:

But you know, those doodles were fun while they lasted, and why not? I love to see people customize the things they own. To not accept them straight out of the box, to get creative and funky with them, even if it’s for a short time. What can YOU customize today?
Another “Fail” Story
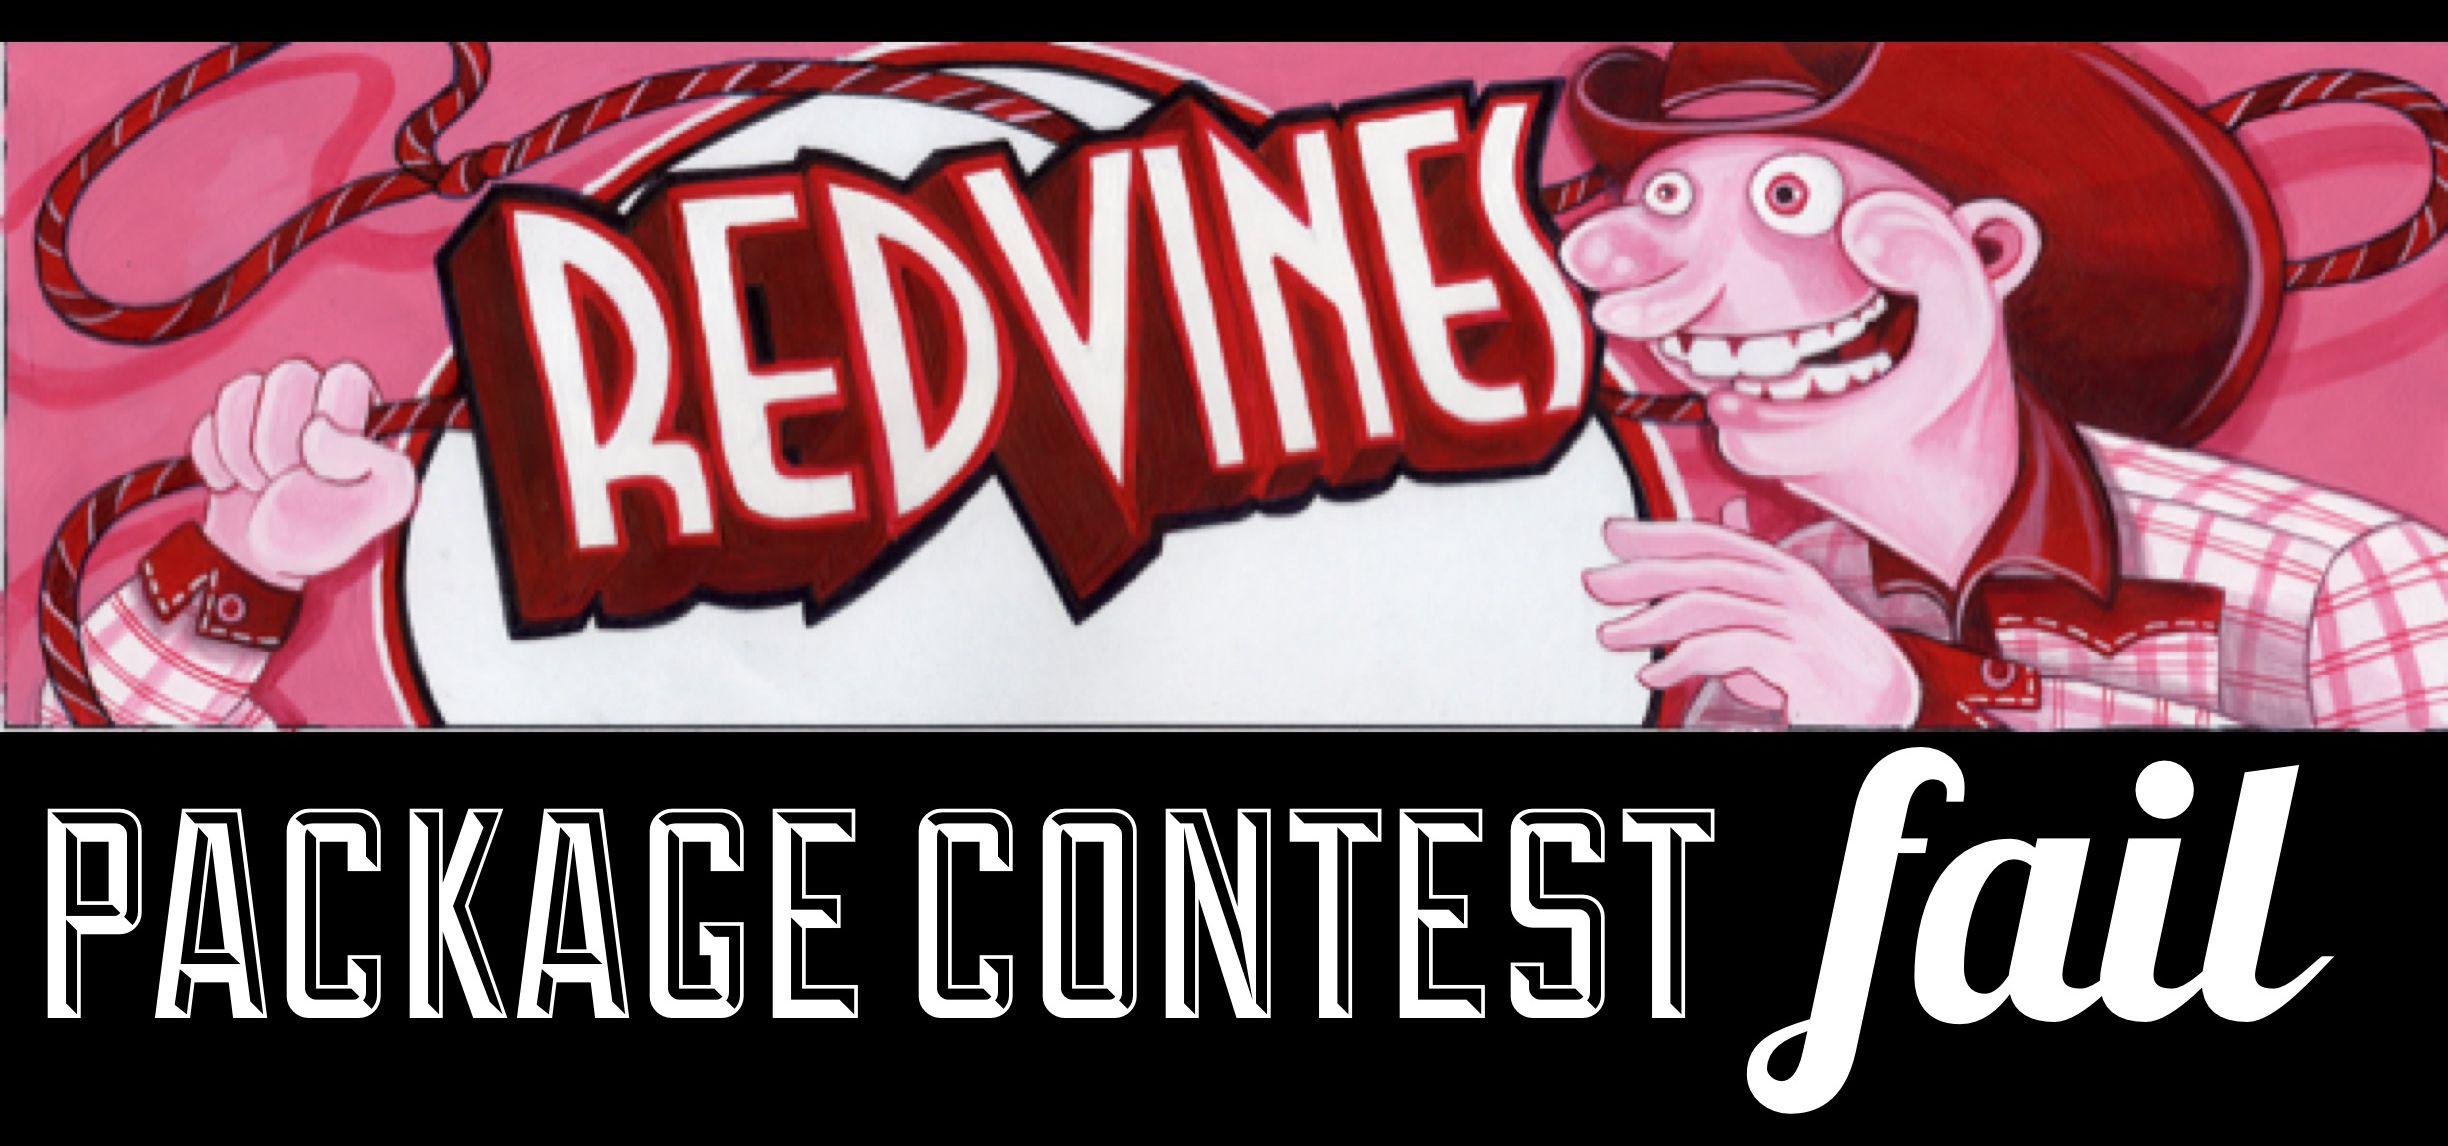
I enter contests. A lot. Basically, whenever someone points me to a design contest, I try my hardest to get something into it. I always think of it as a way to at least get my work out there, and maybe find a place for all my doodle skills. So when this Red Vines contest presented itself several years ago, I thought, “AWESOME!” I love their logo.
The contest requirements were to use any single-color medium, and feature the Red Vines logo. I think they also said something about referencing the origins of Red Vines, which they describe as “Deeply rooted in the traditions of the American West.”
So I drew a goofy cowboy dude lassoing with a Red Vines rope!!! Simple, yeah, but I thought the fun would be in the package design, and how it’d look on an actual box. In the world of painting, “single-color” usually means black & white & one color. I mean, the term “monochromatic” even is defined as “a hue modified by the addition of black, gray (black + white) and white.” So…sweet! I got this. Right?
Um. Wrong. The winning pieces were announced online, and while I don’t remember them specifically, I remember with distinction that most of them were done in PENCIL. I mean…PENCIL. None of the ones I saw actually took the package design (including the “window”) into consideration, other than drawing in a long, rectangular area. And not many of them had ANYTHING to do with the history of the gosh-darned American West. Are you KIDDING me?!?!
I must’ve totally misunderstood SOMETHING. Maybe I was too literal. I’m not saying I’m super awesome or anything, but whatever I’m putting out to the world, the world doesn’t always really “get” it. I’m not saying I should win every contest I enter, but dang! Not even an honorable mention?!? I apparently was a little too gracious with my definition of “single-color,” as it most likely referred more to the print industry. My bad. And I suppose I should’ve drawn the furthest thing from a cowboy. …A space alien, maybe?
SIGH! That’s usually my luck, when it comes to contests. Aaaaaaaah, well. Another one down the drain. But that’s okay–I like Twizzlers better, anyway. 😀
Scrapbook dresser

For awhile, my neighbor friend had a very aggressive Craigslist furniture habit. So when I asked her advice on finding a big wooden dresser for my daughter’s room, I was thrilled when she brought me to her garage to pick one out. Twenty bucks later, I was the happy owner of a huge (but quite plain) dresser.
My neighbor was crafty enough to sand her furniture finds down, prime them and repaint, but with a little kid at home and a deployed husband at the time, I didn’t have time or patience for all that.
Instead, I took the hardware off (super easy to do–just unscrew from the inside drawers). I got some scrapbook paper from the craft store, and for mine, I wanted to pick some thin, more intricate paper. Gold isn’t really my color, but it’s what they had the most of at the store. And with a big ol’ jar of Mod Podge and an XActo knife, I pasted down the paper to each panel.
If you’ve never used Mod Podge, it’s super easy. It looks like glue. You glop it down with a paintbrush on your object (the dresser), place your paper down, and saturate the paper with Mod Podge on top. It gets bubbly sometimes, but if you smooth as you go, they usually fix themselves. The glue consistency dries clear (or shiny, if you get the gloss version), and your paper is sealed down. Fun & easy!
All in all, the goldish colors I chose ended up looking very vintage and awesome.
Since I was solo with my kid at the time, I only did a single drawer or two a night, so it took a few days, but what an easy way to dress up a dresser! I love Mod Podge. I thought maybe some old comic book pages would look awesome later down the road on her nightstand…
Derby Dolls
I know I do a lot of posts about derby, but this one is pretty crafty, too…
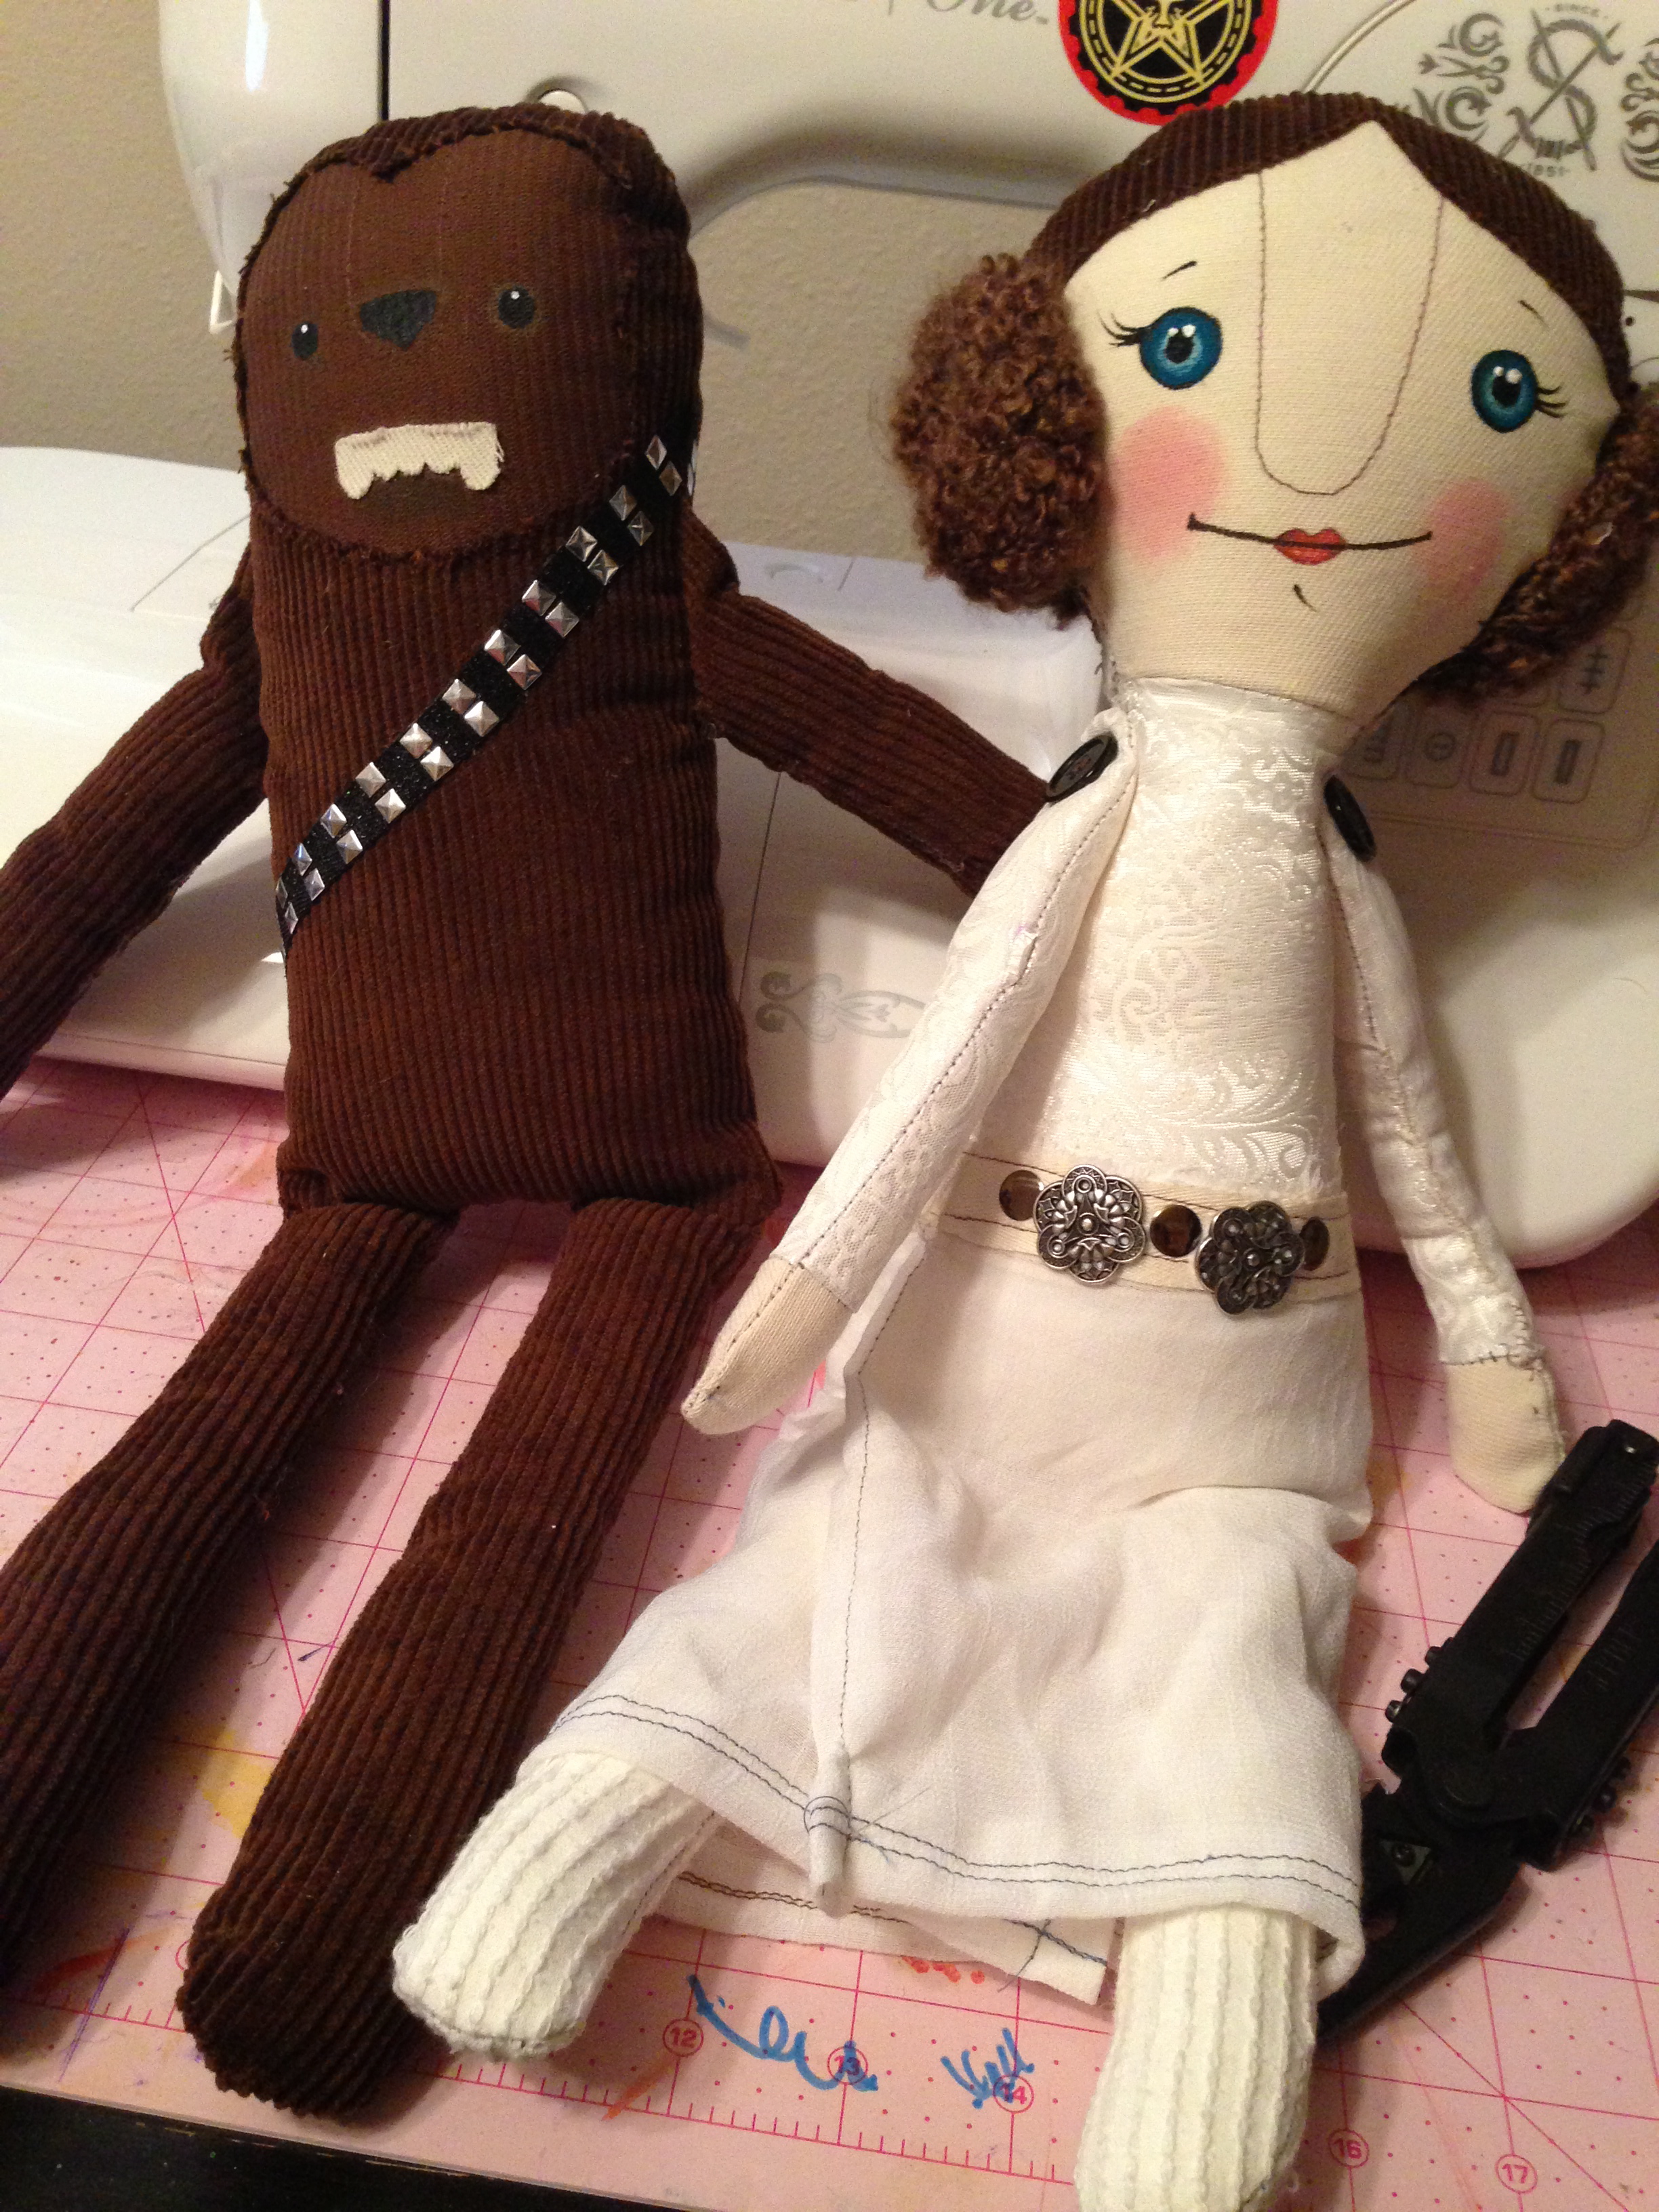
With just a little tweaking and customizing, I can do a lot with a single pattern. I’ve bought a lot of patterns from MMMCrafts on Etsy, and the one I’ve had the most fun with is this Little Red pattern. I’ve never actually made Little Red, but I used the same doll pattern to make a sweet Princess Leia doll for my Star Wars-lovin’ daughter (separate Chewie found here, by the way).
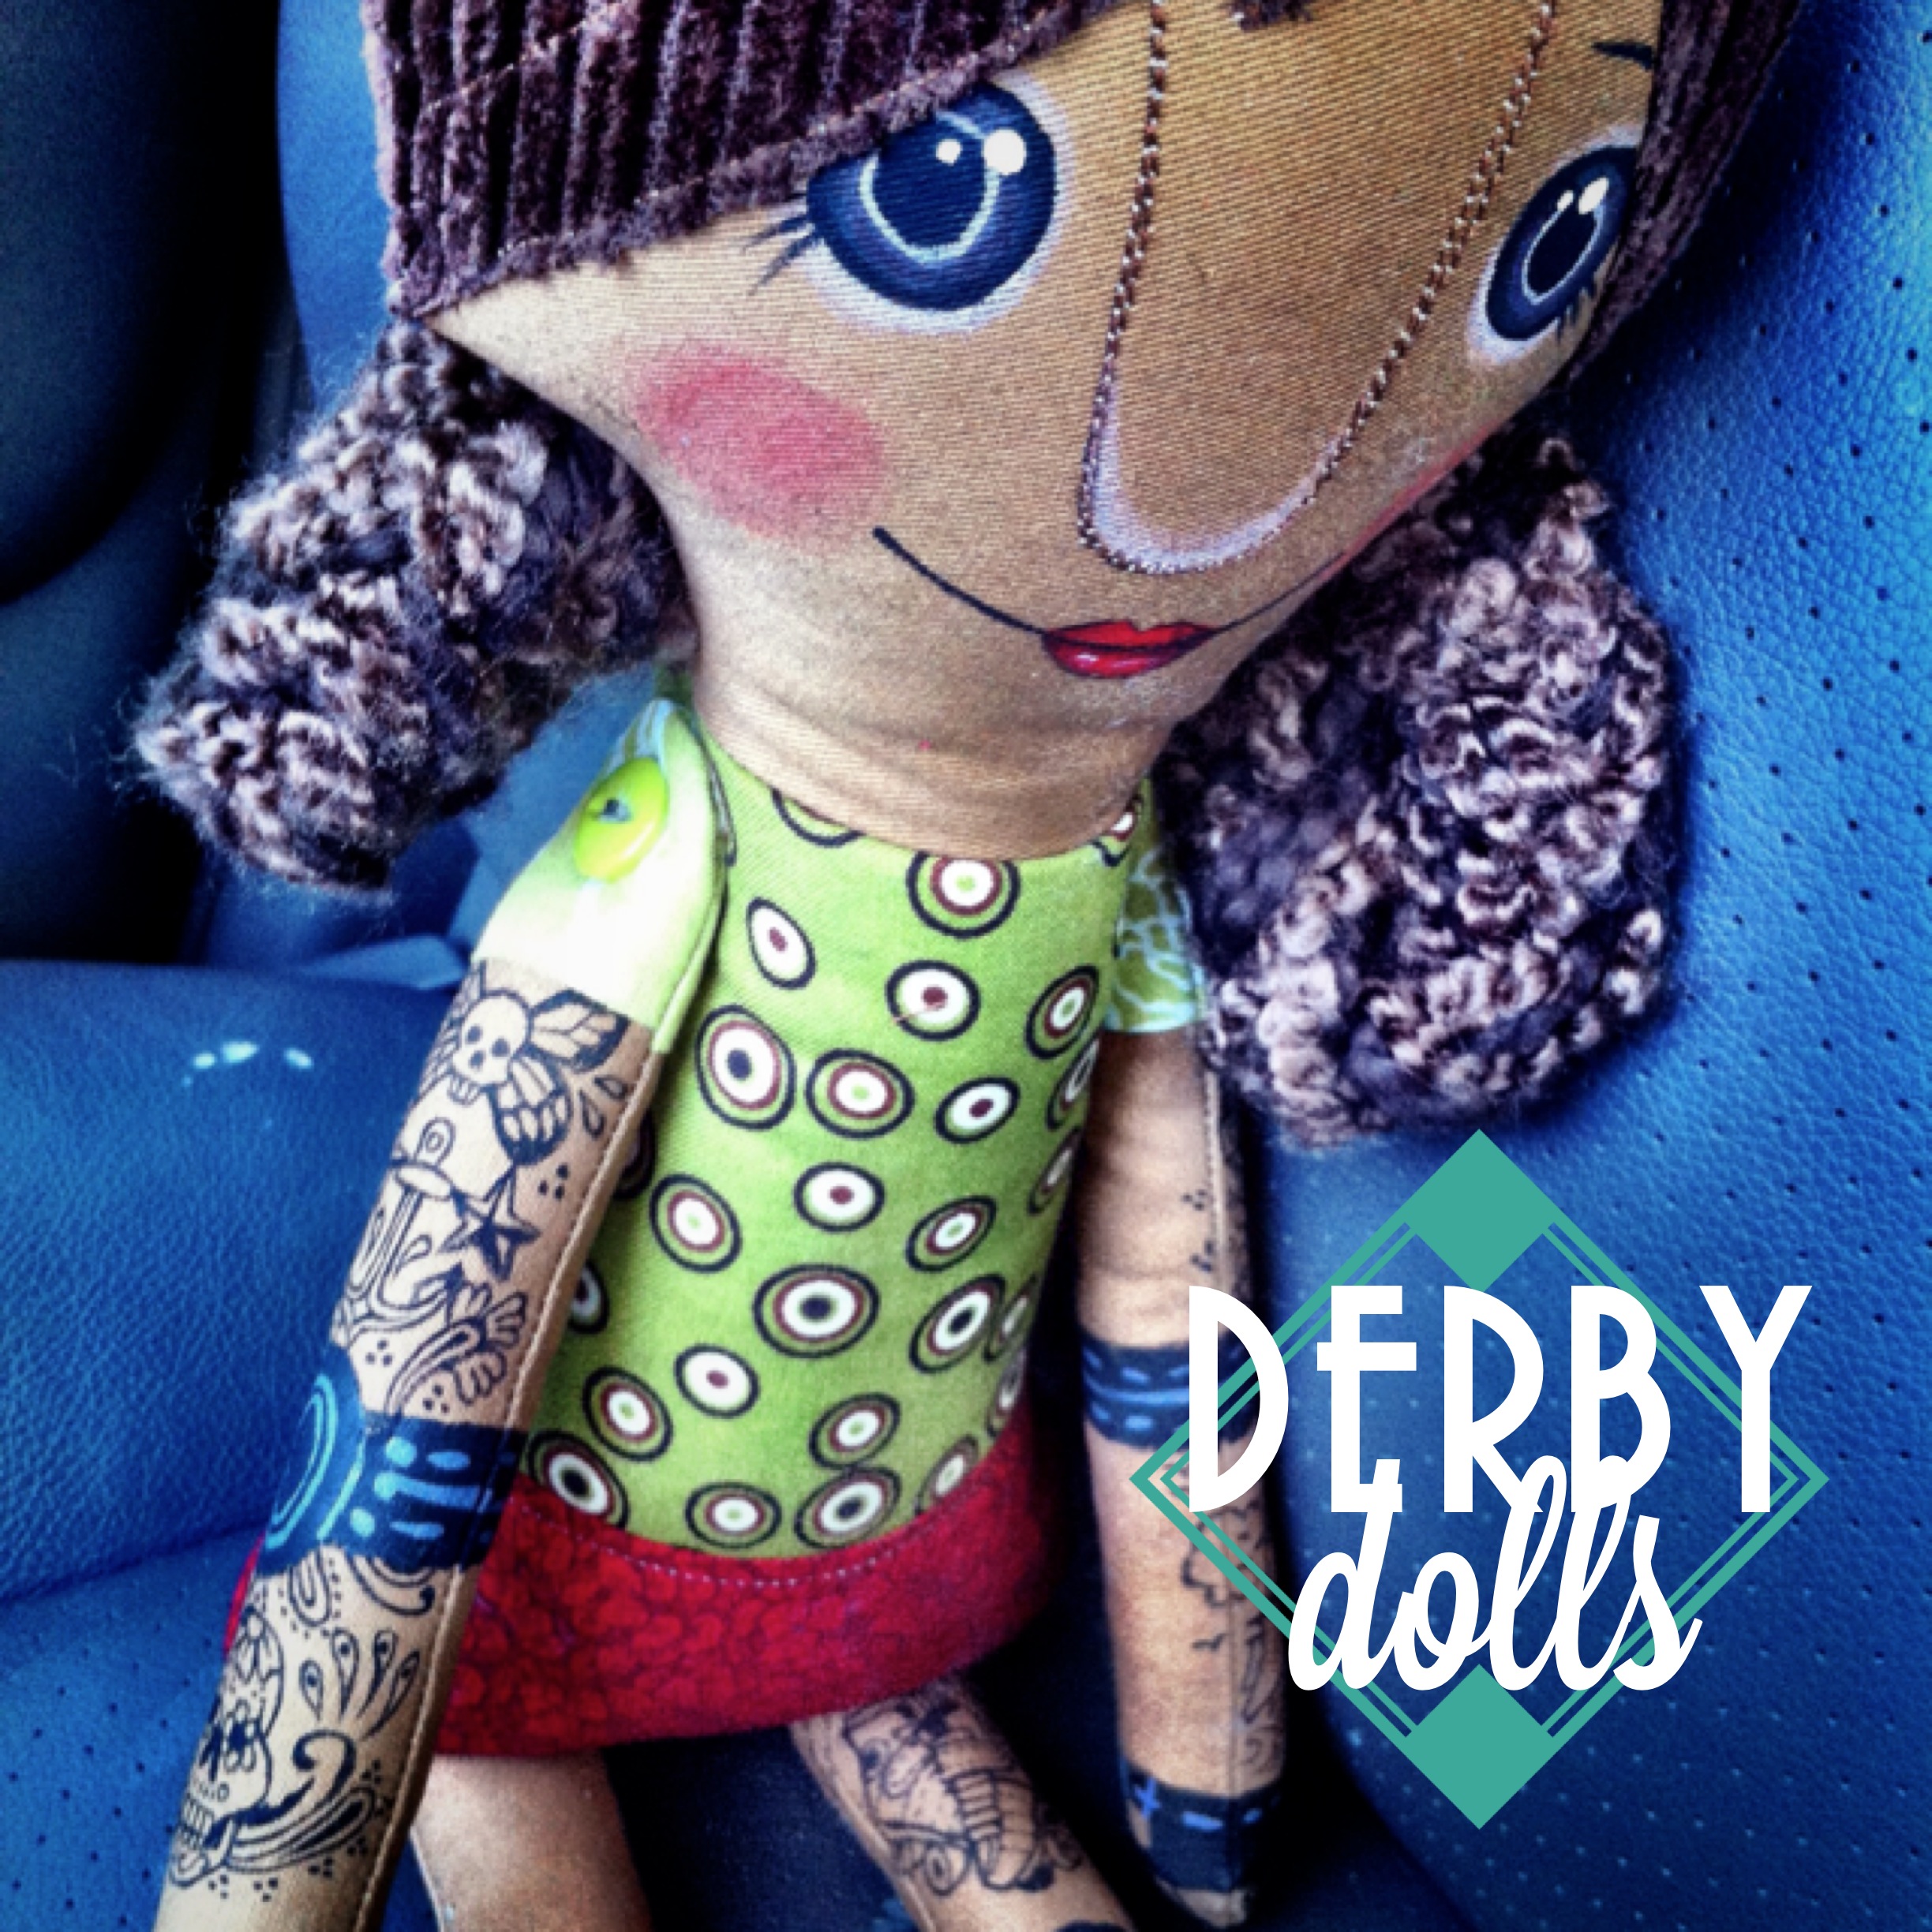
But when my very good “derby wife,” Sunny (also the early founder of my derby team, NPBT), was moving out of state, I wanted to make her something cool & quirky & special.

Since she has short hair, I just left off the ponytails. I handpainted our team logo on her “shirt,” but I’ve done similar things where you can use iron-on transfers with computer paper and just iron on a logo.
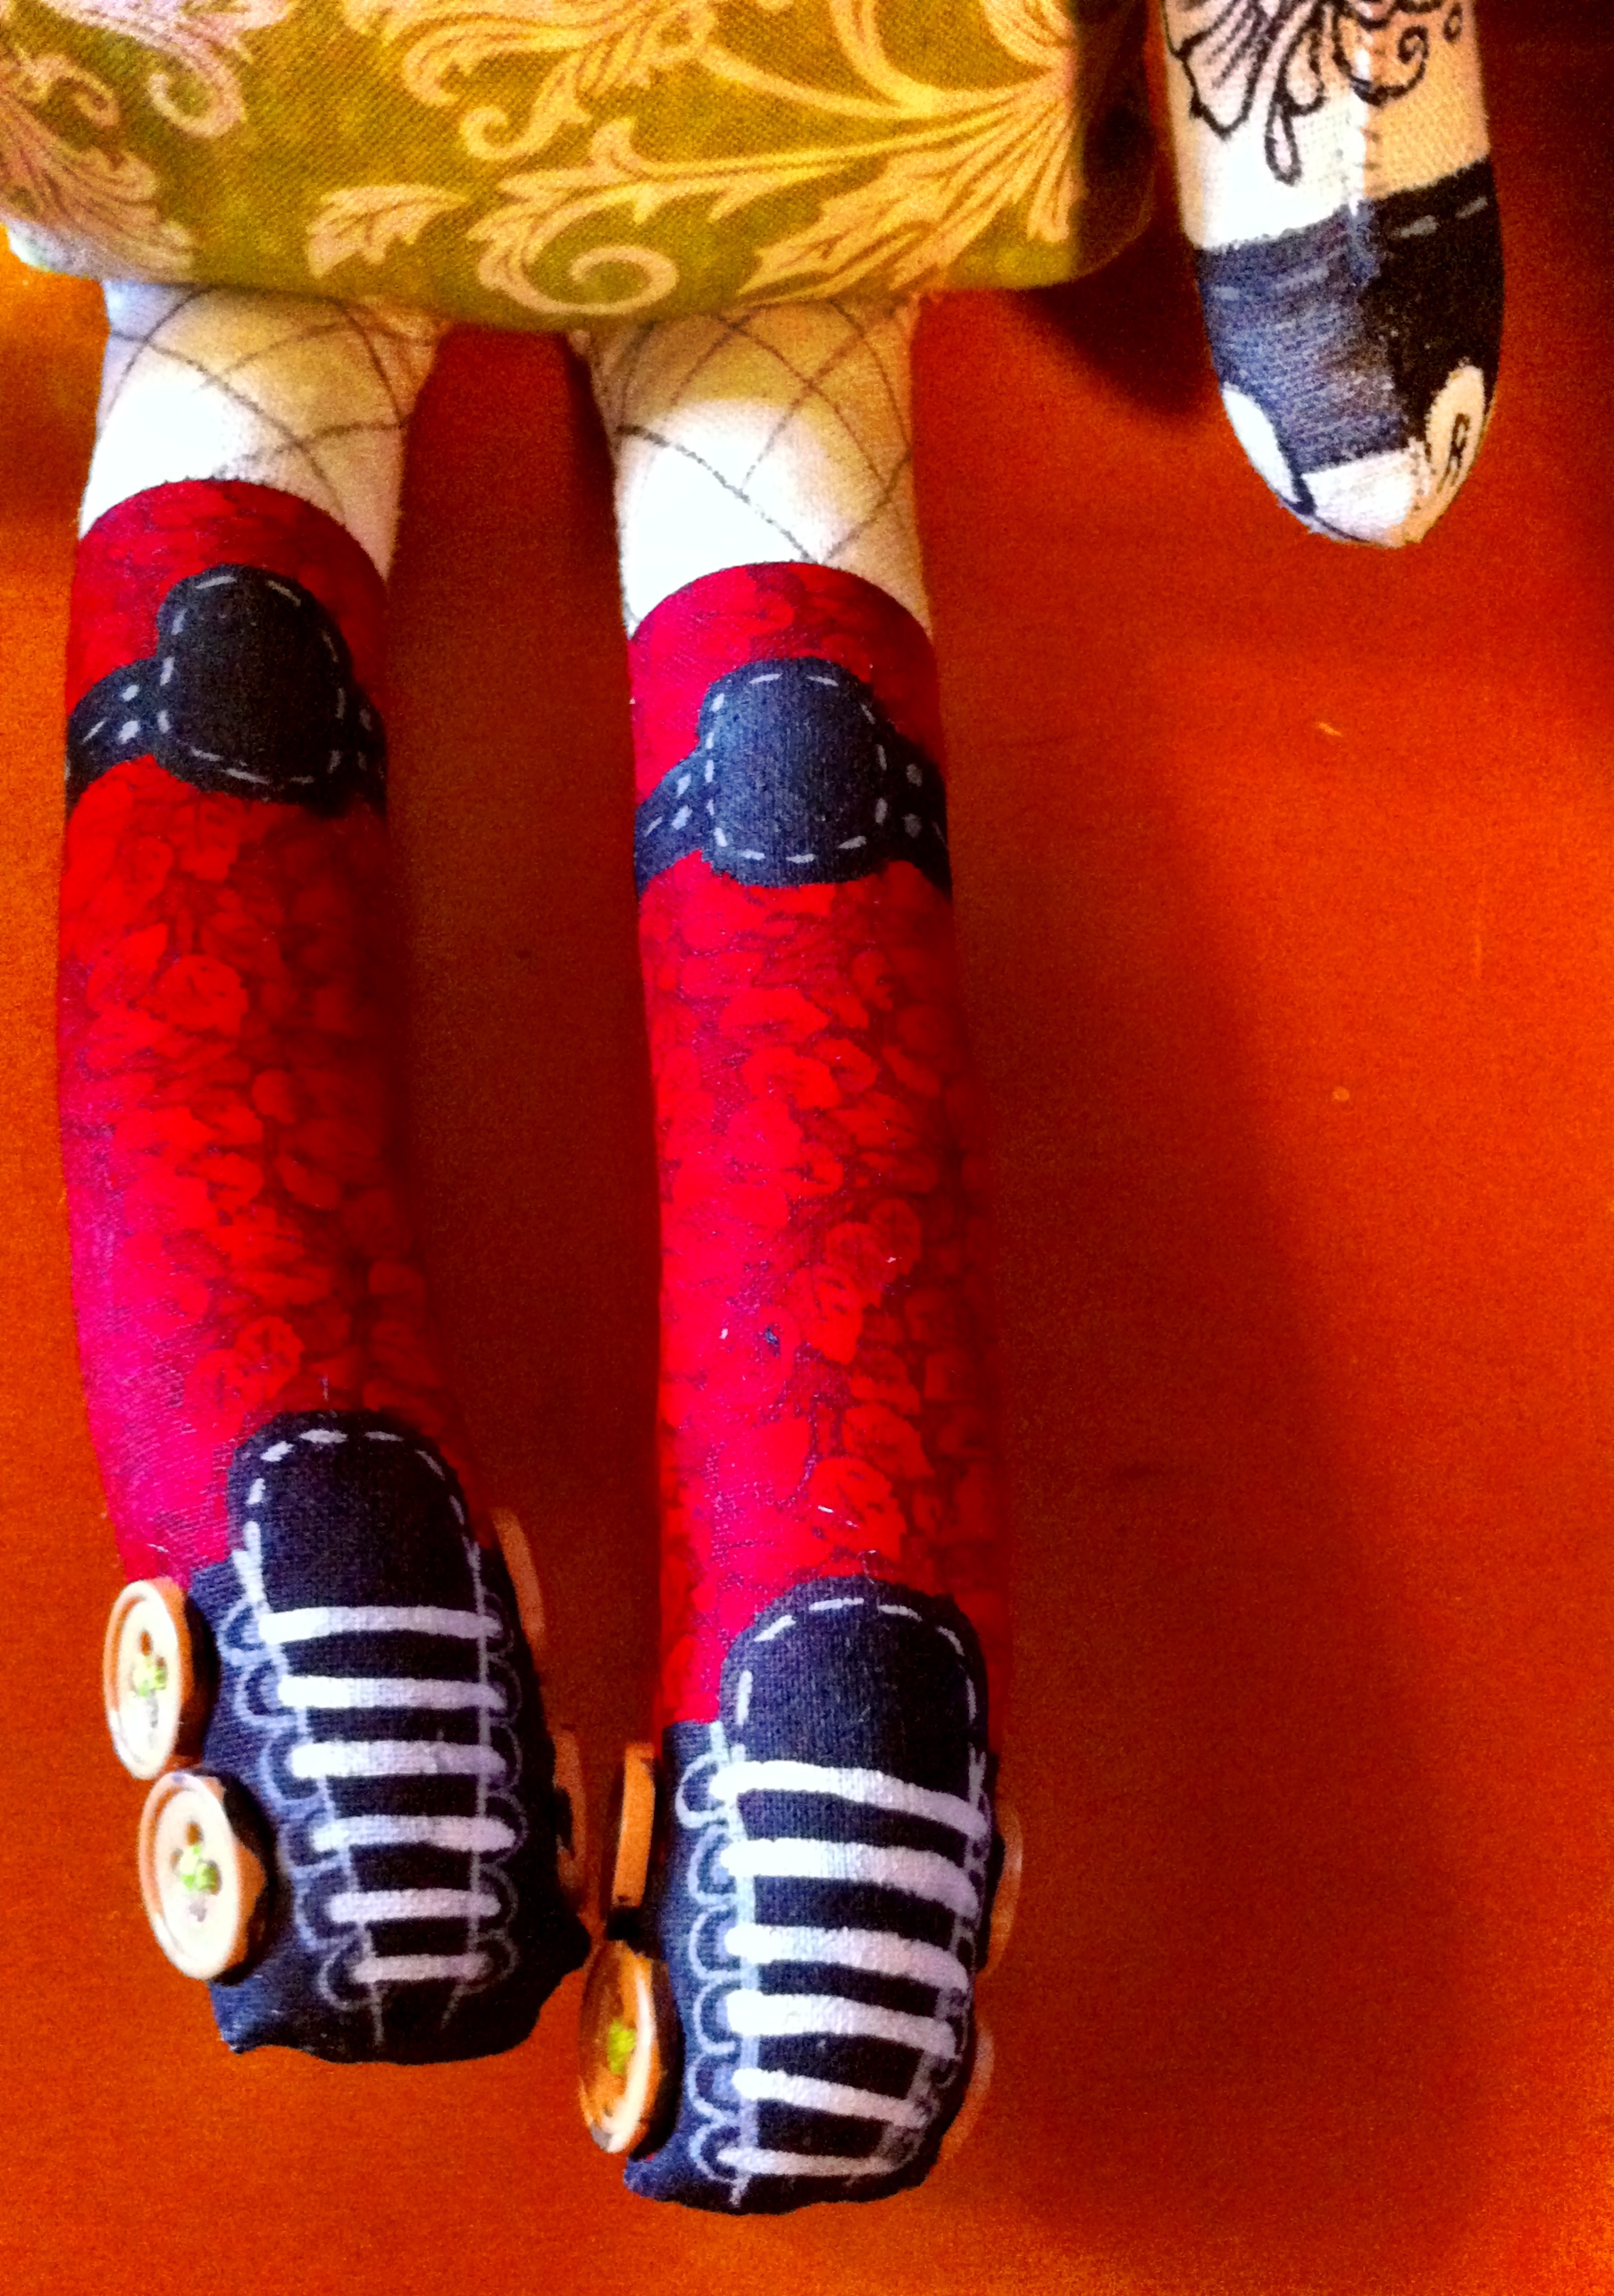
Since our colors were red, white & green, I made the bottom half a different color to look like derby shorts. She has several tattoos, but I added several more to decorate her arms all up. I used acrylic paint for her face and tattoos, which (if you’ve ever gotten it on your clothes by accident you know) stays on fabric really well.
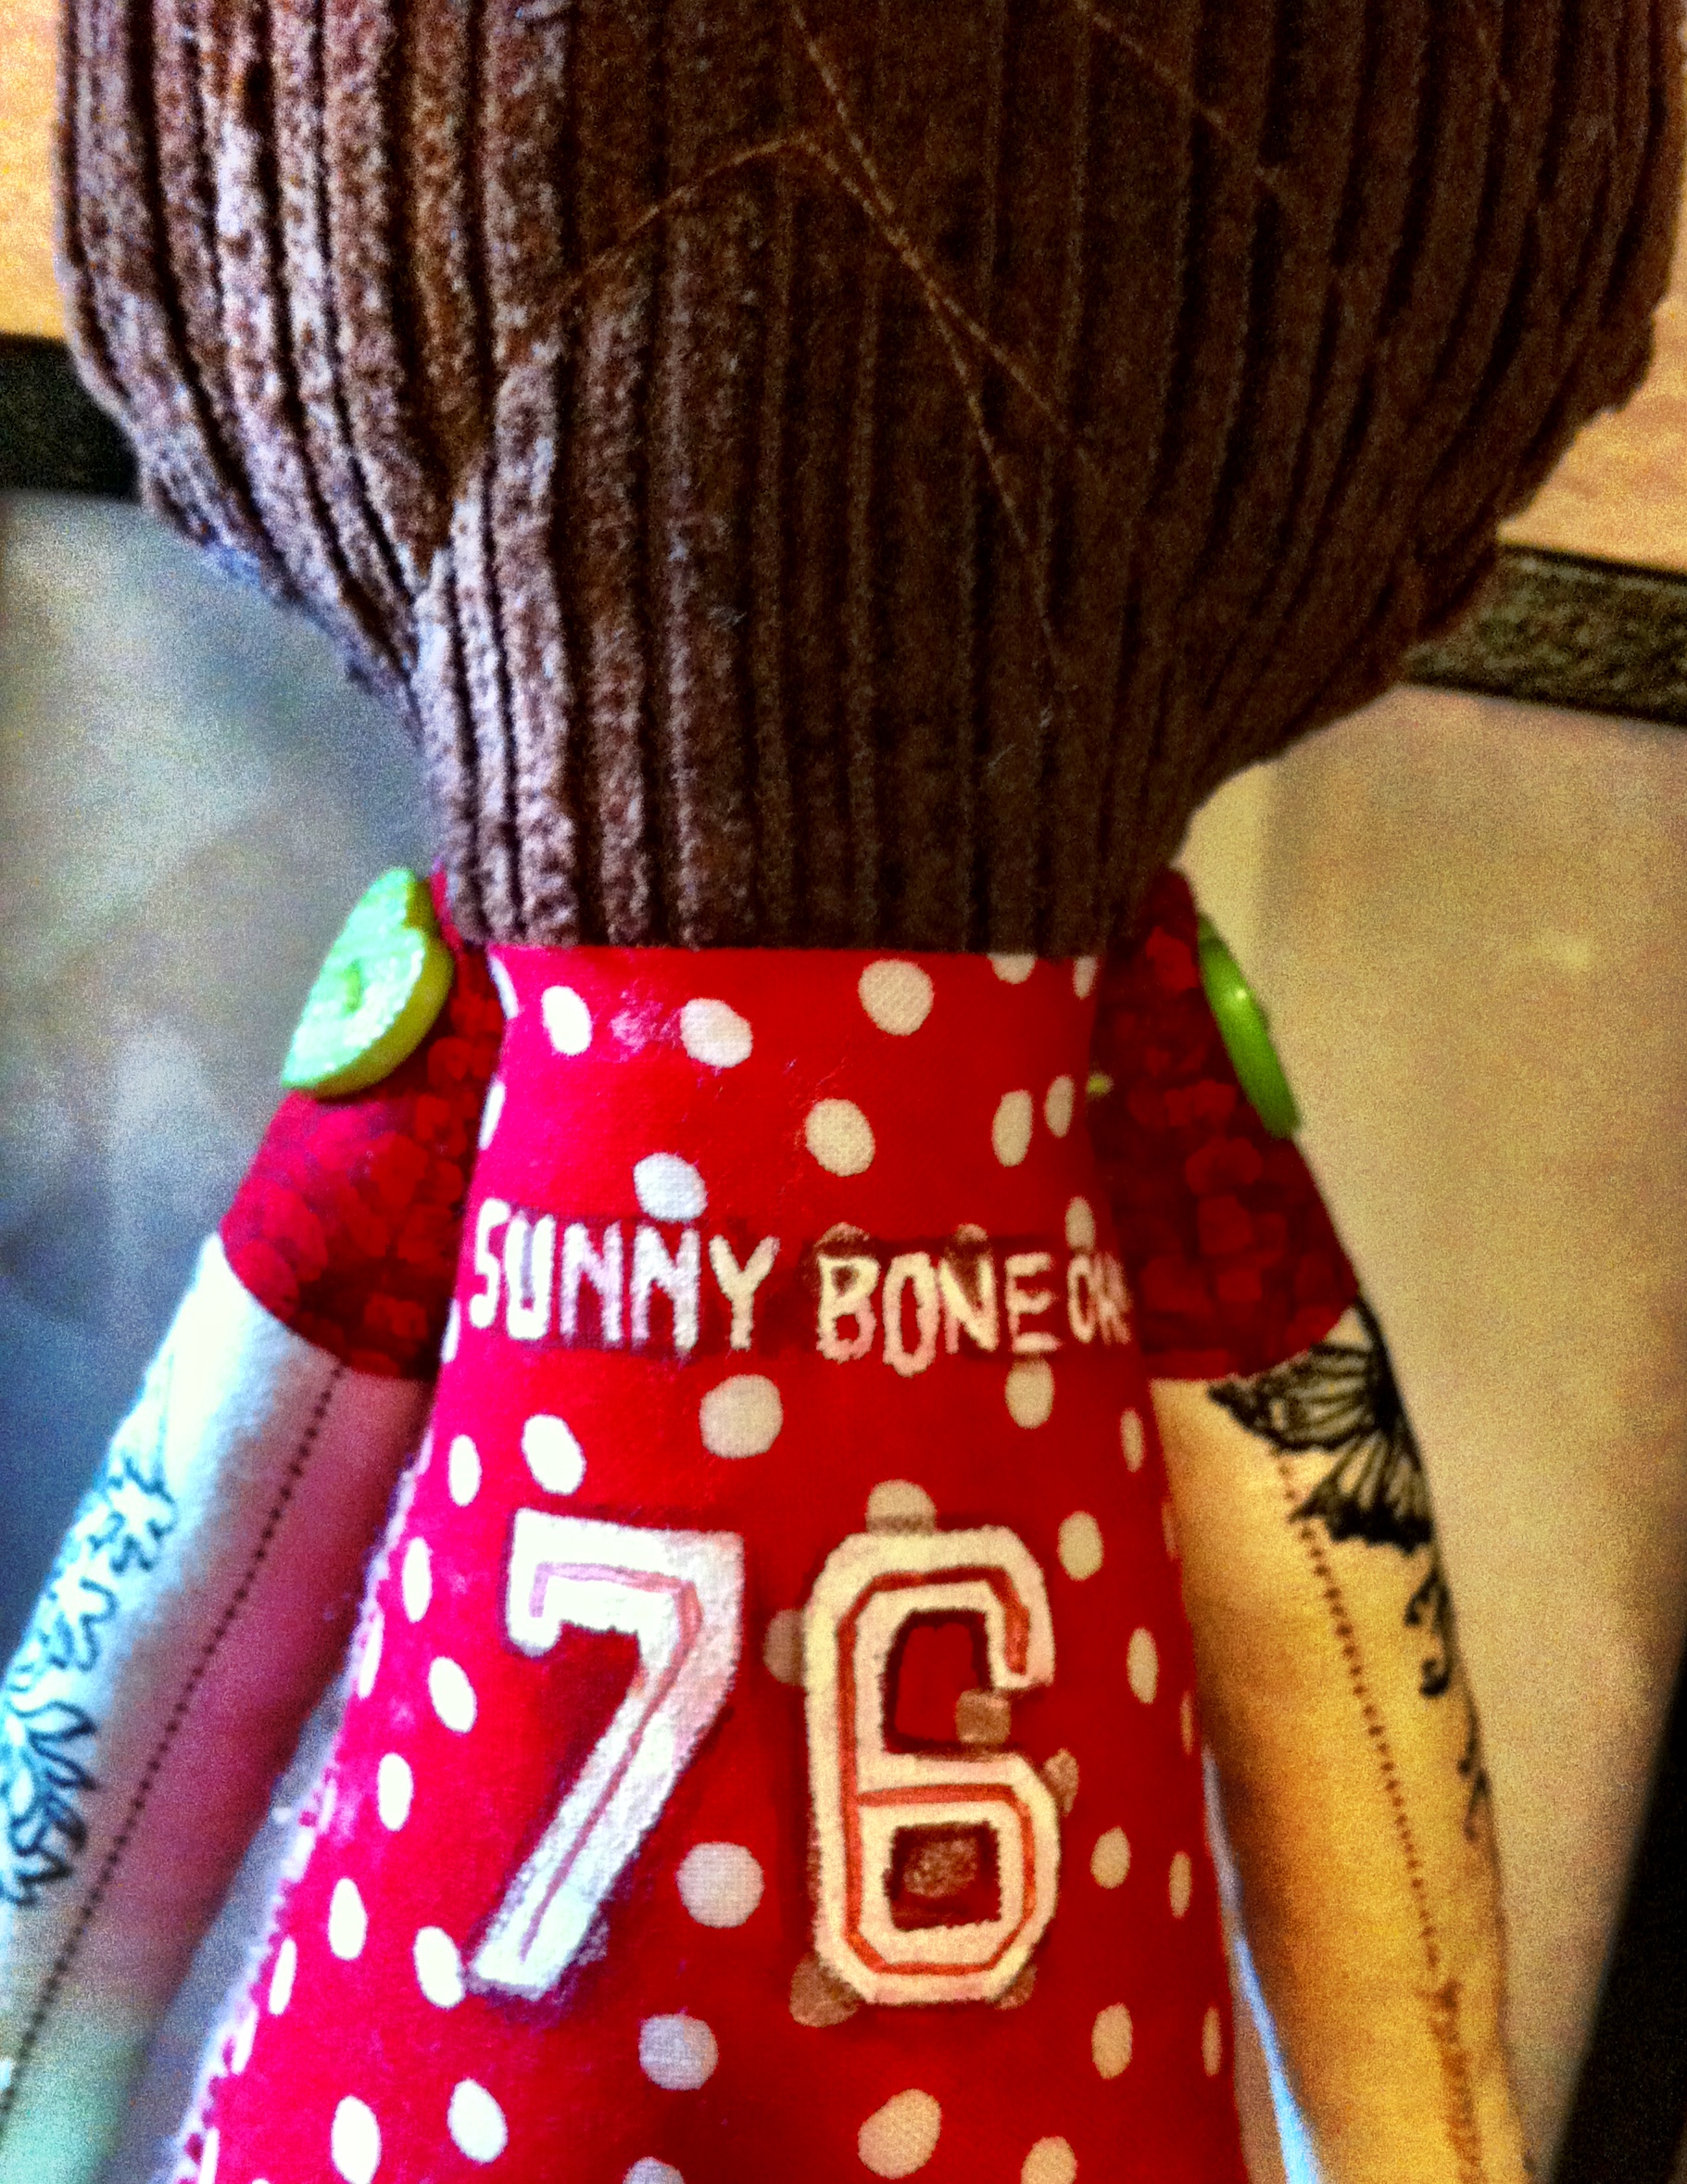
I put her number & name on back, made cute little wheels out of buttons and paint, and painted on the kneepads and wrist guards. The high socks are just a strip of fabric instead of doing one solid piece for the leg, as the pattern said.
I liked it so much, I had to make one for myself! Uh…I mean, for my daughter.


If I had a long, long time to spare, I’d maybe consider doing custom orders, but they sure do take awhile, and I might have to charge a bit for them. For now, give it a try it for yourself! It doesn’t even have to be derby-related. I think it’d be COOL to have a doll that looks like your friends or family….
Greater Than

I am horrible at math. I can’t “see” numbers in my head the way I can see images & ideas. As a student, I had to draw little dots on my math papers when I did calculations and doodle when I did word problems. Teachers were not very patient with my inability to keep up.
I remember being taught once about the “greater than/less than” symbols. (><). It made zero sense to me until someone said to imagine the “less than” symbol (<) as a smaller number with a mouth, ready to eat the bigger number. From there, I imagined the bigger number holding a sword, pointing at the little number.
And from THERE, years later, I elaborated on that image with this painting. Still not sure if it makes any sense to me in the world of mathematics, but if they made math books full of fun illustrations, I might have paid a LOT more attention in class….

