The Obscure Backpack
Last year, before the beginning of preschool, we performed the ritual of Gathering New School Supplies. I know getting new school supplies is fun, but the most fun (probably for me) is getting a new backpack and lunchbox. So I asked Myla what sort of backpack she wanted, and without hesitation, she insisted “NIGHTCRAWLER.”
She had first seen him during a kid’s Superhero Summer Camp, where she was introduced to X-Men Evolution–a Saturday-Morning-style cartoon, apparently about the teenage versions of some of the X-men. Kurt (aka: Nightcrawler) was goofy, jokey, silly and had a tail. She loved him instantly.
But since the X-Men aren’t really the height of current backpack fashion–let alone a Nightcrawler version–we decided to make our own. I ordered a cheap plain navy blue backpack from Amazon, and I got out some acrylic craft paints. I let her paint the main portion of it (since she practically begged me).
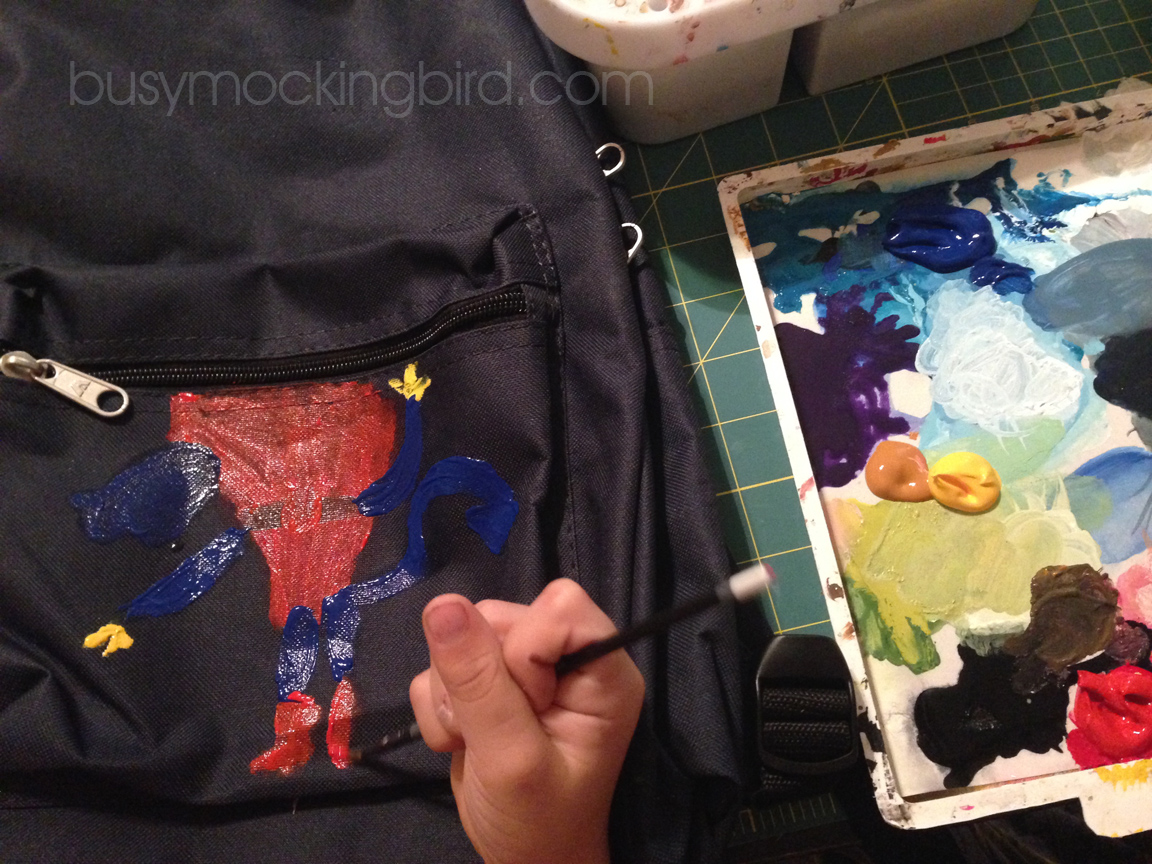 And then to help define it, I later added another version of him at the top…(PS: painting on dark canvas is HARD…)
 And she was ecstatic. She was so proud of that obscure backpack! I tried to casually prepare her for strange looks by telling her that most kids might not know who Nightcrawler was, and she said, “Well, I’ll just have to teach them.” I had some red puffy paint, so I added the “circle x” X-men symbol on each side, and although no kid in school knew who he was, she was so willing and happy to tell them all about the wonders of Nightcrawler.
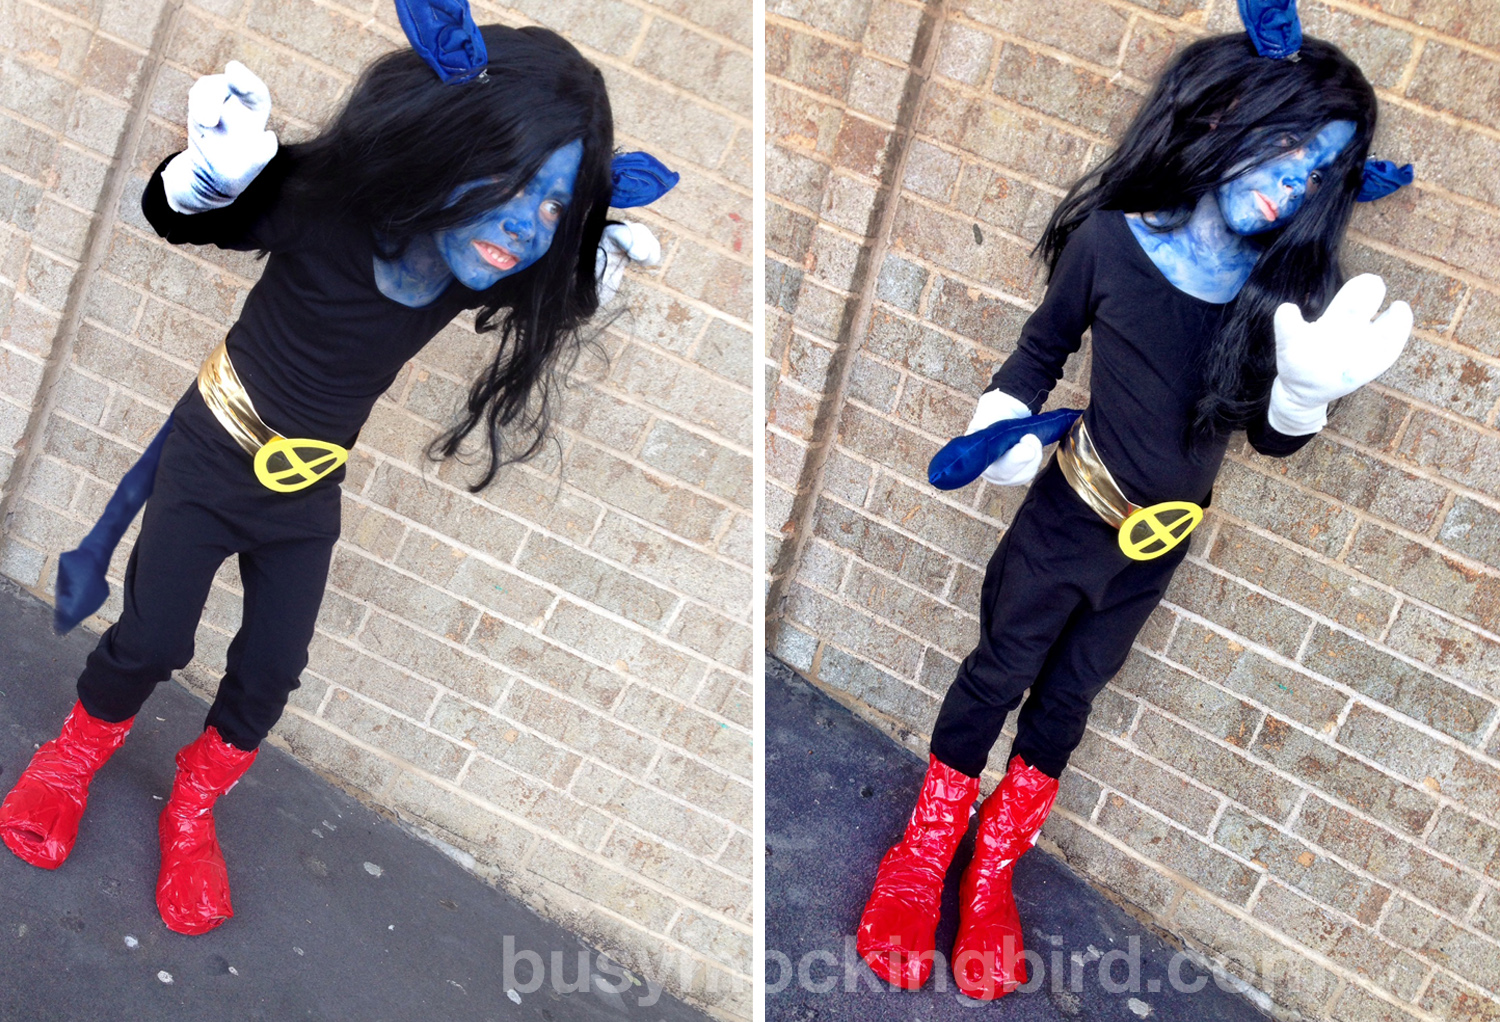
Her Nightcrawler obsession lasted for quite awhile. We even turned her into Nightcrawler for Halloween…
 Sadly, the cheaply-bought backpack was short-lived, as the zipper on it died before the school year ended, so it was promptly replaced with a Ninja Turtle-shell backpack (strange choice, since she’s never even WATCHED the Ninja Turtles…but she thought the turtle shell was cool). Ah, the fickle obsessions of a kid.
Her interests have evolved as quickly as the X-Men’s powers, and Kurt has now paved the way for Minecraft, Phineas and Ferb, and all kinds of other creatures. But I know she’ll always have a soft spot for Nightcrawler.
In any case, if your kid (or you) has a great love of a character you know will never be seen on the school supply shelves of your local stores, painting one on might be a good option! Or if painting skills aren’t your thing, there are iron-ons, patches, and transfers you can order online or get at the craft store.
And for all of you that have kids starting new adventures, good luck, and happy school year!
The Super Builders
One rainy day, after watching a few too many episodes of the Amazon show “Annedroids” , Myla said, “I want to build something! I want to be an inventor. Hey mom, can we build stuff out of other stuff, too?”
Not one to turn down an awesomely creative educational opportunity, I asked her what she wanted to build.
“ROBOTS!” she exclaimed. “We can even make one that helps with chores, and does the dishes. Maybe even one that talks to us and plays Legos. Can we make one that cleans?”
Um. Well, since I don’t happen to have earned a degree in robotics and engineering, I was stalled out. Until I remembered this:
One year while visiting my parents, my nieces decided to take apart some old electronics and build stuff. They just took it all apart and hot-glued it all together. Because that’s the kind of awesome stuff they do. One of them came up with this one, and sent it to us–it’s a portrait of Myla painting!

Isn’t it AWESOME? The curly hair! The eyes! The “paints,” and even the little collaboration taped to the easel.
I offered that as a suggestion, and Myla jumped at it. We dug around the garage for some old electronics, but since I had recently donated or dumped most of them, a trip to the thrift store yielded a good harvest: $5 for an old broken cassette player and a video tape rewinder. The height of technology at the time, they now served a much more artistic purpose by yielding parts for our creations.

The cool thing was getting her familiar with some tools, which is a good skill for any kid to have. I unscrewed the main body of the pieces, and taught her a little about wire clippers and screwdrivers. This all involved a lot of work on my part, but it kept her busy and interested, just trying to figure out the tools and tiny pieces. (Plus she looks super cool in her dad’s sunglasses, which doubled as eye protection, since I didn’t have any kid-goggles.)
A big bowl came in handy to keep all the little parts in for later. That would be where we’d keep all the tiny pieces and what we could dig through to build more out of later, and she got a kick out of seeing all the little pieces inside.

I plugged in our trusty low-temp kid’s glue gun–those are the ones that heat at lower temps to make it a little easier for kids to use. Still, since she had a bad experience with it ages ago (she directly touched the hot glue), she was hesitant to use it. Instead, I let her tell me what went where, and I helped her glue. I showed her, too, how the glue dries VERY quickly, and as long as you don’t touch it right away, it’s pretty harmless.
I just remember being warned so often about the dangers of power tools (my grandad cut the tip of his thumb off once, and I’ve heard tons of Wood Shop horror stories) that I have to fight through my fear of them sometimes. I’d rather teach her the right way to use them, than just have her be afraid.

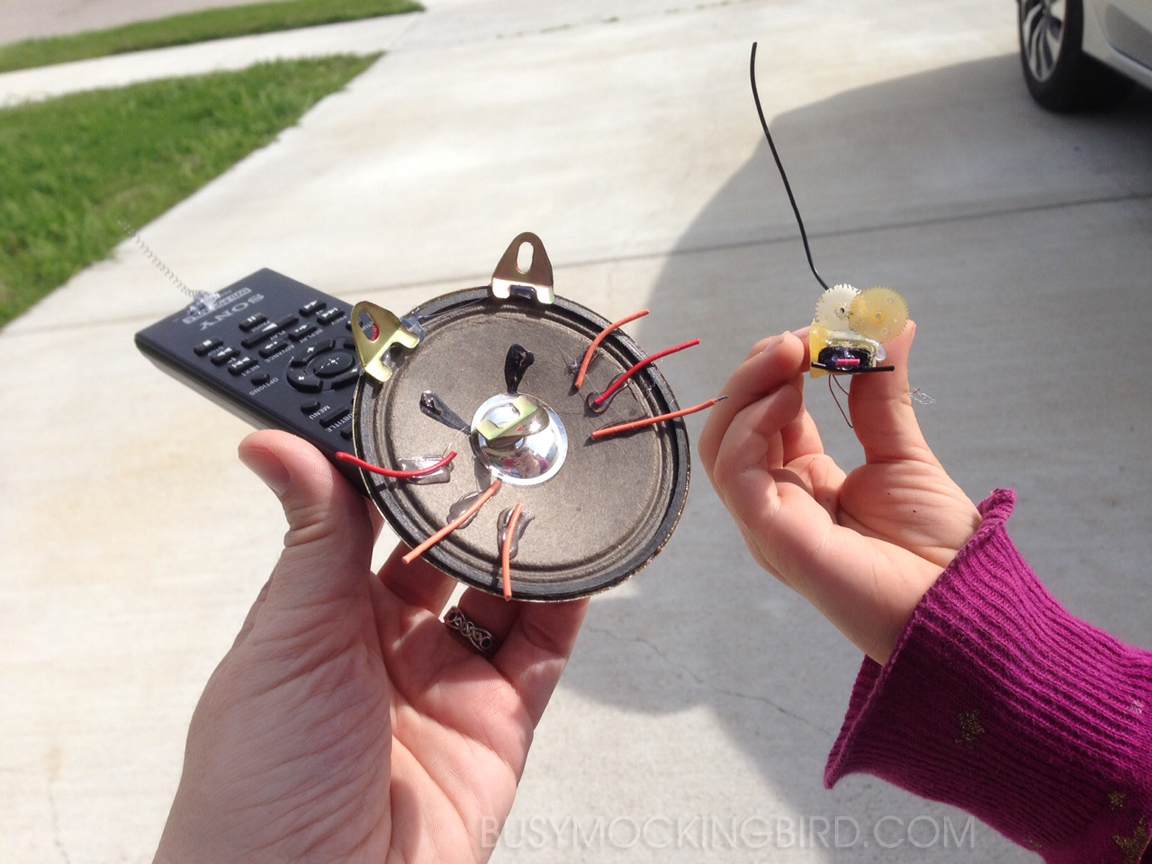
So here’s what we created! A remote control cat, and a tiny gear robo-mouse! So what if they can’t move on their own. They were fun to make, and we had a great time building them!
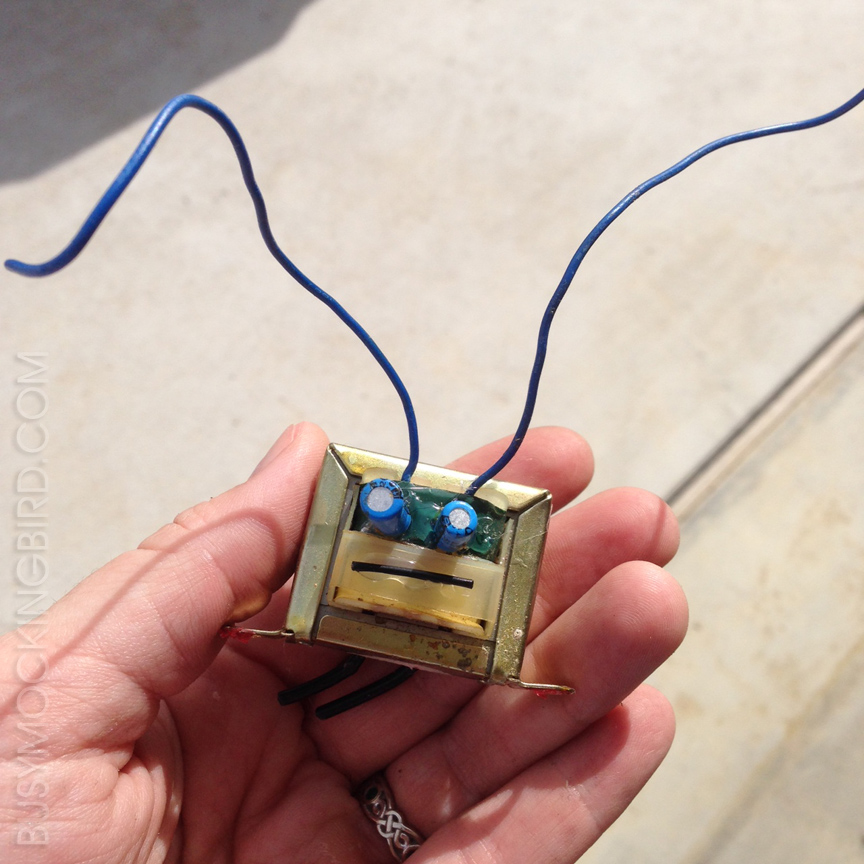
This is the first little face I made as a quick example to show her how you can make things out of the junk parts…
Later, I was inspired by an Instagram artist who fixed his friend’s Ever After doll by building her a steampunk leg–and I realized I could use some of the broken electronics to make a prosthetic arm for a Monster High doll that Myla had acquired, whose arm was missing.
I had some tiny watch parts from a jewelry project I had in my craft supplies, and just hot-glued a little hook-arm together for her.

Anyway, it’s a rainy day again today. Maybe we’ll have to be inventors again. Ah, sciencing! It’s the best!
Playing With Dolls
It all started with a Blythe doll….
Not too long ago, I was introduced to the crazy world of dolls when a friend traded me a Blythe doll in exchange for some artwork. She had warned me I may become addicted. “Oh pshaw,” I thought. “They’re cute, but I’m not really that into ‘people’ dolls.” I really didn’t know much about Blythe…just that they were a very unique doll that I had seen around for ages, and thought it’d be fun to have one for Myla.
But then I started learning about this whole other WORLD of customizing dolls. Now THAT I could get into–not so much to sell, but just for fun. Taking something that was factory-made and changing it to your own version? That’s pretty darn cool, I guess. People do ALL kinds of crazy customizations to their Blythes, and I started to find it fascinating.
But PAUSE–I’ll come back to Blythe..
I saw that people were customizing other dolls, so soon I found myself eyeballing my daughter’s Monster High ladies (if you’re shooting for impossible body standards, you may as well go ALL out and be a MONSTER, right?). Since she wouldn’t give her approval to let me experiment (although she did let me add some definition to the lovely designs on her Loch Ness Lorna doll) I took matters into my own hands, and started shopping around.
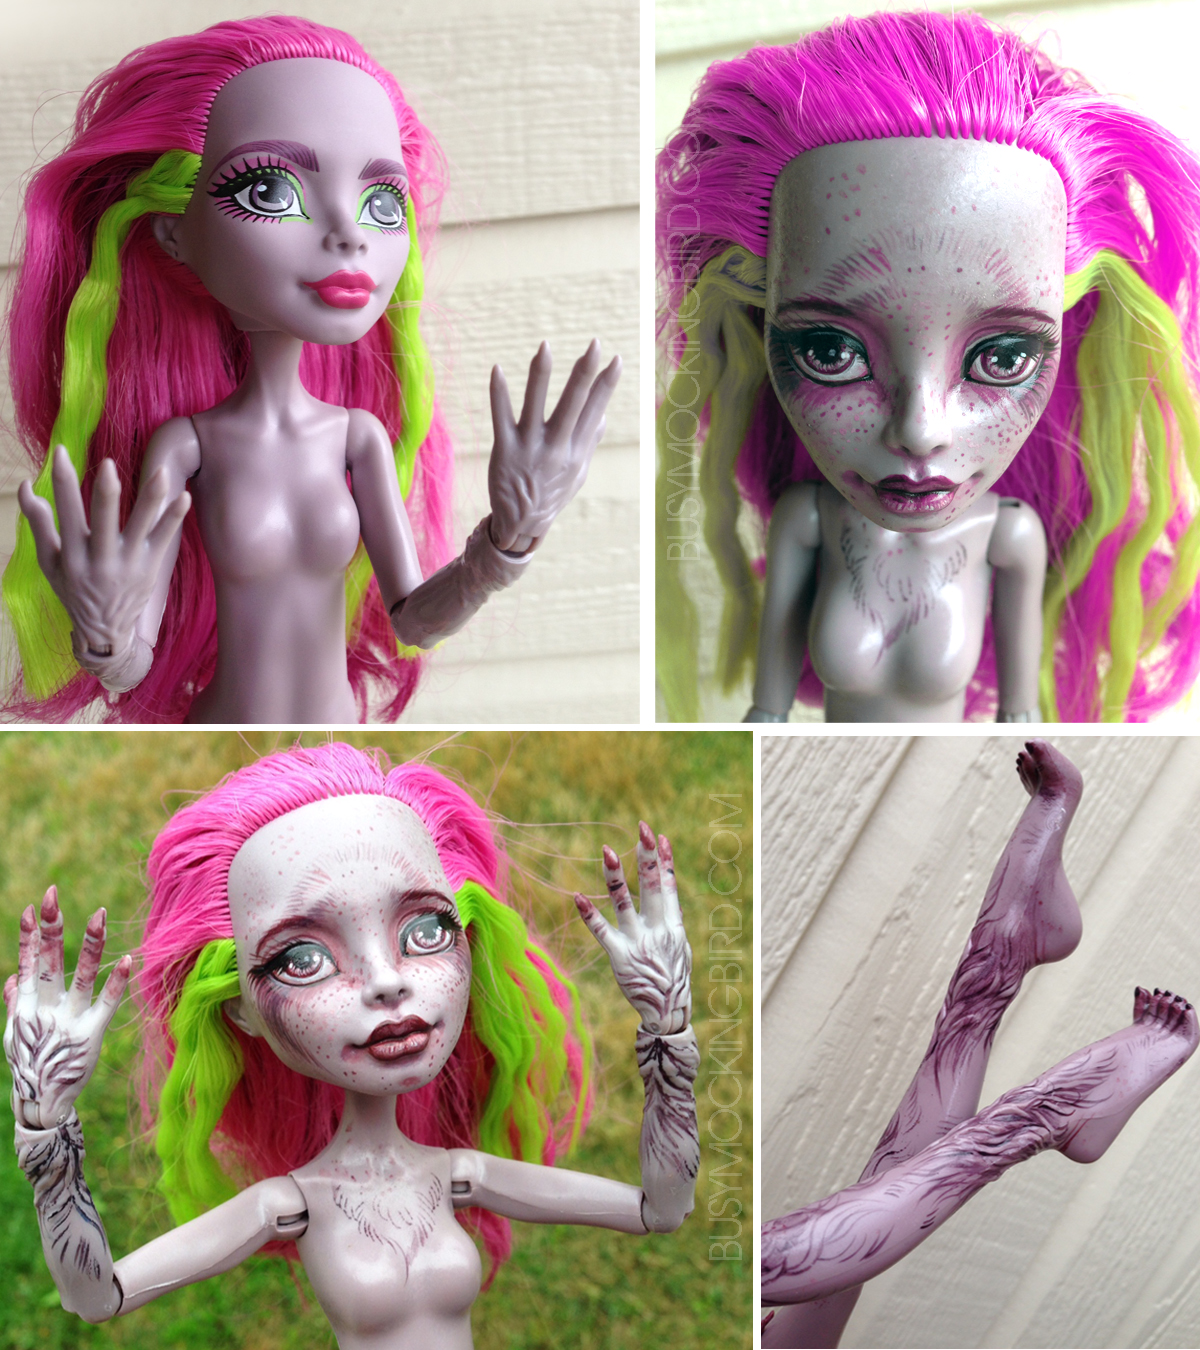
 And when I saw this girl based off of Bigfoot–complete with hairy arms, hairy legs, and GIGANTIC feet, how could I turn that down??
So I googled a few tutorials on customizing doll faces (there are THOUSANDS online), and took the paint off of her face and repainted her all over again…a little more hairy. A little more freckly. And those LEGS! Those are some non-shaved winter sasquatch legs for SURE! I love ’em. It was a little intimidating at first….I guess just the idea of totally messing her up. But really, if I had messed her up, I really could just wipe the paint off again with nail polish remover, right?
 The Tech Talk
There are a hundred ways people do and don’t do it, so I won’t give a full tutorial. Really, there are tons of people who make money online professionally customizing dolls, and they really know their stuff. I don’t. I’m just playing around.
I’ll just say I wiped her off with nail polish remover that had acetone in it (apparently, this can melt some plastics, so be careful), and it all came right off. Then I painted her with acrylics (most people use certain types of art pastels and paint that on, which gives more of a soft airbrushed look). The trickiest thing is spraying it to seal it all, because some sprays never fully dry, leaving the plastic tacky. This is particularly annoying because EVERYTHING sticks to it. This is what I accidentally did (despite reading about it), so now her face and arms are a little tacky. I ordered the correct spray, though, so help is on the way! The plasic was pretty easy to paint on–the acrylics didn’t really bead up or anything, and I was able to get a LITTLE bit of smooth shading (pastels would’ve probably been a lot smoother).
So to me, store-bought Monster High doll: boring. CUSTOMIZED Monster High doll? SUPER COOOOOOOOL!!!
And despite insisting I wouldn’t become a “crazy doll lady,” I was messing around on etsy, and found an inexpensive little MH WIG from FantasyDolls. And OMGersh, look how cool it looks!!!

She’s almost a proper sasquatch! It’s not properly glued onto her head or anything yet–like I said, I still need to fix that little “tacky skin” issue first–but I think it’s going to be pretty darn cool. And since she’s a “bigfoot,” I thought clothes wouldn’t look right, but nekkid didn’t quite work either. So the lovely lady from the shop offered to send me some scraps from the wig hair, and I’m going to use it to tack onto her body, like a really real sasquatch!
So why, you ask?
I don’t know. Because it’s fun. And why not?
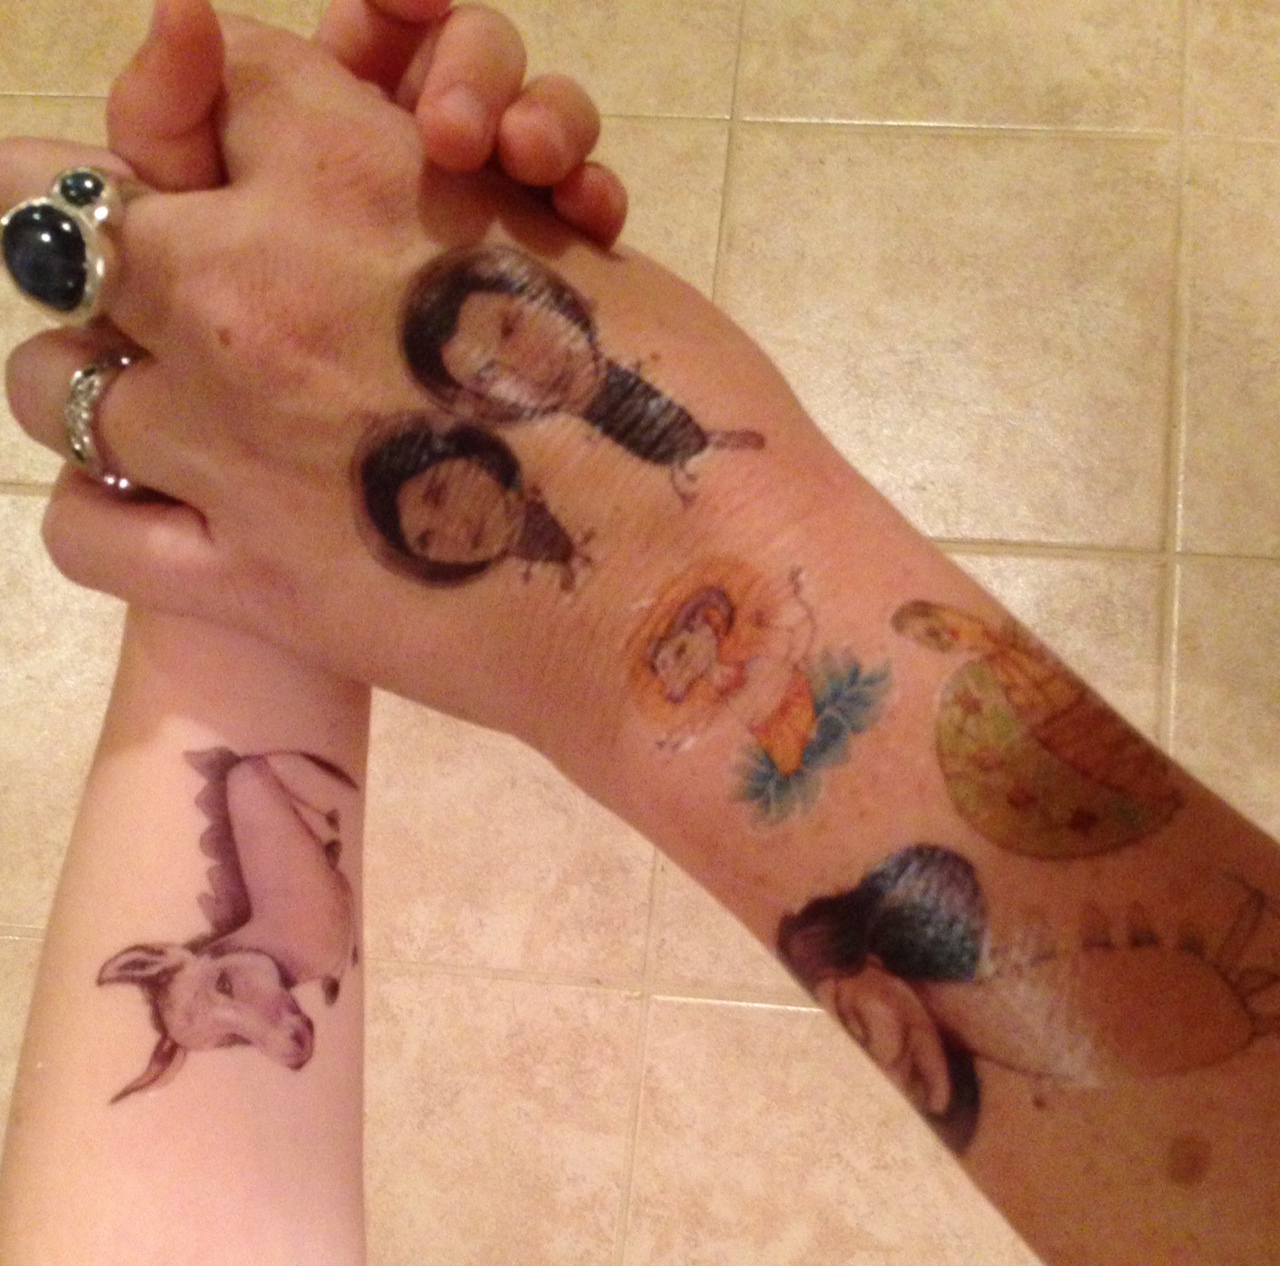
In the meantime, my friend has fully supported my new experiments by sending me two Blythe doll bodies to play with. So I “tattooed” them with acrylic paints and permanent marker…I want to see which will hold and which won’t on what kinds of plastic. And hey–doll tattoos!
 So let’s return back to Blythe…
Myla has a blonde, curly-haired Blythe doll she named “Sweetie.” I have a long brown-haired one we named “Mabel” (after the backyard gnomes that used to “visit” us).
There are SO many options for customizing Blythe dolls–you can change their bodies, paint their faces, paint their eyelids, you can give them completely new hair, and you can adjust their eyes so they don’t have that creepy straight-ahead doll stare, just to name a few. Since I’m not so skilled in all of THAT (and since they’re quite expensive dolls), I decided to do a few littler things, like paint “tattoos” on their bodies, and make horn headbands for them.
 I made deer antlers for Mabel out of Super Sculpey, hot-glued and E-6000’d onto a little doll headband. Myla asked if I could make Sweetie a pair of goat-horns, so I made those the same way. (I tried to cast them in resin so I could make a lot more, but my molding and casting skills still need some work.)
When I told Myla I was going to “tattoo” my doll’s body, she asked if I could do Sweetie’s too. She told me exactly what she wanted: a deer-girl. Because she says Sweetie is someone loves caring for all kinds of animals. So that’s what we did! And since Mabel seems like some sort of wood-nymph fairy girl (yeah, you heard me), I did a moth on her.
Anyway, call me crazy for playing with dolls. I get it, really–it does seem pretty strange. But really, it’s quite fun! To be able to take something and make it into something else completely your own is pretty awesome. I wish I had some spare Blythe faces to play with. Apparently they come straight out of the box looking VERY plastic, like this:
 And when you start looking at what people do to them (just google “custom Blythes,” if you’re curious), it’s actually pretty impressive.
I’m not sure what I’m going to DO with these dolls once I’m done. Stick ’em on a shelf? More than likely, Myla will want to play with them. I know some dolls are fancy, and some are expensive, and it may be risky to let your kid play with a “nice” doll. But if you teach that kid to be NICE to your “nice” doll, then hey–why not? I mean, they’re toys, afterall. They’re meant to be played with and enjoyed!
Valentines, Shmalentines.
I think about this time last year, I mentioned my distaste for Valentines Day.
But having a kid always gives you a chance to find a new appreciation for things you might not have even liked before. I always ask myself if there’s an opportunity to do something fun that I would actually like to do…so I asked Myla what we could design for V-day.
“Sugar skulls!” she said (she has seen Book of Life a few times lately). I considered how to make that work for valentines, and even asked friends to help with puns (like “no bones about it,” or “don’t be a bonehead” or something), but we decided to go a whole other route after we saw this:

They’re cute little candy huggers, and they’re perfect! But since I have neither a custom cutter or the patience to hand-cut 25 of them with an x-acto blade, I tweaked the idea a little, and we went with her second idea…
MONSTERS!
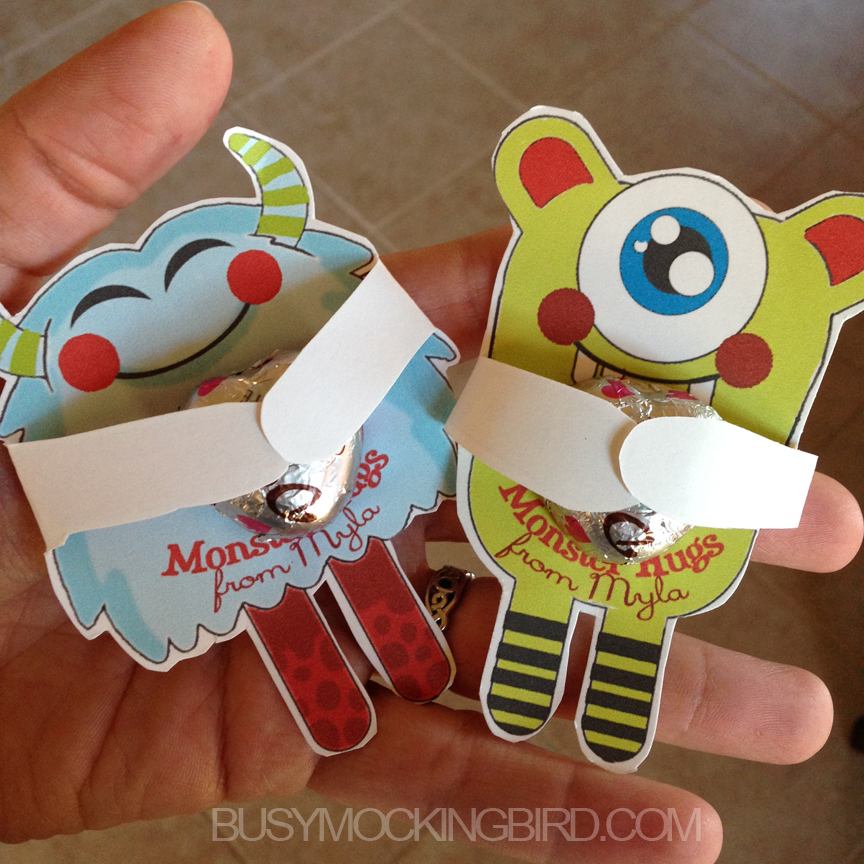
They’re so easy. Yeah, these look a little wonky, but that’s because I hand-cut them with scissors while I watched TV, and it took all of about 10 minutes. If your kid’s got mad scissor-skills (ours does), you could even let her help…(unless she’s SUPER engrossed in drawing her own imaginary superhero robots…which ours was, at the time). Kids don’t care if it’s wonky, though, because: MONSTERS AND CANDY.
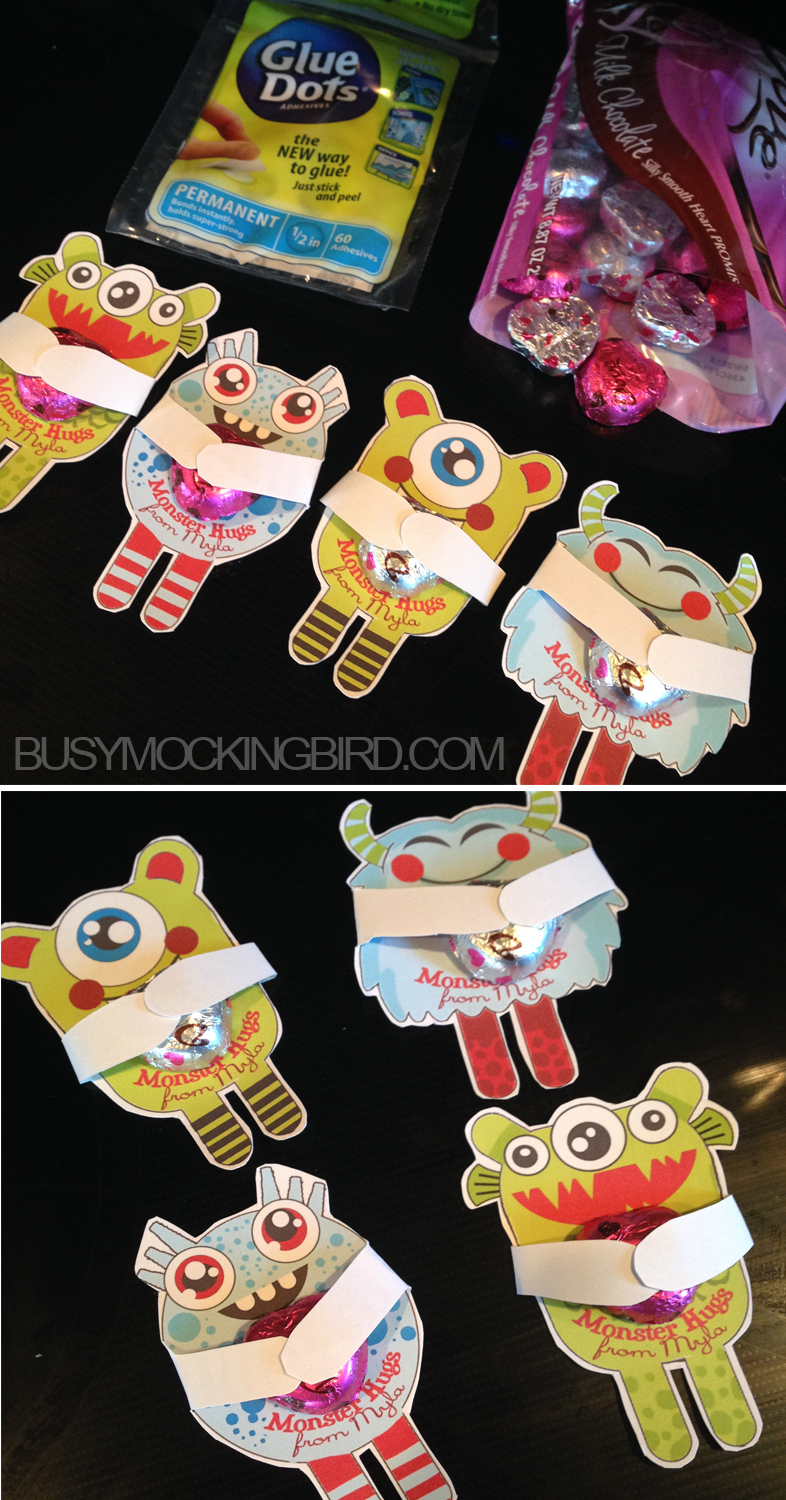
A few glue dots and some Dove heart candies later, and they were all done! I’ll even pass along my monster template, and you can feel free to customize it, if you like! Just right click it and save it to your desktop. Stick a glue dot on the belly, press the heart candy down, stick a glue dot on top, and fold the hands over…And BOOM! Sort-of instant valentines.

And if you’re not into these monsters, check out the monster ones I did last year. That post also has links to my friend Stowe’s site, which is full of some fabulously geeky valentines.
So there you go! Whether you can’t wait for your roses and chocolate, or you’re a humbug like me, I wish you all a very happy Valentine’s Day!
(…Or at least I wish you lots of candy. Whichever you prefer. …Mmmm, candy.)
Monster Kittens

In my ongoing experiments with sculpting, molding, and resin casting (like this one), I wanted to try out a more functional use for resin casts….Could I maybe make some kind of doll with a resin-cast face?
After a few rough sketches, I got some Sculpey out on an index card, pushed marbles in for eyes, and played around to see what I could come up with. Of course, since Myla loves to be involved, I let her have a lump, with which she made the little figure on the top left, and I came up with these two monster faces on the right (people on Instagram said they looked like monster kittens):

I still have some tricky times with molding and casting, and have wasted more than my fair share of molding rubber and resin…So I let Myla have a few of the wonky ones to paint herself…

And I added some color to a few molds that actually came out well…

(Initially, I put resin on the mouth and eyes for a “wet” look, and only sealed the faces with varnish, but later ended up sealing the whole face in ModPodge Dimensional Magic for better wear & tear).

Aside from painting them, the most fun part was trying to figure out what sort of fabric to use. So many options that completely change the look of each face! And I just used scraps of things I had in my fabric bins, including fun fur, industrial felt, mismatched fabrics, and excess pieces of a patchwork quilt I once made.
I learned from talking to other artists (have I mentioned how much I love Instagram??) that the best way to affix the heads to the fabric is to use E600, and put them under a heavy object overnight. Granted, they smell like chemical warfare afterwards, but if you let them air out awhile, the smell eventually goes away.
The first creature I made was a basic doll-shape:

…And Myla loved him.
Then I made a body for the one she painted herself:

…And Myla loved him.
I tried a more “pillow-like” one, with octopus-legs…
…And Myla wasn’t crazy about that one. (Don’t worry–it’s found a good home at my friend Corrie’s house.)
I did what Myla describes as a flying fish-fairy:

And a sort of dragonfly-dragon:

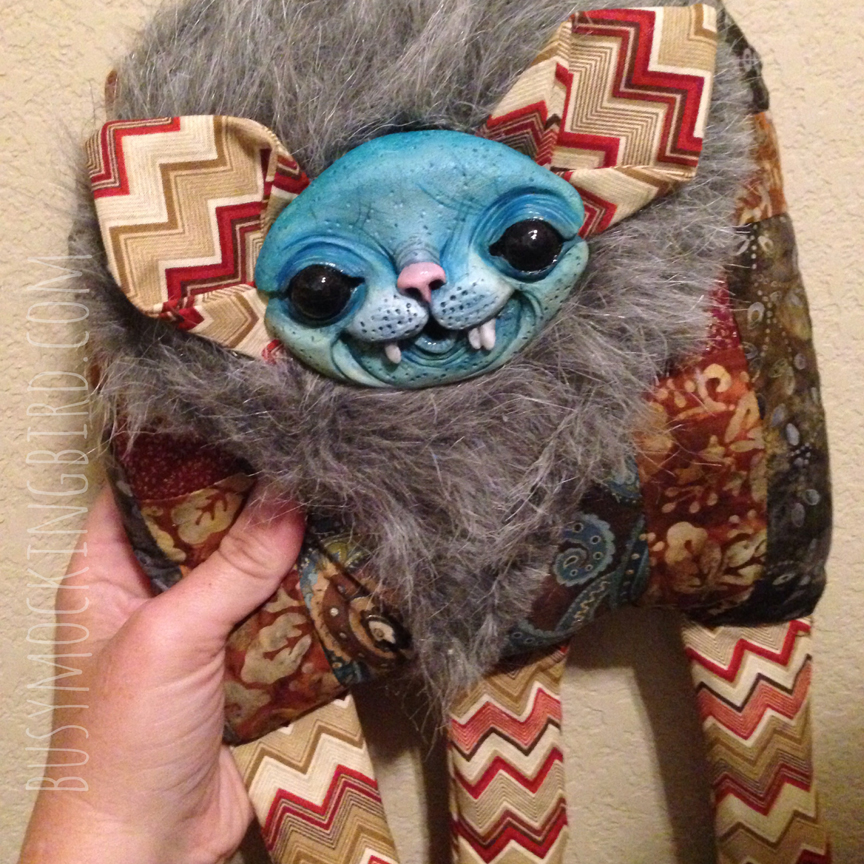
But by far, my favorite was when I tried something completely different, and made a more 3-dimensional body, with three little legs on each side.
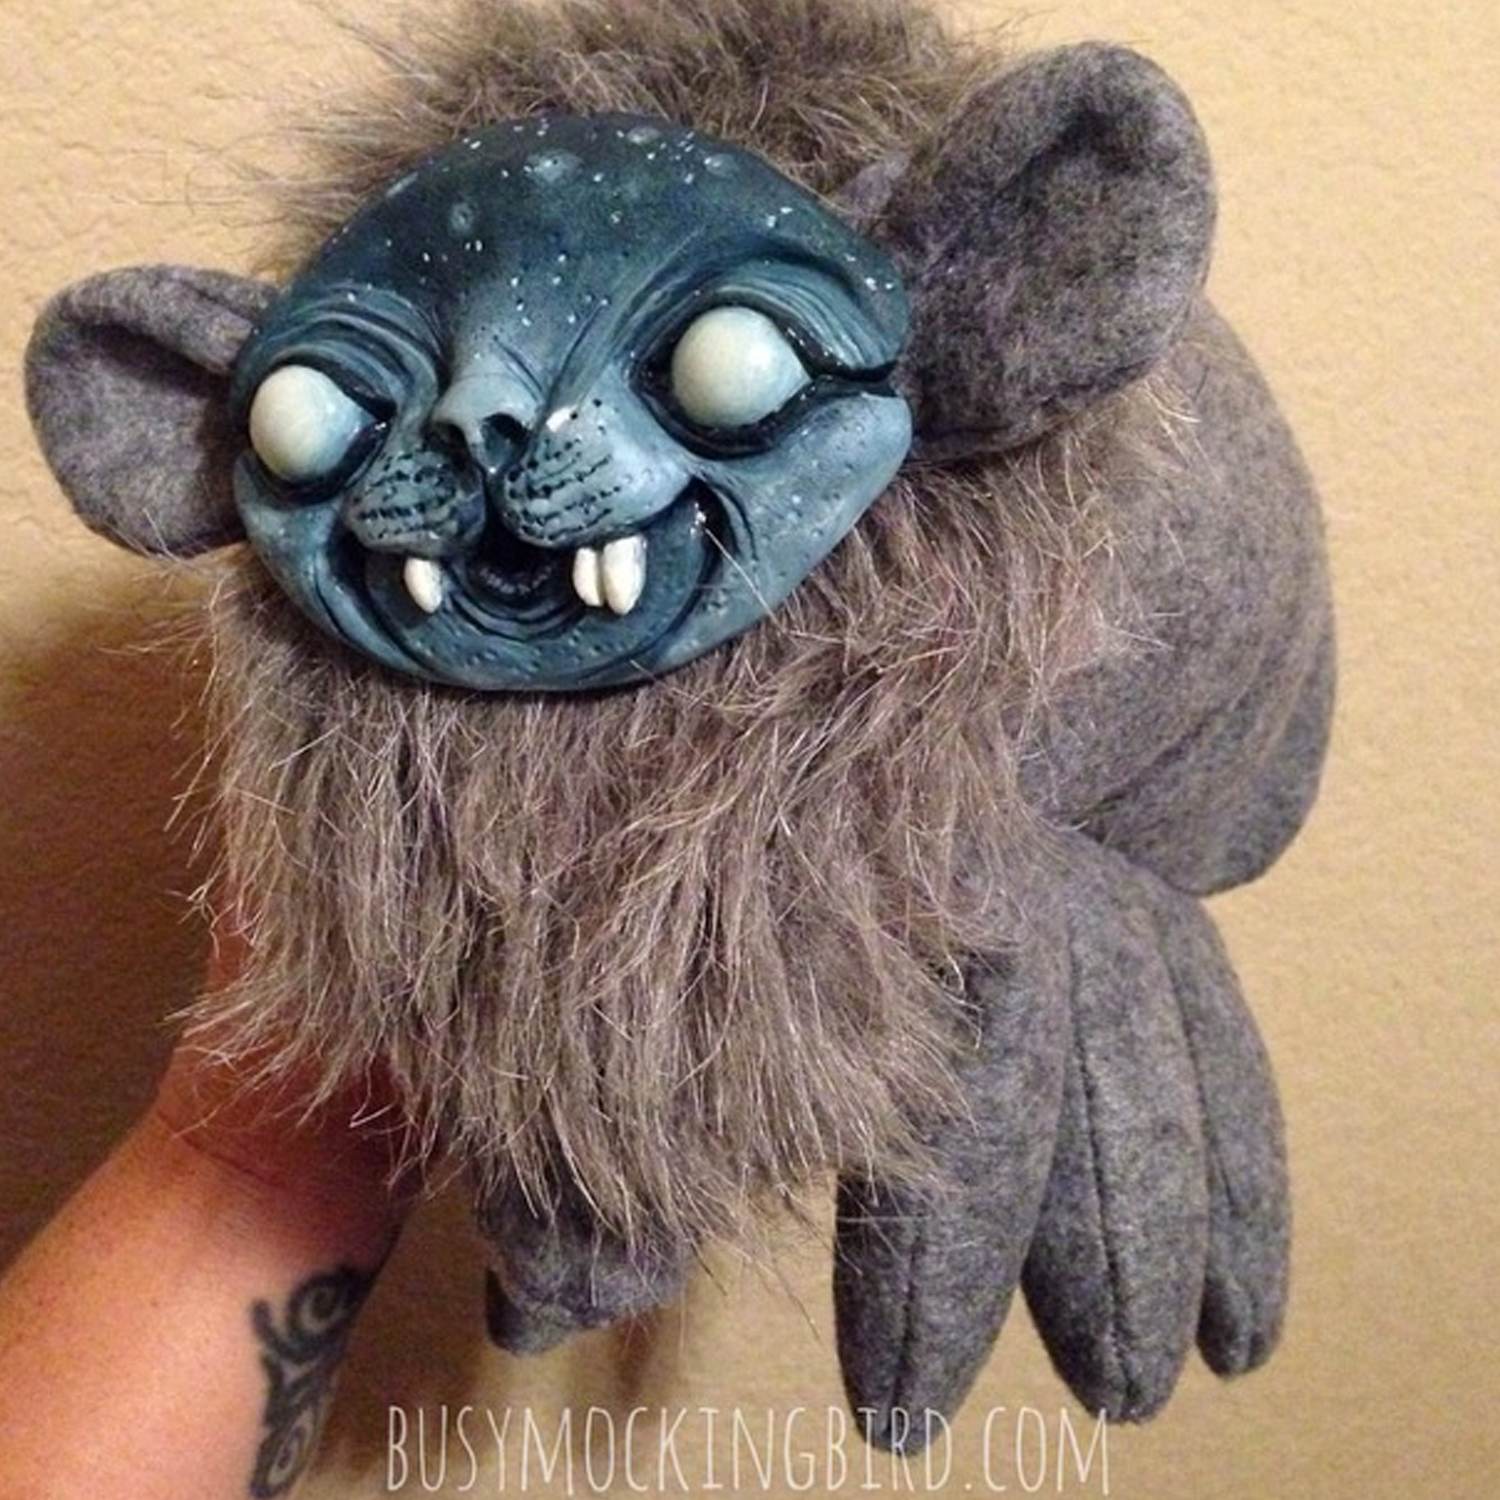

It was my first time making one that wasn’t just a flat front & back without using a pattern, so it’s a little wonky, but I quite like it.
Annnnnd, of course, Myla loved it. She calls her “Midnight” and carries her everywhere lately. I realize these things are not necessarily made to be ‘toys” (how much they hold up to the wear & tear of kid life is still being determined), but she treats her dolls pretty well, so why not?
Thankfully, the horrendous glue smell has gone away. And after repairing her chipped little resin face a couple of times, I think a good coat of the ModPodge stuff has really helped keep her shiny & new.
It’s a funny thing, though, when she takes her little monster places. Other little girls will look at Myla and smile sweetly, and Myla will smile back…then they’ll look down at her fuzzy little monster, and their face will inevitably change to a mortified “what the HECK??” When she takes Midnight anywhere, the comments she gets stem from either complete disgust, or absolute fascination. And when people ask where she got such a doll, she says, with her sweet little 5-year old voice, “my mom sculpt it and cast it in wesin.”
Listen, I know we like weird things. And I know most people won’t “get” the same things we’re into. So we could teach her to either hide what she likes to be “normal,” or take it as an opportunity to share our weirdness with someone else.
We teach her that when someone doesn’t like something, or doesn’t “get” it (like maybe her references to characters she has heard stories of and loves, like Gamora and Groot, or Storm, or Star Wars), it might be because they just don’t UNDERSTAND it, or haven’t heard about them….but that it doesn’t make it wrong. It might just mean that they don’t know, which would be a good chance to teach them something new. People don’t always like the same things, but they shouldn’t try to make someone else feel bad for liking what they like. And no matter what, you should never EVER feel bad or ashamed for liking what you like, no matter how weird, as long as you’re not hurting anyone else. If they don’t like it, that’s okay–that’s their business.
So far, she’s done pretty well with that, thankfully. She doesn’t go out LOOKING for a conflict, but so far, she handles it with grace when she does.
On a side note, people have asked if I sell these, and so far, there are many reasons I haven’t. I quite like doing them just for fun, and as much as I’d love to share them, the thought of doing them to order is quite intimidating! (Not to mention, the effort that goes into sculpting, molding, casting, painting, and sewing might be worth a bit more than people are willing to consider.)
I have trouble with that–the thought of custom work and getting rid of the things I make. It really is daunting. I worry that it might lose it’s “fun” or its spontaneity. Also, I’m not sure how well they’ll hold up. Maybe one day, when things aren’t so busy, and I’ve got this whole resin-casting thing down pat/ Maybe I’ll make a few and put them up in a shop as-is. (I keep saying I’m going to do that….)
Until then, have any of you tried resin casting? Have you tried making dolls from them? I’d love to see your creations and hear from you about your resin-adventures!
Playing with Mermaids
Inspiration comes in strange places. With the excitement of Austin Wizard Con looming, I have been playing with all kinds of ideas for the table display and the idea of little knick-knacks to show. And since I follow a ton of very talented artists on Instagram, I was inspired by them to try something completely new for me: molding and casting.
So I watched a few videos on YouTube, and now I’m an expert.
I won’t do a full DIY step by step, since I don’t really know what I’m doing and this is all new to me anyway (trust me, this is one of those situations where you have to just jump in and try it). But I’ll give a rough rundown of the basic steps, just to show you what was involved…
Step 1: Sculpt something.
I used Super Sculpey, and tried to come up with a little sculpted version of the mermaid girl Myla & I made. (I realize she looks very little like the original, but Myla said she was cute, so I think it’s okay…) Since kids have a natural magnetic attraction towards clay, I sacrificed a handful of Sculpey and let Myla make her own mermaid. (She modeled her after a character on Doc McStuffins, who is not, in fact, topless–but she couldn’t remember what her top looked like, so she just gave her breasts. I’m not sure if I should put a censored black bar over kid-sculpted breasts? I just go with it)…

Step 2: Make a mold.
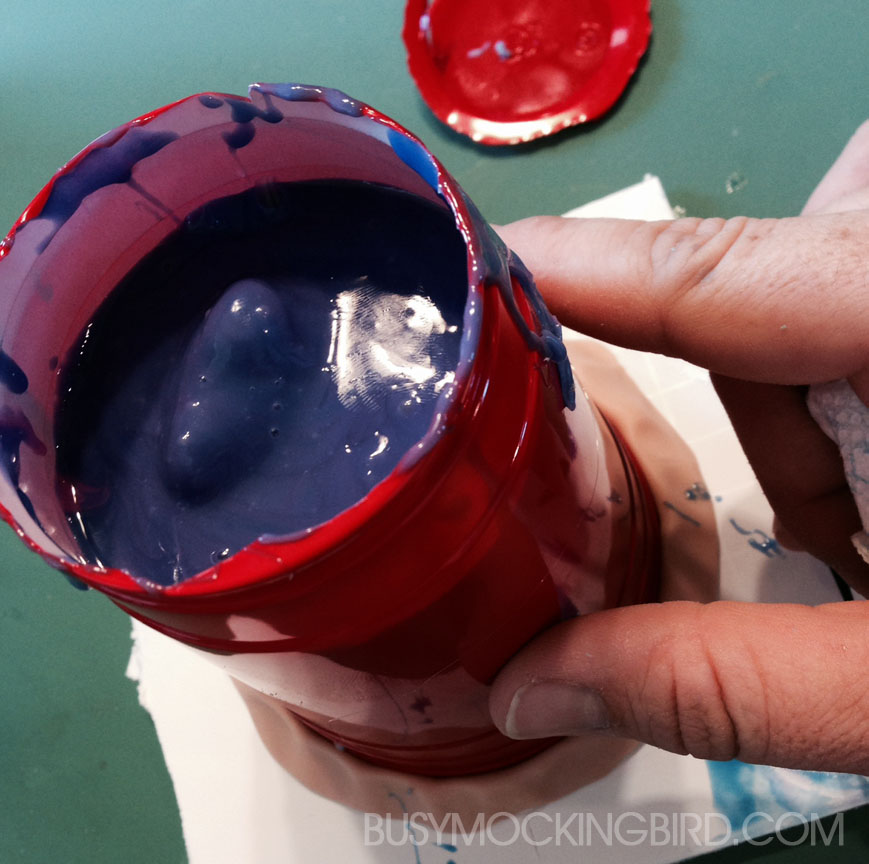
I got my kits from a company called Smooth-On (who have TONS of great videos on their site). I won’t give you every little detail on this, since the directions are really easy (and on the box)…but the basic idea is mix This with That and pour. (Plus, if I told you everything, I’d ruin all the messy fun for you.) The main thing I learned during this step: make sure you mix it REALLY well. If you don’t, it doesn’t set right. I made mine from silicone rubber in a plastic cup. I nearly didn’t mix enough for the tail, but it turned out alright.
Step 3: Cut your sculpture out
You know that bit of instructions that you think, “Ah, that’s not a big deal, I’ll just sort of wing it”? Well, turns out sometimes they tell you those little tips for a good reason. When I put my sculpture in the cup to mold it, I forgot to mark on the cup where the back side of her was. So when it was time to open her, and I “guessed,” I guessed wrong, and sort of sliced up her face. The stubby arms were apparently a little too weak for the whole process and broke off. And the body crumbled because I hadn’t fully cooked her. But the mold itself turned out fairly good. And Sculpey can be touched up a bit, so I patched her up and fully cooked her, and she was just fine.

Step 4: Pour plastic/resin into the mold.
The first go-round, I tried a liquid plastic kit from Smooth-On. And along with my repeated advice of making sure you mix everything the right way, I’ll add a couple of pointers I learned: First thing is that it’s probably a good idea to wear gloves. Initially, I gave that bit of advice a big ol’ “Pshhhht, whatever.” But plastic nearly ALWAYS gets on your hands, and it feels super creepy, like when you get superglue on your fingers. Blecch. And later, when I tried pouring resin, I had a bit of a leak in the silicone mold (it was a different mold, and I had two “air holes”), and it leaked hot resin ALLLLLLLLLLL over my work table. Trust me, that’s not fun at ALL. So my bit of advice there? make sure you don’t have a spot in the mold that might leak. And lastly, GIVE IT TIME TO CURE. I’m very impatient. But hot plastic hurts.

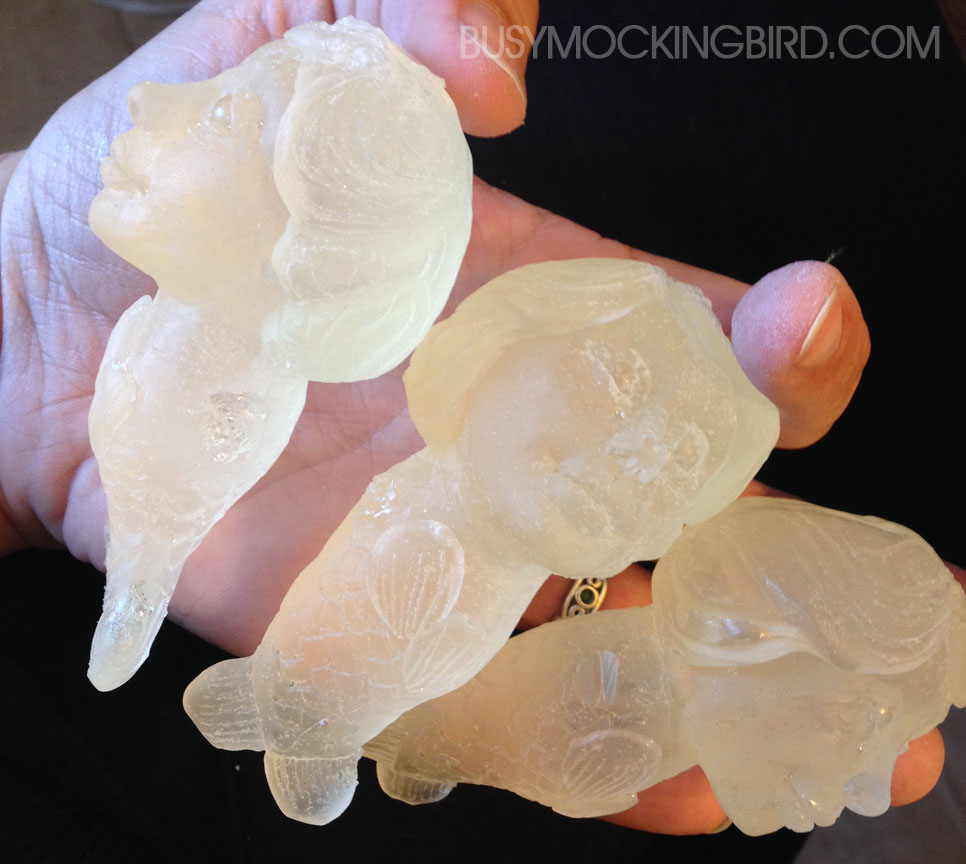
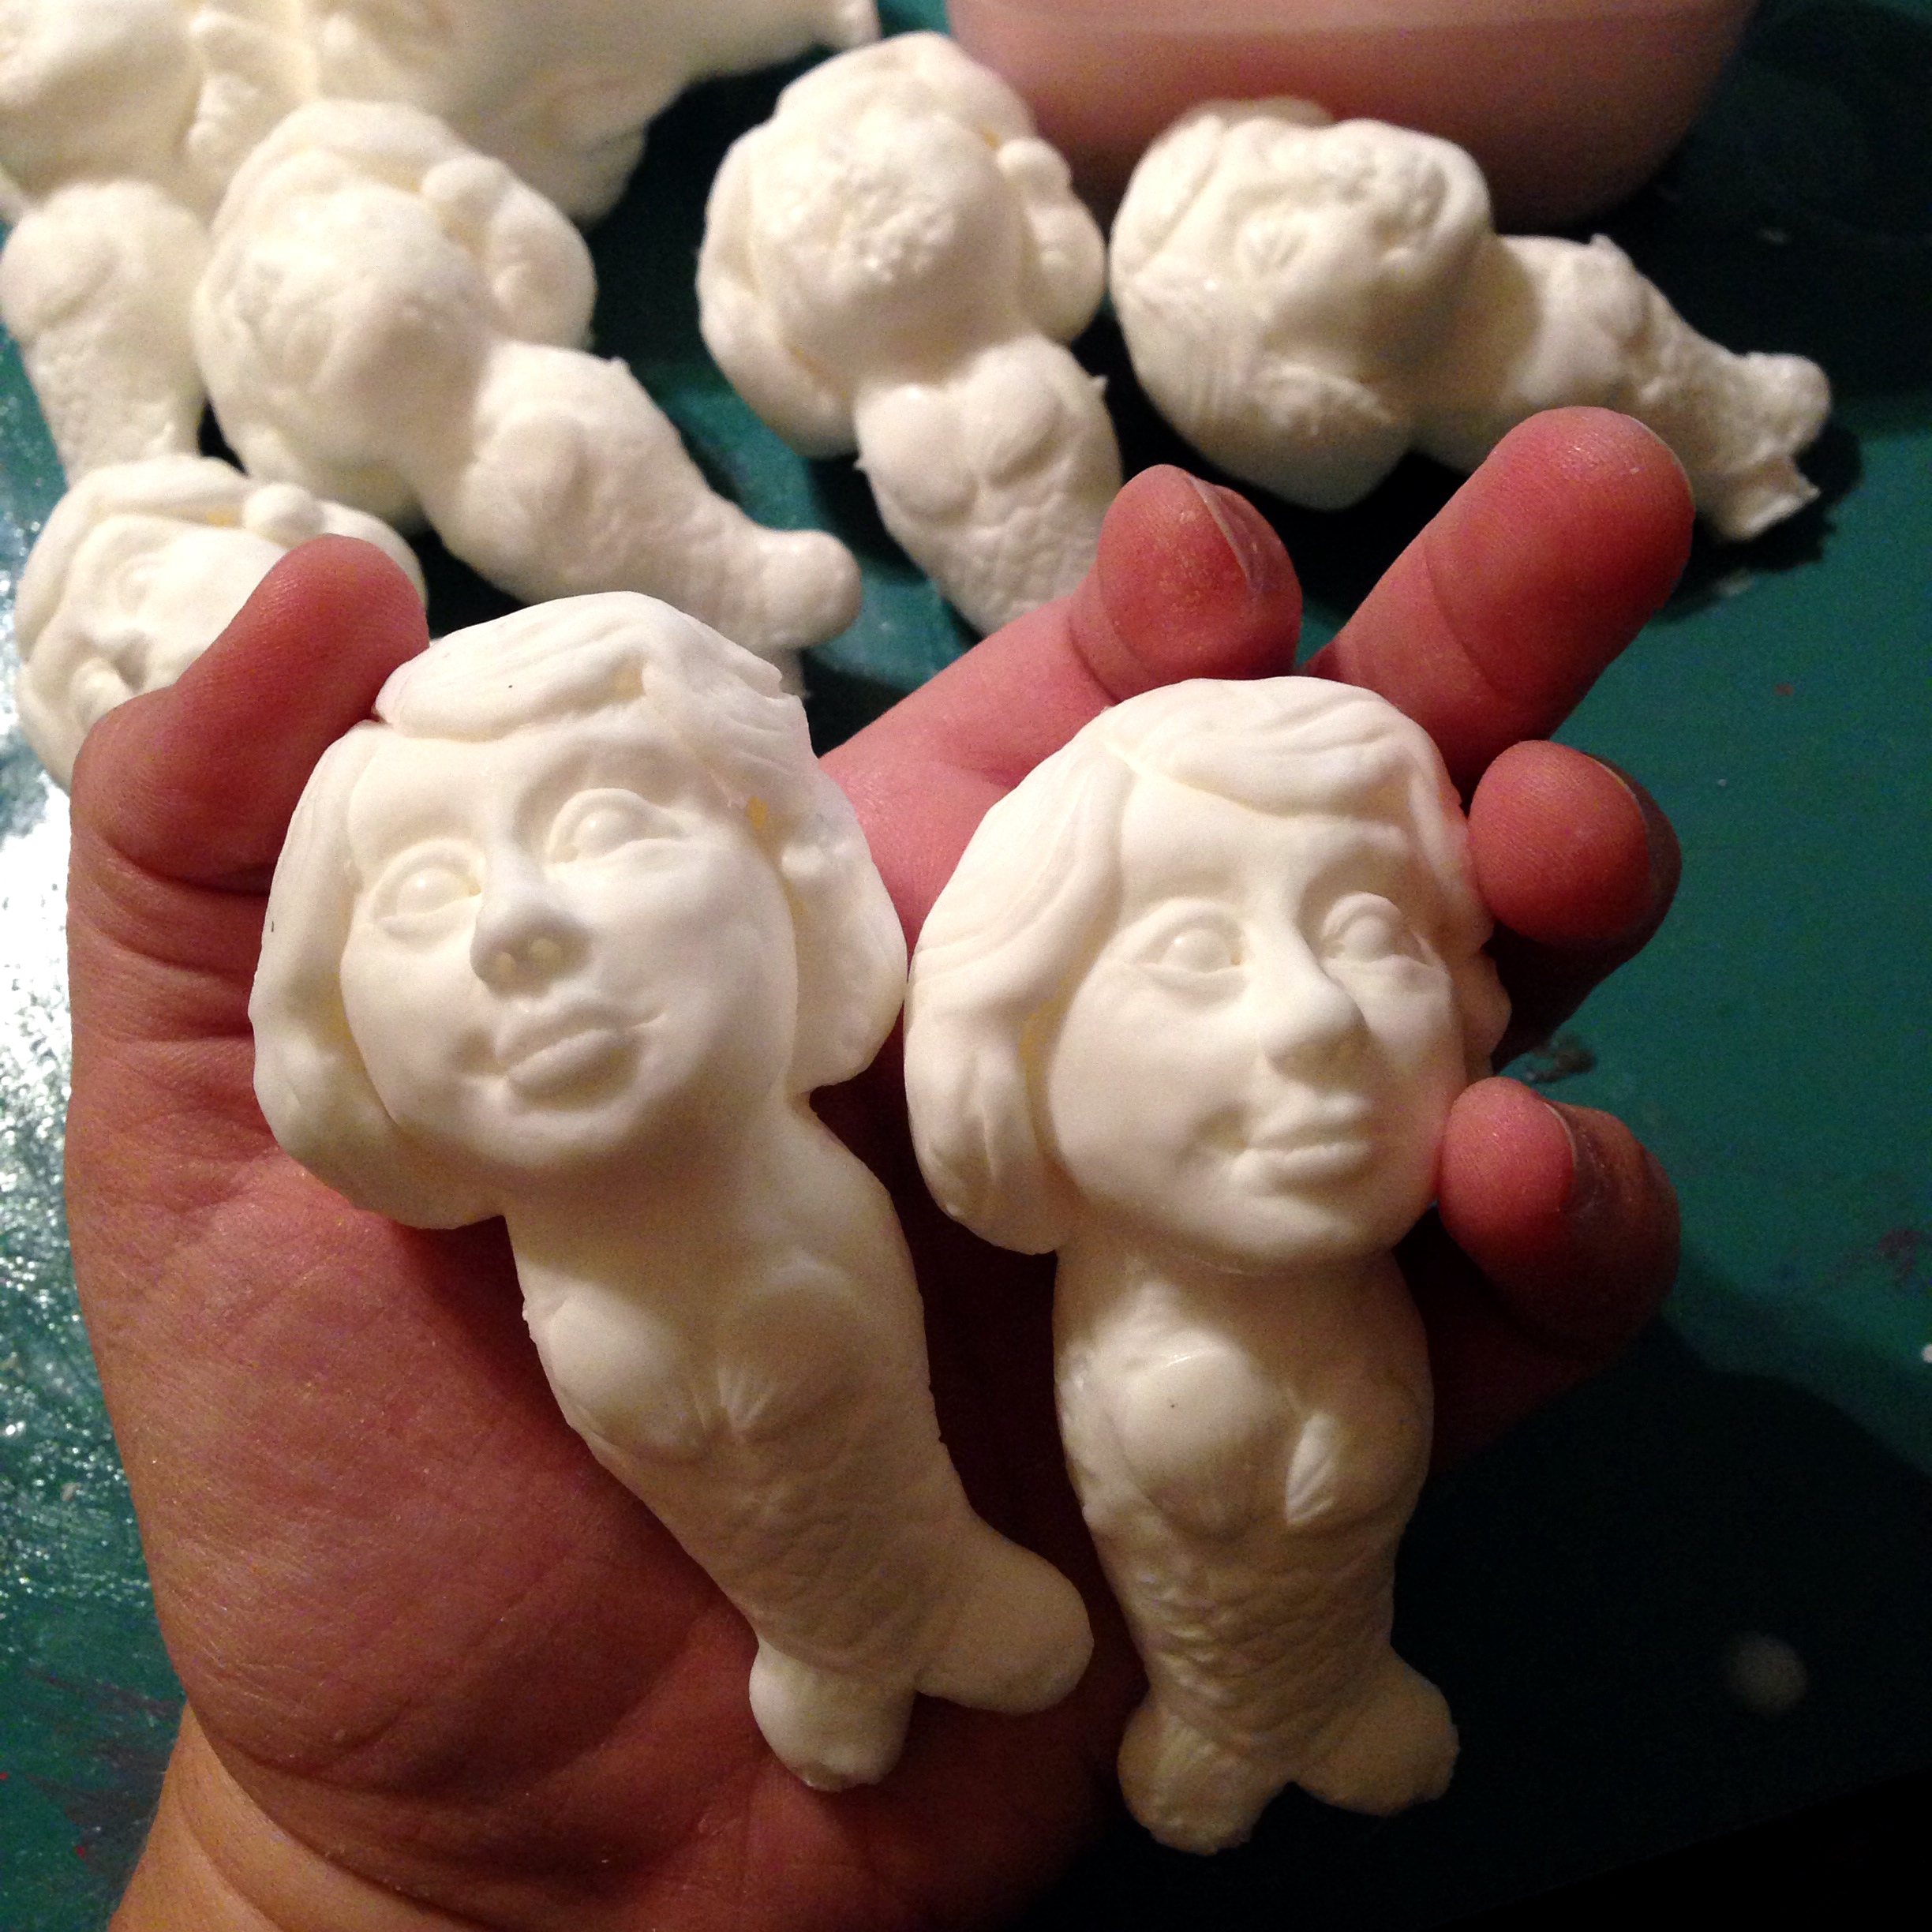
Step 5: Plastic mermaids!
So I messed up quite a few mermaids, but after some trial and error, I was able to get a few decent-looking plastic mermaids! Fun! I couldn’t figure out why their faces were bubbly, though, until I looked closely at the mold, and realized that the mold itself had bubbles set into it. Whoops. Later I made a better mold, and made it smaller and on its back, so I wouldn’t waste so much silicone rubber. That helped clear up any bubble issues, and gave me a much clearer mold. Apparently, having her on her back, and pouring the silicone in the corner and letting it sort of “seep” into the face on its own is the big trick with that. (I HAD done that the first time, but she was positioned upside down, and all the details of the face were on the bottom, leaving lots of chances for air to get trapped in there. Whoops.)
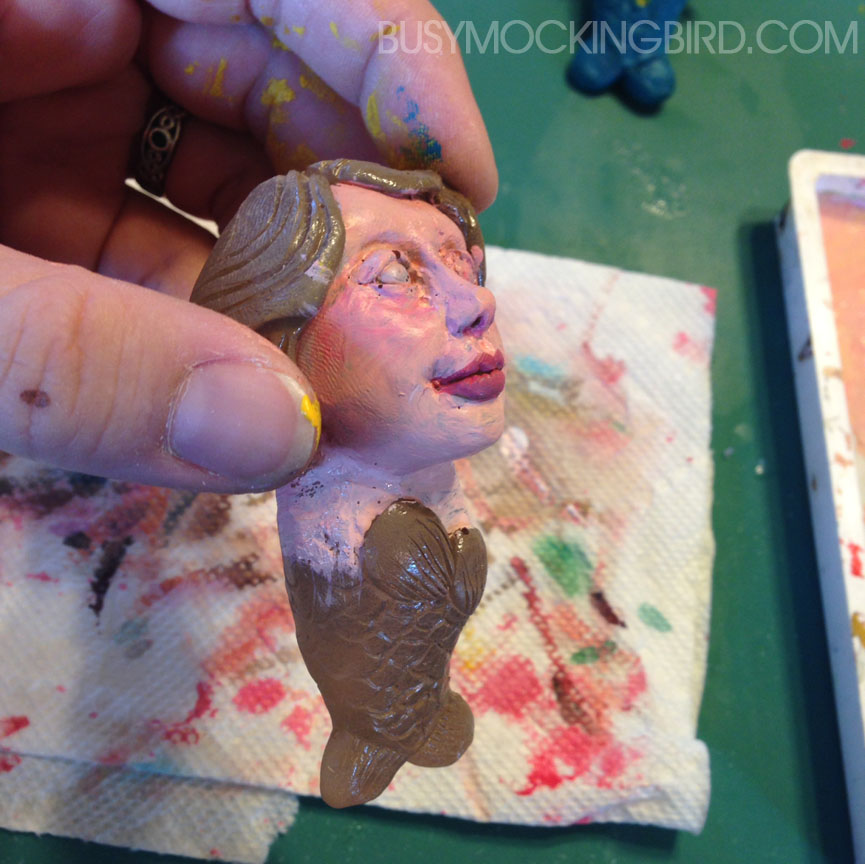
Step 6: Paint that junk
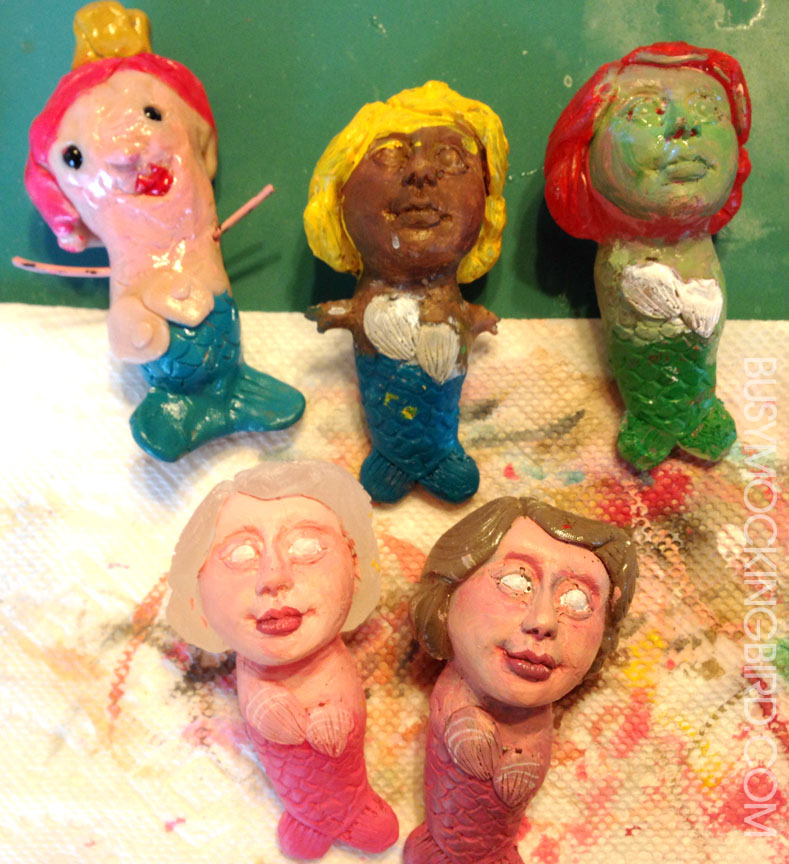
So with a handful of funky mermaids, I decided we should go ahead and paint’em up. Why not? And since they came out wonky, I let Myla have a go at them, too. 
I had a little trouble painting on the actual plastic with acrylic paint. (Myla had no complaints.) I even tried a basecoat of brown primer for plastic, but it just didn’t look so great.
 Myla had an awesome time painting them, though. She painted her McStuffins mermaid, along with a yellow-haired one (modeled after a Monster High doll), and a green-skinned Ariel.
 Later, after making the bubble-free mold, I tried casting in resin, instead of the plastic…and despite MANY failed attempts (note the mutant mermaid army in the background) I finally got some good ones!
 Apparently, again–the trick is very careful mixing. In my very limited experience, I’ve learned that if your mixture is off, it can do all sorts of wonky things to your cast. I haven’t tried painting these resin casts yet (I’ll try that later), but I’ll be sure to post the outcome!
With new projects, there’s always a level of intimidation for me. That casting kit sat in my art room for about 5 months before I actually got the courage to try it. But you know–when you do, it feels awesome to have finally figured it out! Even if you end up with an school of mutated fish-women, you can’t really consider it a failure if you’ve learned something.
So jump in and try something new! I promise, it’s worth it. Wonky mermaids and all.
I love BUGS.
Yes, I love bugs. Insects. Beetles. Whatever.
Well, mainly, I really love the IDEA of bugs, and I love LOOKING at bugs. (It’s a whole other story when they’re actually touching me.) I don’t like squished bugs, but sometimes if they’re all dried up and pretty, I love looking at dead bugs. I have a few I’ve collected here and there, that I’ve hung up on the walls of our house for the past ten or so years. By “collected,” I don’t mean I’ve gone out & hunted them down myself–I mean that I either found them, bought them, or was given them by friends.
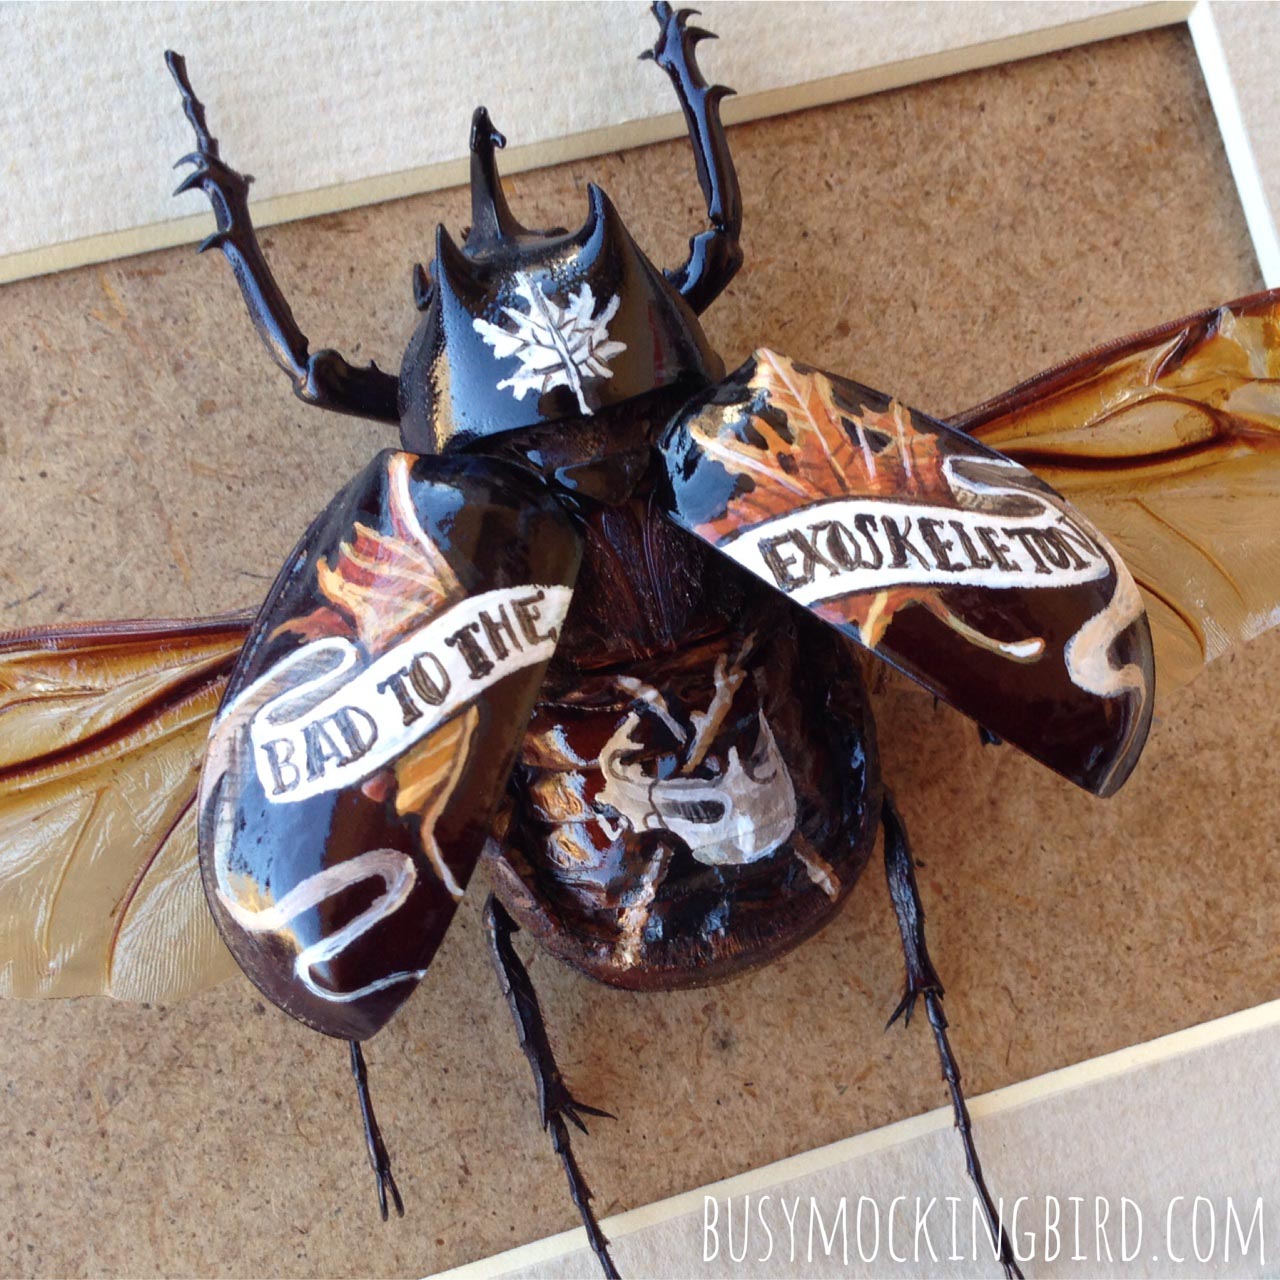
One day, while helping our daughter get ready for bedtime, my eyes tripped over a rhino beetle we had hanging in our bathroom. It had been there for YEARS (in different houses, but in roughly the same spot), so long that it just sort of blended into the scenery of everyday life, overlooked. But this time, a strange and very intense thought occurred to me, and it did so with a very loud voice: “I wonder if I could paint on its wings?”
Then I wondered, if beetles could customize their wings with painted “tattoos,” what would they get? Beetles often fight, so maybe they would be aggressive battle scenes with intimidating imagery. But not the typically intimidating human skulls, since beetles lack an internal skeleton and therefore it wouldn’t mean the same to them. Perhaps instead of a skull and crossbones, they’d have two sticks and some decayed leaves around them? Maybe a Japanese fighting beetle would have ornate scenes of fighting beetles emblazoned on their backs, or a fear-inspiring giant sole of a boot, since their main natural predator might be our own feet trampling down on them. Maybe there would be peaceful, hippie-tattooed beetles. Or images of their larvae with birth dates. Or a portrait of “mom.” And what on earth would a DUNG beetle get?
Yes, these are the kind of thoughts that sometimes go through my head while staring at the shell of a beetle and getting our daughter ready for bed.
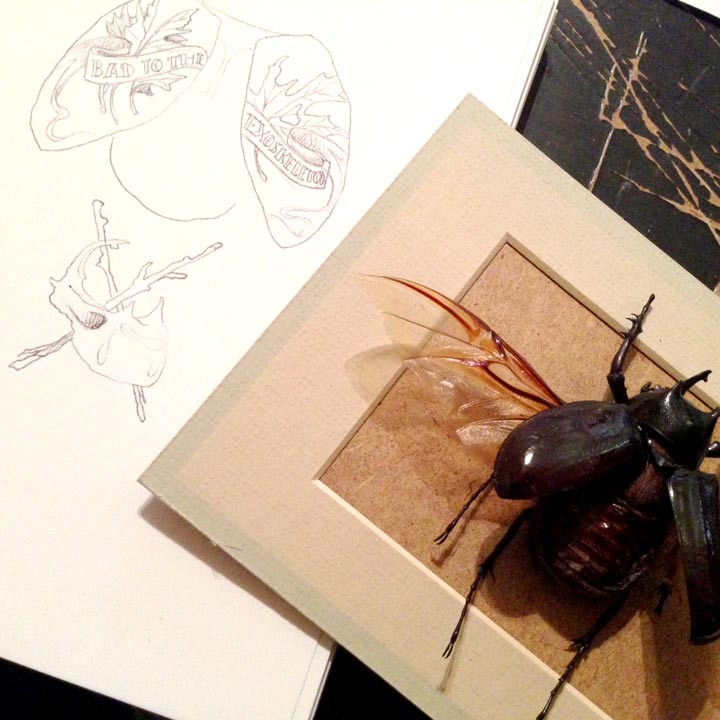
So, like most ideas I have, once they’re in my head, they won’t go away until I do it. So I did. At my husband’s suggestion, I drew a preliminary sketch. I don’t always like to do this–I often like to just wing it (haha, see what I did there?). But this time (like most times) he was right.
Apparently, this beetle had been sprayed with a kind of varnish (because I bought it at a store and of COURSE they sprayed it to preserve it), so it was a little like painting on plastic. I used acrylic paints, and took my time going over and over and over it, layer after layer, since the paint had a habit of beading up.
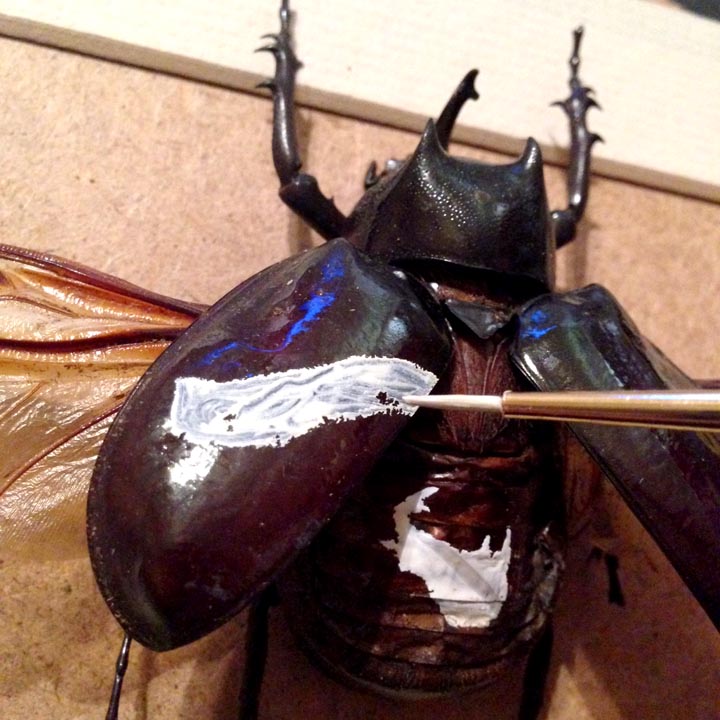
But with each new layer, the image started coming together, and the basic layout was falling into place.

Thankfully, the wing shells were pretty sturdy, and although they had the slightest give, they didn’t really move much. Since I am impatient, I tried using thicker blobs of paint to cut back on the amount of layers I’d need to repaint, but I still needed to go over and over it again and again to bet the basic underpainting. Once that was dry, I could go back and add the little details and shading and fine-tune the whole thing.

And here it is: the final beetle! I really REALLY wanted to put a skull on his head, but that didn’t make sense, so I put a tiny leaf that ended up looking a bit like a snowflake from a distance. Still, I like the little “skeleton beetle skull with crossed sticks” (instead of a skull & crossbones) on the inside of his back. And instead of “bad to the bone…” Well, you know. Because beetles don’t have bones, right?
So I had SO much fun with that, that I immediately looked around the house for more insects I could vandalize. Some of my nicer ones are contained completely inside wooden frames and sealed plexiglass, which makes breaking into them nearly impossible (probably for the best), but I was able to accost one of my dragonflies.
So what would a dragonfly get? There are so many different styles of tattoos! This one is a tribal-style dragon on dragonfly wings…
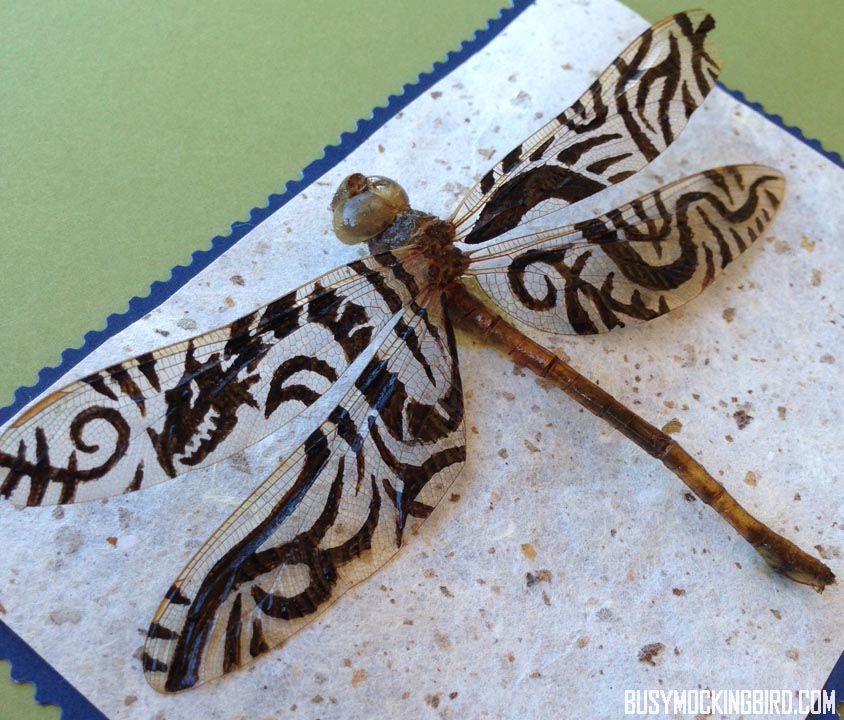
Those wings were hard to paint, by the way. I was hoping for more detail, but this guy died about 14 years ago, and is really fragile. Plus, dragonfly wings, with all those little cells, are almost like tiny little tissue-thin accordions. Keeping a straight line was pretty difficult.
And the last one was this brittle old moth. (The light one, not the dark one who just happens to be glued next to him.) I gave this guy old-school flames, because of the ol’ “like a moth to the flame” standard, and because moths love light, right? So he’d probably tattoo some daring flames on his wings to show off his bravery at dancing close to danger. Or something. Anyway, they didn’t turn out as detailed as I had envisioned either, because moth wings are fuzzy, and it’s like painting on a tiny little carpet.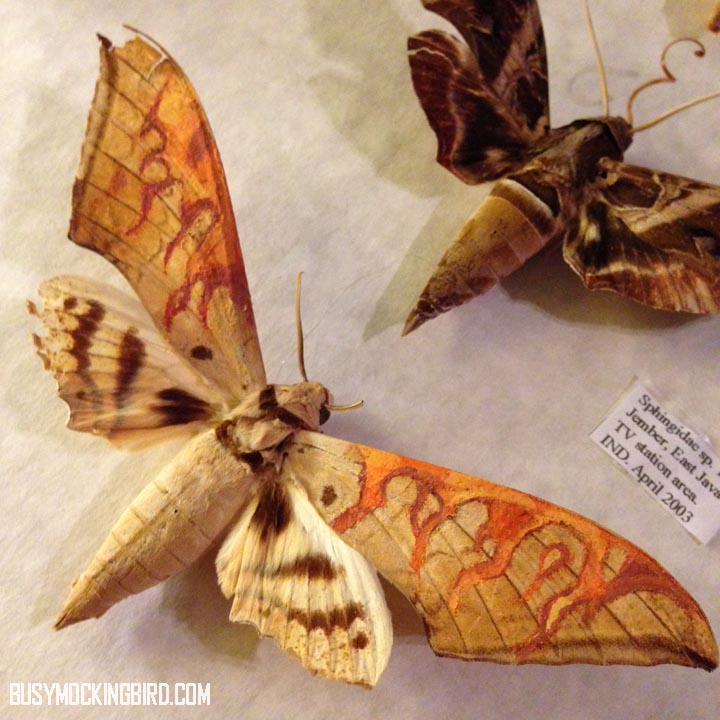
So there are my painted insects. I immediately went on Amazon and ordered a few more beetles to paint on, but apparently I didn’t notice they’re shipping from THAILAND and will be here in like three years. Or two months. Either way: a long, long time.
In the meantime, I’d love to hear your ideas: with all the different styles and influences, what do you think different types of insects would get if they could customize their wings?
Happy Heart Day, Sucka!
I’ll be honest with you, here. Shhhhhhh—-lean in a little bit; I’ll whisper it to you: ….I don’t really like Valentine’s day.
Not even a little bit. Maybe it’s because I was always the “new kid” who was a bit weird, so on V-day the fancy little box we made in class only ever had a scant card or two in it. Maybe it was because as I got older, the flowers & candy seemed to be not simply a sweet sentiment shared between two people, but a rating and judging system that primarily existed ONLY for the sake of some of the snotty girls to announce to us lesser creatures that, “someone likes me THIS much, and now I am royalty.”
Okay, I admit it: the years have made me a little bitter. If there was a humbug for Valentine’s Day, I’d be the poster girl. I can’t help it–I blame the unrealistic expectations of 80s movies and fairy tales. Even now, after 12 years of marriage, I PREFER IT if my husband doesn’t do anything more than say, “Happy Valentine’s Day, babe!”
But having a kid, you start to see the silly holidays in a different light, for what they are probably MEANT to be, and right now, she’s at a stage where they’re just an opportunity to get some candy and give out fun cards. And that’s cool. I’m pretty alright with that.
So when our daughter’s Pre-K class had a Valentine’s party last year, I looked around at some of the kid’s cards out there. Some of the sentiments in the pre-made cards always seemed a little too “lovey-dovey” for my tastes. I mean, they’re in PRE-K! I’m not trying to marry the girl off just yet! I’ve not ever been a big fan of many of the pre-made character cards, and while I realize she will probably insist on choosing some obnoxious character cards later down the road, right now she doesn’t really care WHAT they say as long as candy is involved…..so for now, I get to call the shots. Yay!
So I decided to make my OWN cards for her! I didn’t want to make them TOO pessimistic (I mean my gut idea was “Valentines Day SUCKS” with suckers on them, but OKAY okay–I guess I admit that’s a little harsh for a kid’s class), so since she likes monsters, I just made these…

And you can use ’em too, if you want to! They’re easy and don’t take much work. Just right click the image and save it to your desktop. Print it out on cardstock, and punch holes where the black dots are, and slip a lollipop stick in. I even cut around each one a little, just for something different, but you can just cut straight on the black lines to keep it easy peasy.

And I don’t really think they’re THAT bad, are they? I softened it up with the “Love, Myla” part. Shoot, Pre-K kids can’t read anyway, but they know lollipops taste good, AMIRIGHT???
This year, with the overwhelming amount of candy I’m sure she’ll get, I thought we could be the ones that send the “different” ones, ones with little toys or something in ’em. I found some pre-made ones with little rubbery bugs (which our daughter loves), and I decided to keep the homemade theme going for as long as I can get away with it… Maybe “You Don’t Really Bug Me So Much.” Is that too long for a card? Heh-heh.
Being artsy fartsy comes in handy sometimes! My college friend James Stowe knows that firsthand–each year, his son & daughter request themed V-day cards, and he creates them himself. A few years back, he made the CUTEST Star Wars cards that were all OVER the internet. He’s done Dr. Who Villains and Mario Brothers, D&D and now Firefly and he’s offering those over on his website as a printable PDF for only $3 apiece!
So if you’re a humbug about Valentine’s Day (or even if you’re not), feel free to print my sucka sheets out for yourself. Or get some from an artist like Stowe. Or come up with your OWN! I may not like Valentine’s day, but I’d LOVE to see what you do!
DIY Printable Tattoos

YOU GUYS!! Did you know you could make your own temporary tattoos from doodles you already HAD?!? …Okay, well I didn’t. But I experimented with them, and here’s how it went down.
First off, I’ll warn you that I only tried two brands–one was HORRIBLE and the other was not too shabby. But neither one of them came out like the ink ones you get at the store or in a pack of gum–instead of transferring the ink, they both had an adhesive backing to them, so it’s basically like putting a very very very thin sticker on your arm. Or like letting Elmer’s glue dry on your skin. (I have super sensitive skin that doesn’t like adhesives, so for freaks like me, that might be a problem.)
 I used this brand, which says you should use it with this special die-cutting machine, but you TOTALLY don’t have to (Sorry, Silhouette). You take your images, flip them, and print them out. There’s a plastic sheet you rub onto it once it dries, to sort of hold the adhesive down. Then you have to cut out your “tattoos.”
I’ll warn you that NOT cutting closely around the image means you’ll get adhesive everywhere there’s blank space, as you can barely see in this closeup picture: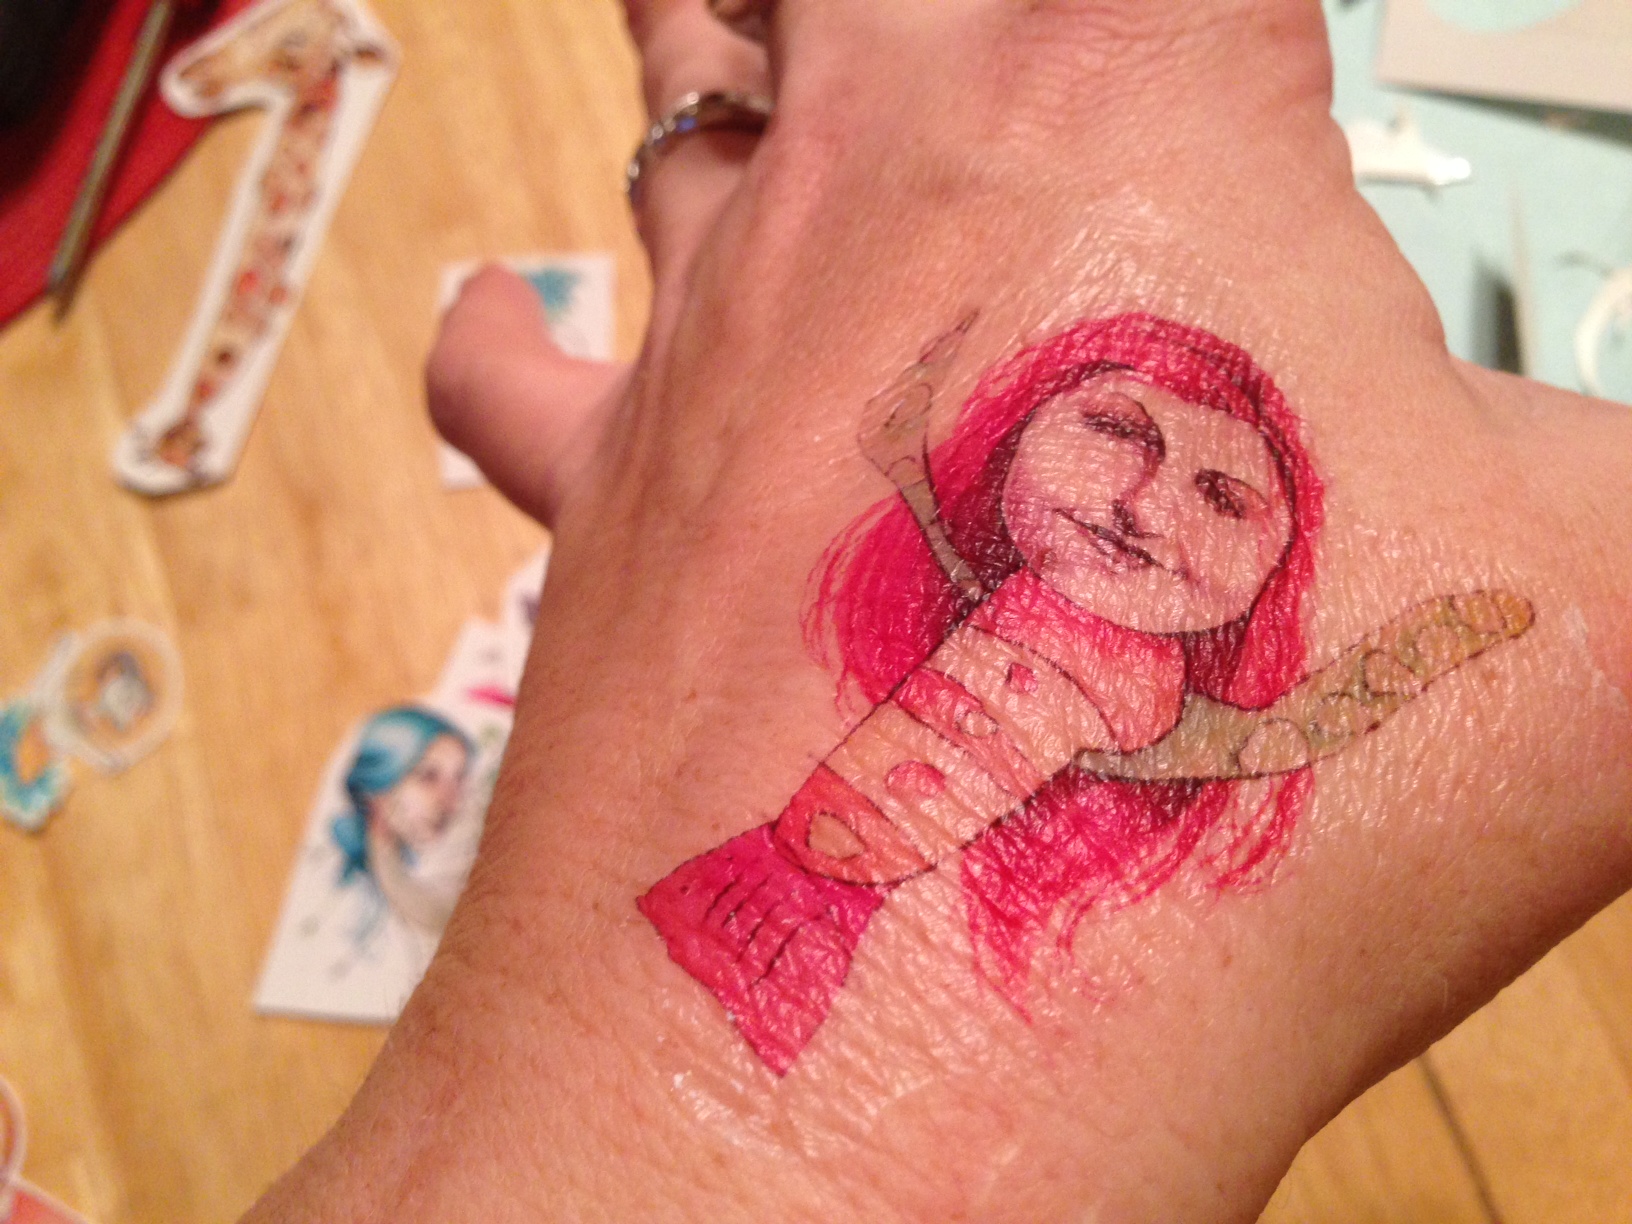
Not cool. So take my word for it, and just cut closely around your image.

The rest is like a regular temporary tattoo: peel off the plastic sheet, and place it face-down where you want it on your skin. Again, a word of warning: You’re essentially putting a very very very thin adhesive on your skin, so if you have super hairy arms, you might want to opt for a less-hairy spot.
Wet the back of the “tattoo” and peel it off.

And temporarily cover yourself in your own awesomeness! Woohoo!
On Santa and Gnomes
A word of warning: This post is a little long, but it has a point. Hang in there.
Christmas is weird. It’s a strange time for a parent, and strange time for a kid. What you believe and don’t believe? Now THAT is the question. My parents always taught me that Santa was more about an idea, a spirit of giving. That there WAS a St. Nick, but now we sort of carry on the magic and spread the love around. And all that jazz.
(Now it’s a bit of a hike to get from Santa to building a gnome house, but please stick around and follow me, here…)
I always felt weird about flat-out lying about a big man sneaking into our house in the middle of the night (bringing toys or not)…especially since my husband’s deployed and she’s ALREADY worried about “strangers.” I found it hard to sell that when it didn’t really make a whole lot of sense, did it? I couldn’t really ever get into the “Elf on the Shelf” idea for the same reason.
So when our VERY practical daughter asked me about Santa, I told her the same thing my parents did. And she was silent. Which usually means she’s mulling it over. So I wasn’t surprised when later she asked the same thing: “Is Santa real?” I got the feeling that she wasn’t happy with my previous explanation, so I tried again in the same way, adding an explanation that it’s fun to PRETEND that he’s real. She silently mulled it over once more, and still later asked me again: “Some kids at school say that Santa is NOT real. Is that right?”
Finally, torn between explaining the real story of Santa and going along with a “lie,” I asked her: “Well, what do YOU believe?” And she thought about it awhile, very seriously contemplating it, and finally said firmly, “I think he’s real.” “Okay,” I said. “Then he’s real.” I’m not sure she entirely convinced herself, but she enjoyed the idea.
The Santa Debate brought questions of other anomalies. “Are fairies real? Are aliens real? Witches? What about gnomes?” To each I would respond, “I don’t know—you know, I’ve never SEEN one, so I don’t know if they’re real or not. But what do YOU believe?” She asked me about the kids at school, and I said, “People believe all kinds of things. And since nobody knows for sure, then nobody is wrong. You believe what you believe, and you let other people believe what they believe.”
So somehow, we got on the topic of gnomes.
I told her a story about how when I was a kid, my parents took my sister and I on a walk in the woods, and my dad helped us construct a little bridge across a tiny stream with sticks and dental floss. Days later, when we came back to check on it, someone had left a note saying, “Thanks, good job!” We joked that the gnomes had left it. Our daughter loved that story, and suggested we build a gnome house and that maybe if we did, they’d come visit US. I sort of agreed to it, but didn’t think much else about it, dismissing it as one of the hundreds of project ideas she has in any given hour. But days later, and she was still persistent.
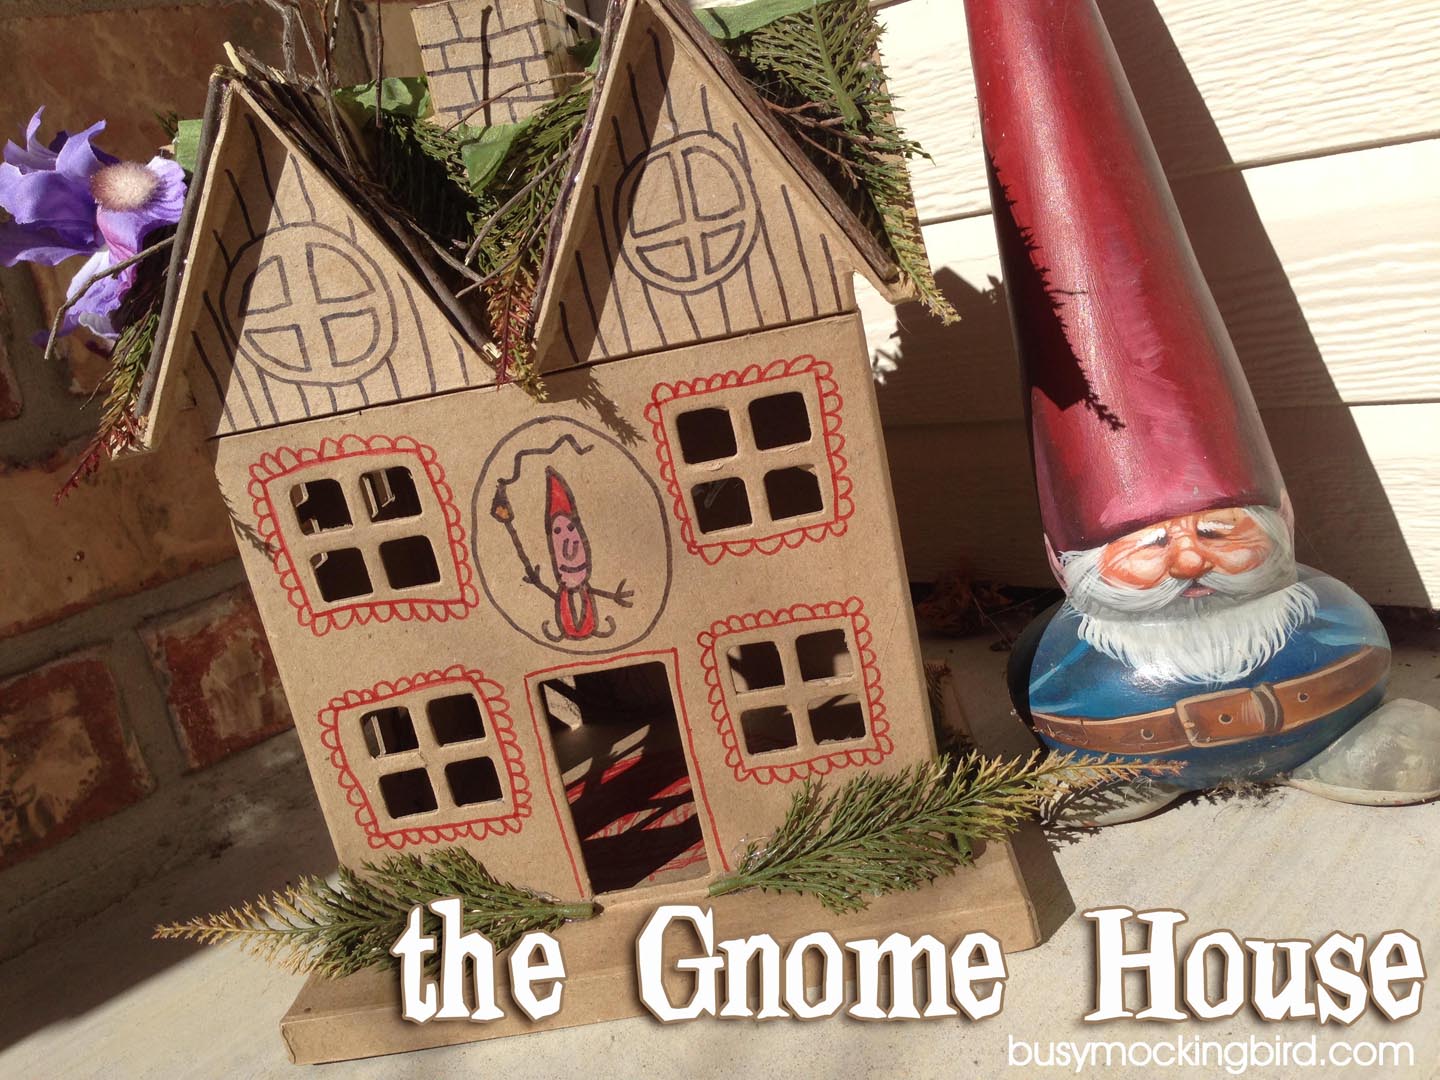
So we built a gnome house.
It was a fun little project, and we got all our supplies on a quick visit to the craft store. She was excited picking out stickers and decorative things to go along with it. I went the easy route and started with those pre-made papier-mache houses you find at the craft store for $5. While she happily decorated it with markered gnomes, I hot-glued sticks and fake plants to the roof. 

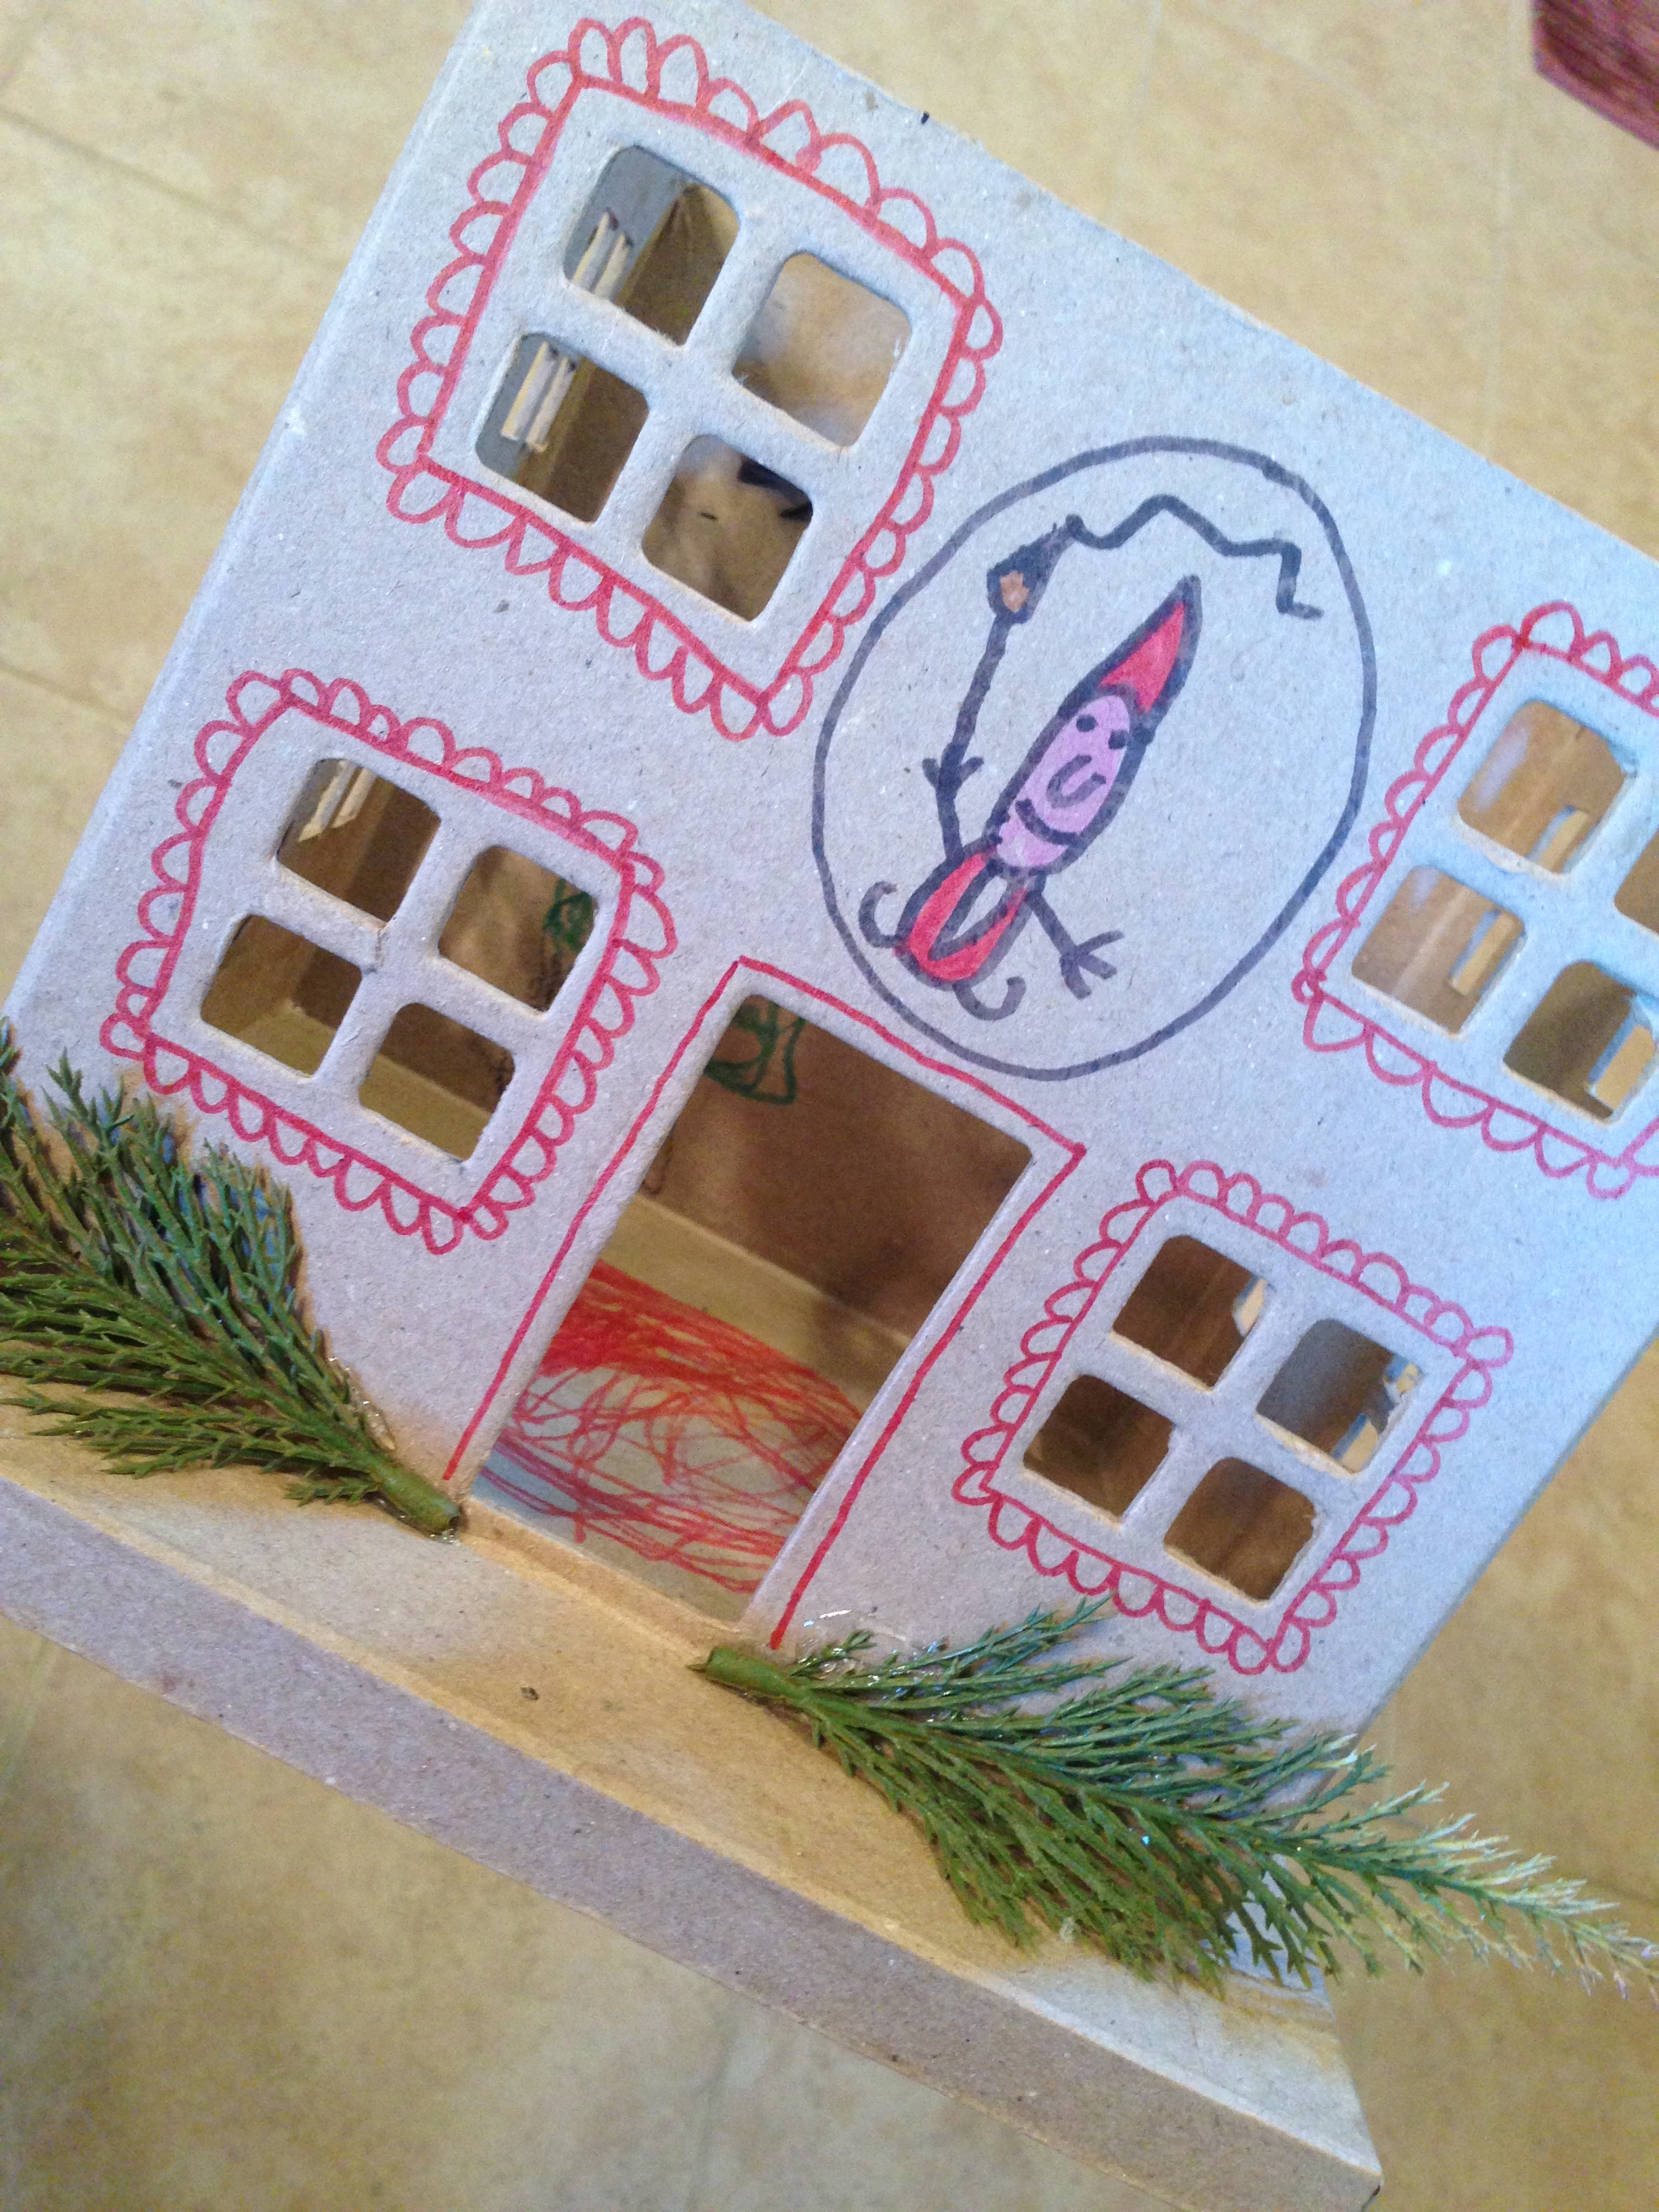
She drew all over the outside, and filled the inside with a doodled Christmas tree (probably influenced by the fact that ours is still up. Don’t judge.) and other stickers & doodles. And the front door was headed by a cute little “painting gnome.” 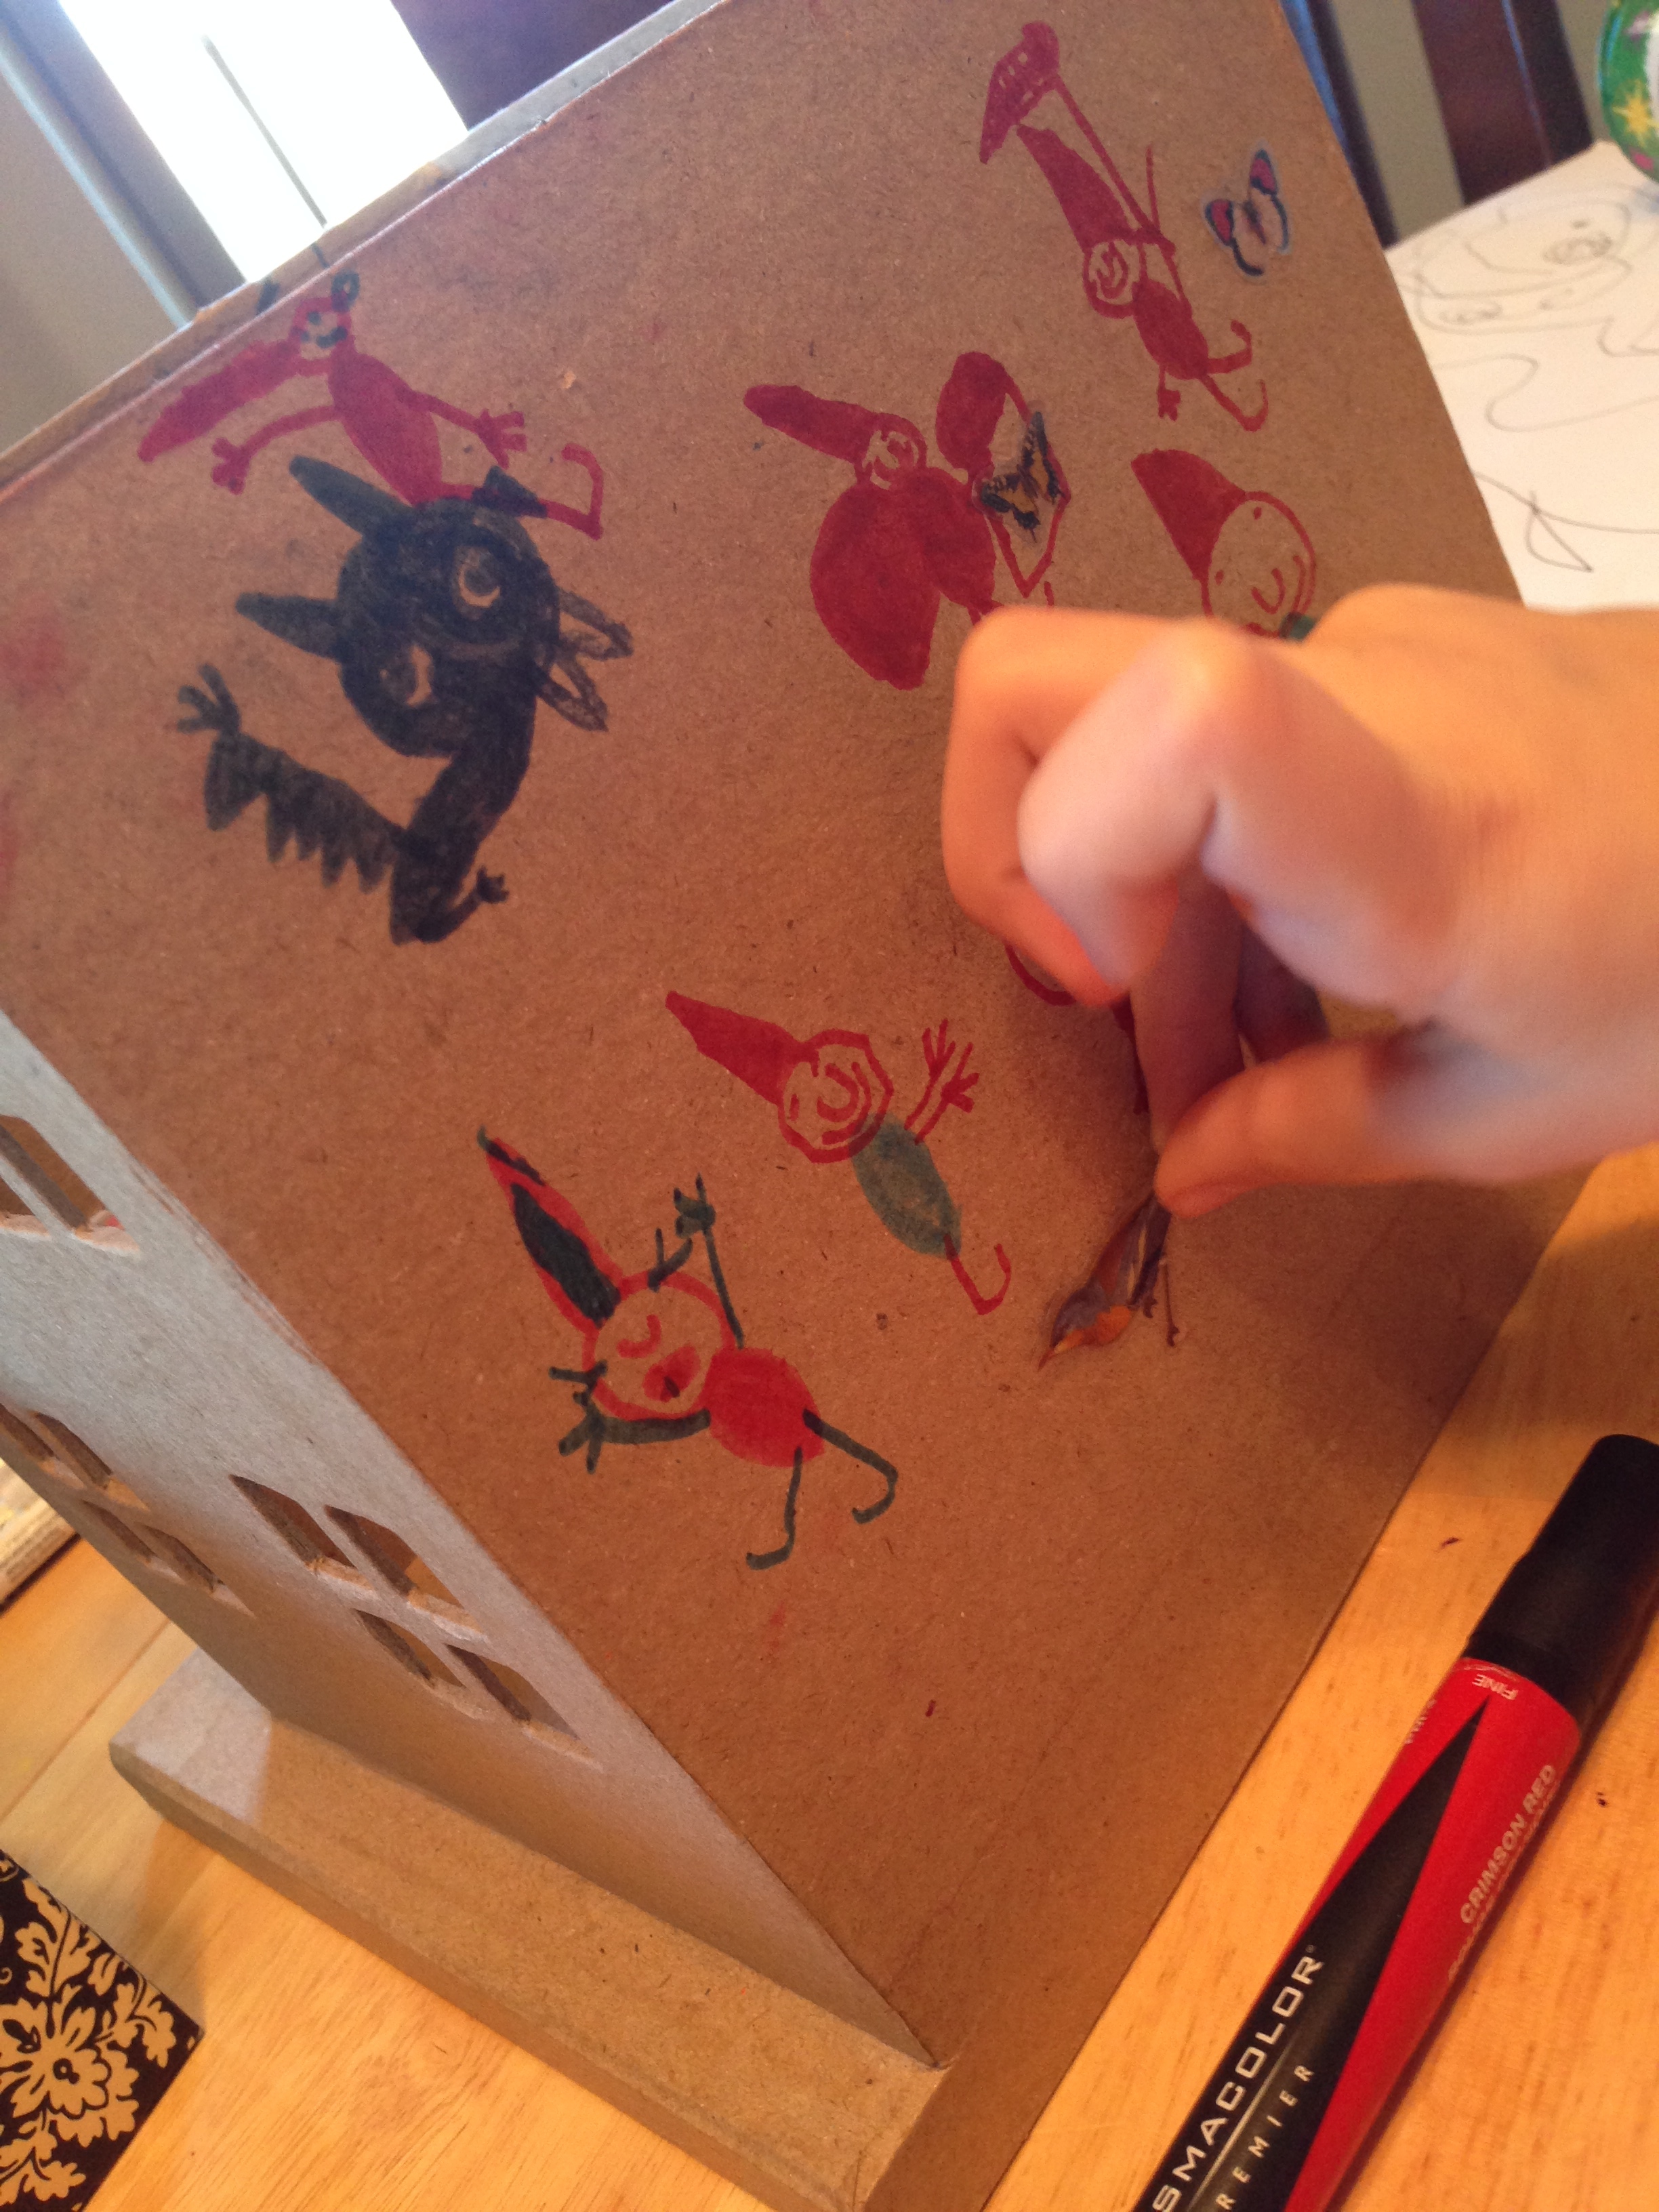

We put some of her dollhouse furniture in it. She put tomatoes in it “for dinner,” she said. And we tucked the little gnome house into the corner of our back porch, to protect it from the rain, since we don’t have any trees around. 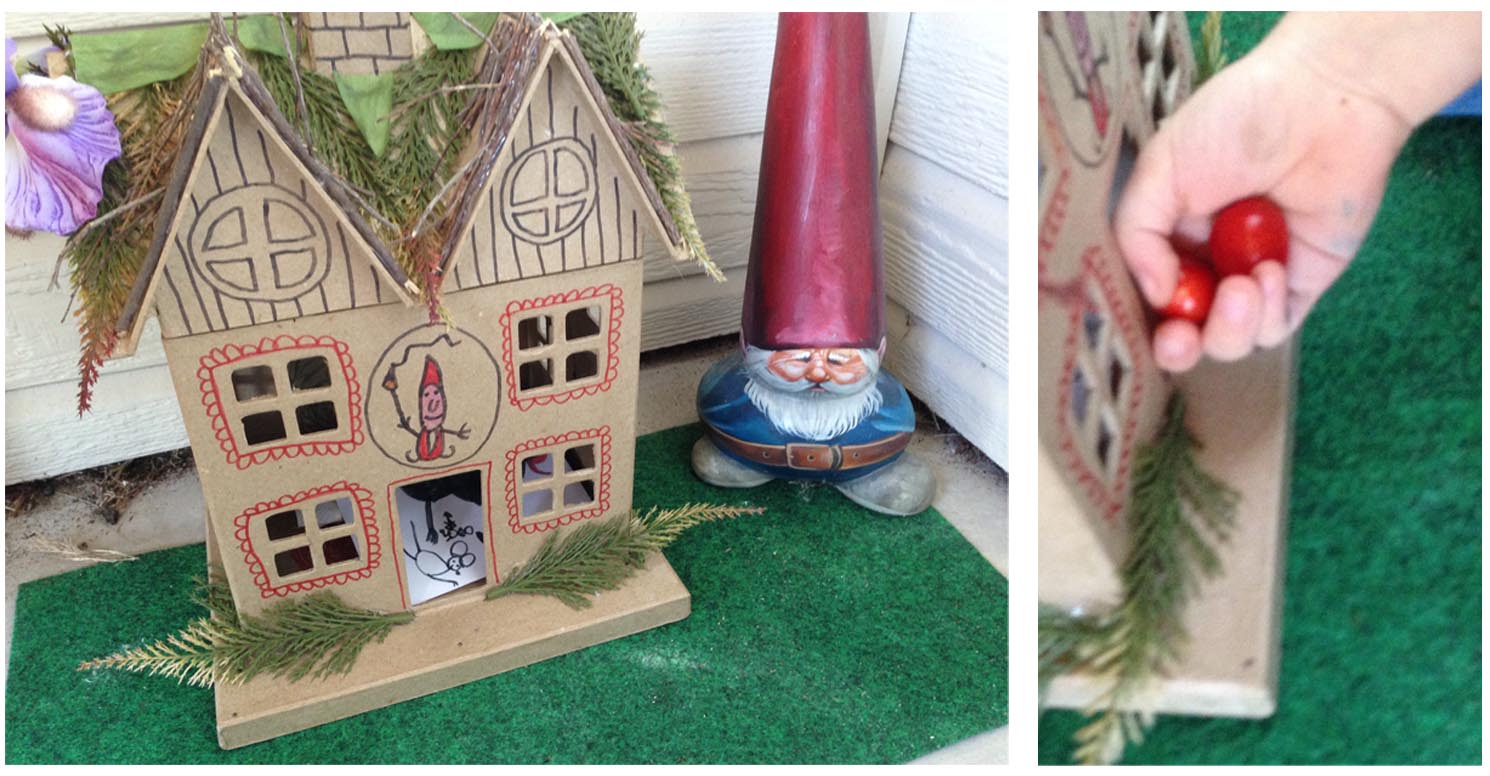
(Side note: That little garden gnome in the picture above is actually a weird little terracotta gnome I got at Ikea ages ago. It came plain, but I painted to look like the gnomes from the Gnome Book. The book Gnomes was a favorite of mine as a kid. It explained gnomes in a realistic way, and fit them into our world as if they WERE real.)
Later, that evening, I threw out the little tomatoes, partly to see if she’d notice, and partly so our little food-hungry dog wouldn’t tear the gnome house up trying to get to them. It all reminded me a little of the Dinovember post that was going around a while back.
Today, it rained. So I decided to have fun with it, and added a few muddy footprints leading up to the house, and a few pea seeds and a tiny carrot from our garden on the table. 

When she saw them this afternoon, she was excited. And I was excited for her. “GNOMES! I didn’t know we could really have GNOMES!” But honestly, I’m pretty sure she didn’t believe it. I suspect she’s enjoying just playing along…
And I’m not sure if I want to run with it, or just sort of let her in on the fun of pretending….
I don’t want to totally LIE to our kid—she’s always known us to be able to give her straight answers on nearly any topic imaginable. But I don’t want to rob her of that magical fun stuff that makes up being a kid. Her world hasn’t been completely defined by reality yet—for all she knows, there ARE such things as horses with wings or giants. Why not gnomes? After all, we’re all free to believe what we want, right?

